
Introduction
Domain problems don't wait for business hours, and the people who most need to know (an on-call engineer, a client contact, a partnerships manager) don't always have an Everflow login. External Notifications close that gap. Say your track.brand.com lands on a blocklist at 2 a.m.: the right person hears about it in Slack before the first support ticket ever comes in. External Notifications let Traffic Health alert a key contact the moment a domain incident, task, or reputation flag is detected or resolved, through the channel that contact already lives in.
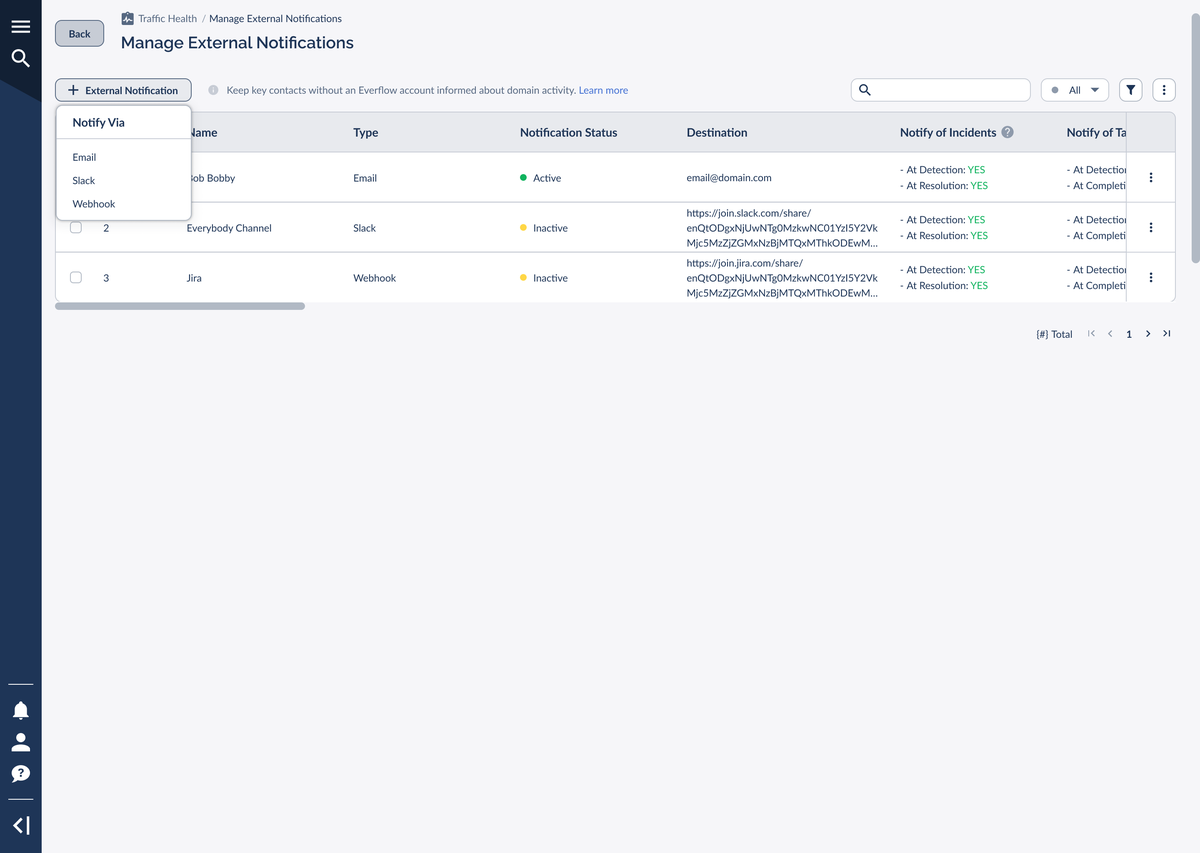
In v3, External Notifications support three channels: Email, Slack, and Webhook. Each notification is built around a single recipient, scoped to the domains you choose, and set up through the same three-step wizard. This article walks through creating, scoping, previewing, and managing them.
External Notifications vs. My Notifications Preferences
Everflow has two separate notification surfaces, and it's worth knowing which is which before you start.
If you want to alert someone without an Everflow seat, you're in the right place. If you want to change your own in-app or email cadence, head to My Notifications Preferences under your account instead.
Before You Start
Have these ready before you create a notification:
The External Notifications List
To reach the management screen, go to
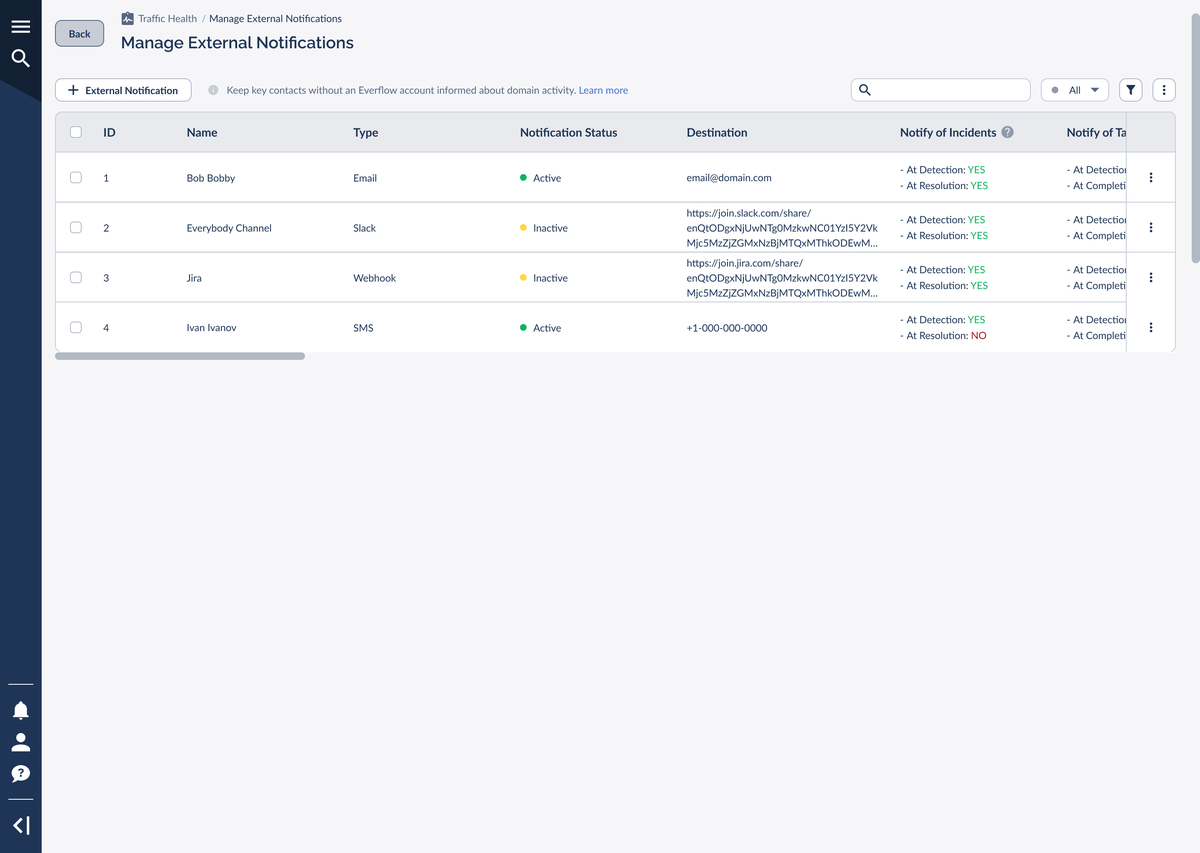
What Each Column Means
Scroll the table sideways to see every column. Each one tells you something about how a notification is configured:
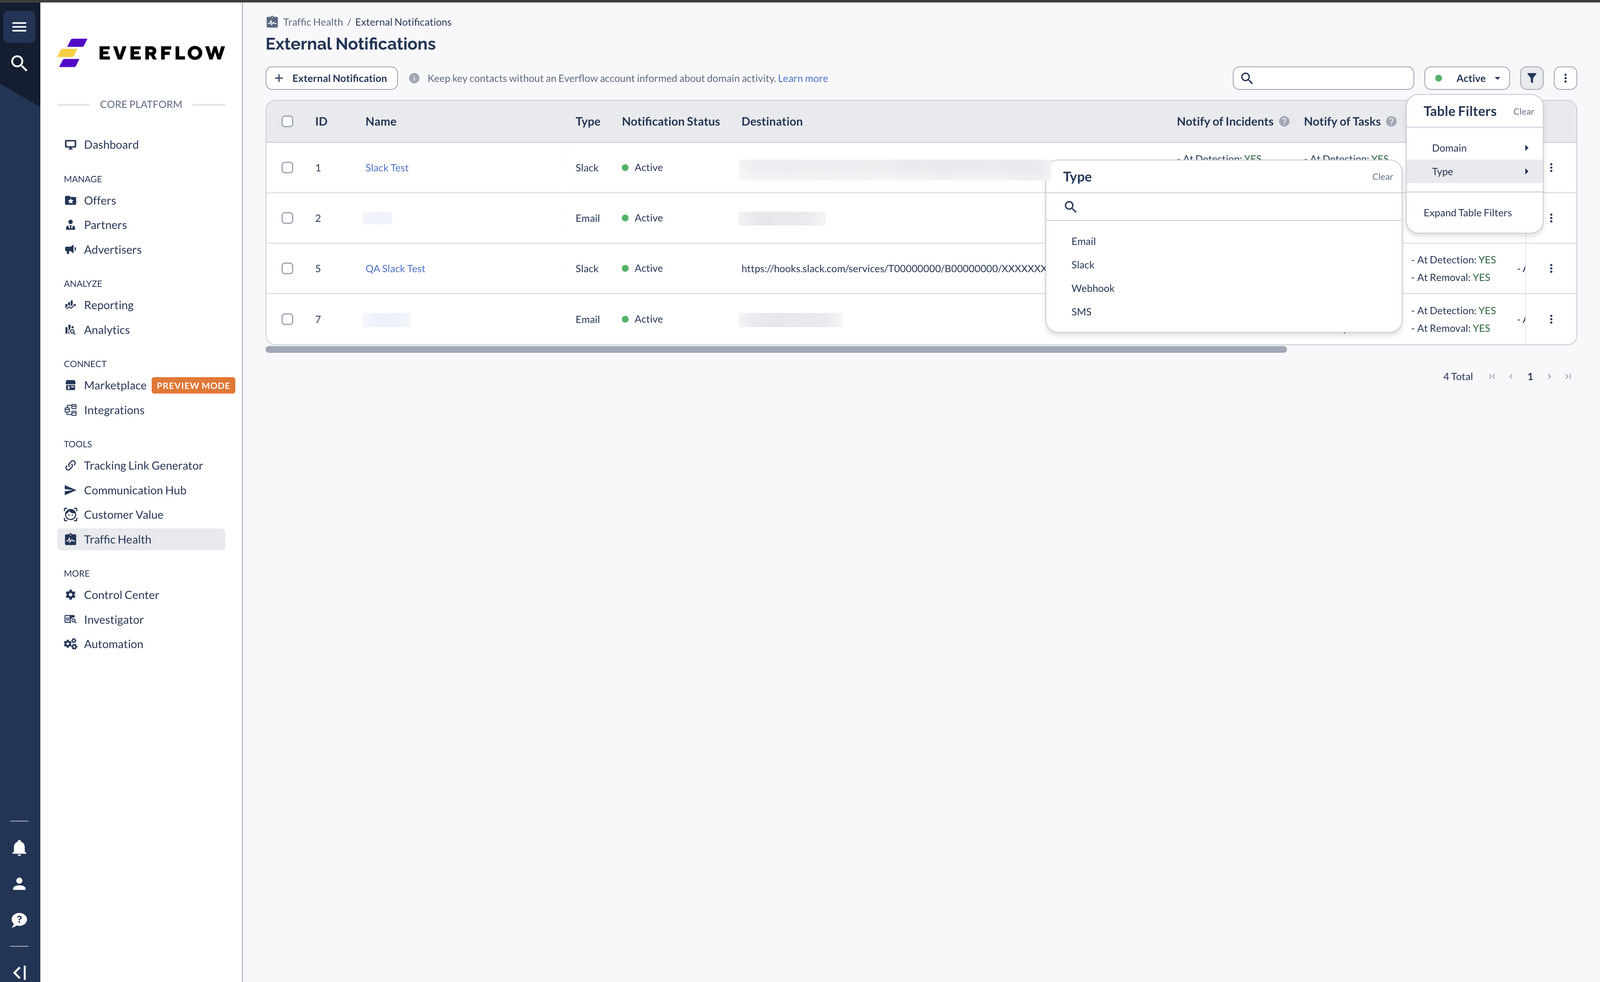
You can narrow the list with the status pill (All / Active / Inactive) and the Table Filters flyout, which filters by Type and Domain.
Editing, Pausing, and Deleting
Each row has a kebab (⋮) menu with three actions:

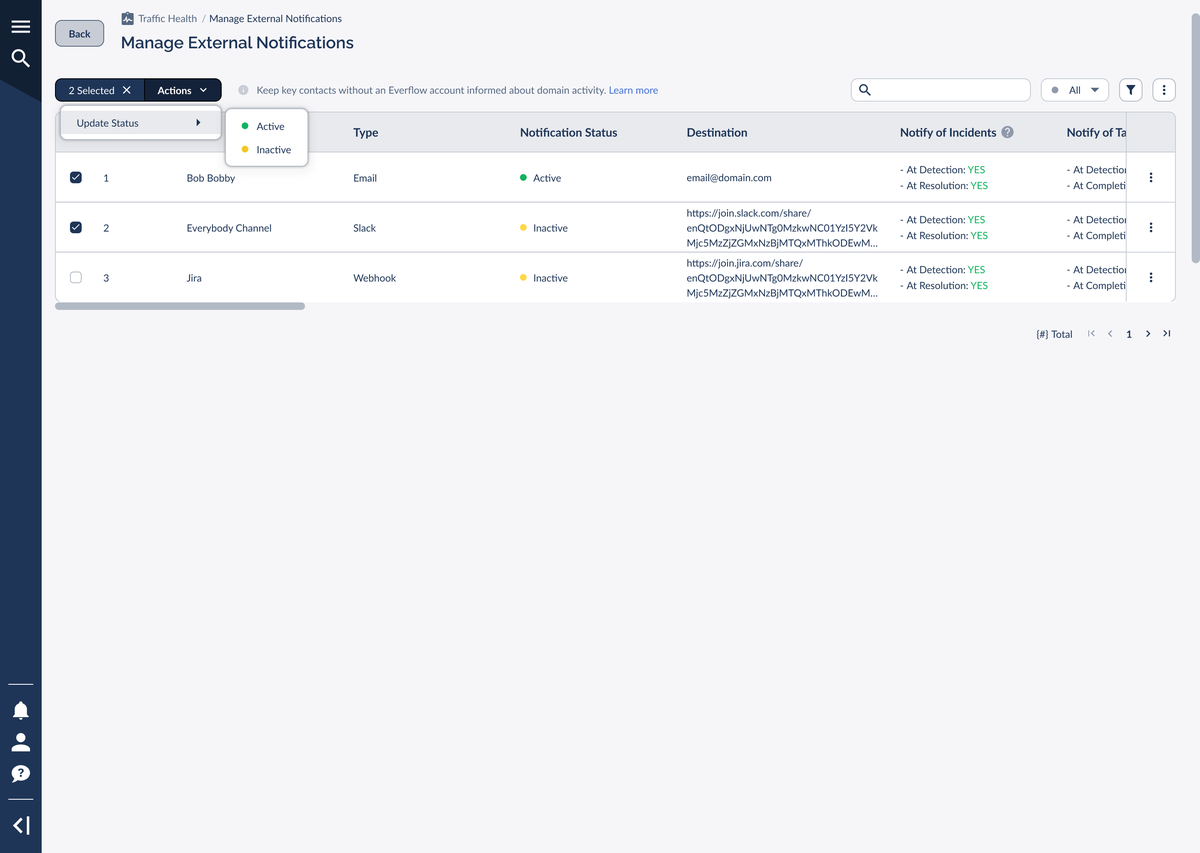
Bulk Actions
To pause or reactivate several notifications at once, select the rows you want. A selection toolbar appears showing how many are selected; open Actions → Update Status and choose Active or Inactive. A confirmation dialog applies the change to every selected row.
Setting Up an Email Notification
Click
Names the recipient: Recipient Name
Sends to: an email address
Test action: none needed
Slack
Names the recipient: Channel Name
Sends to: a Slack Webhook URL
Test action: Test Webhook (sample message)
Webhook
Names the recipient: App Name
Sends to: a Webhook URL
Test action: Test Webhook (JSON payload)
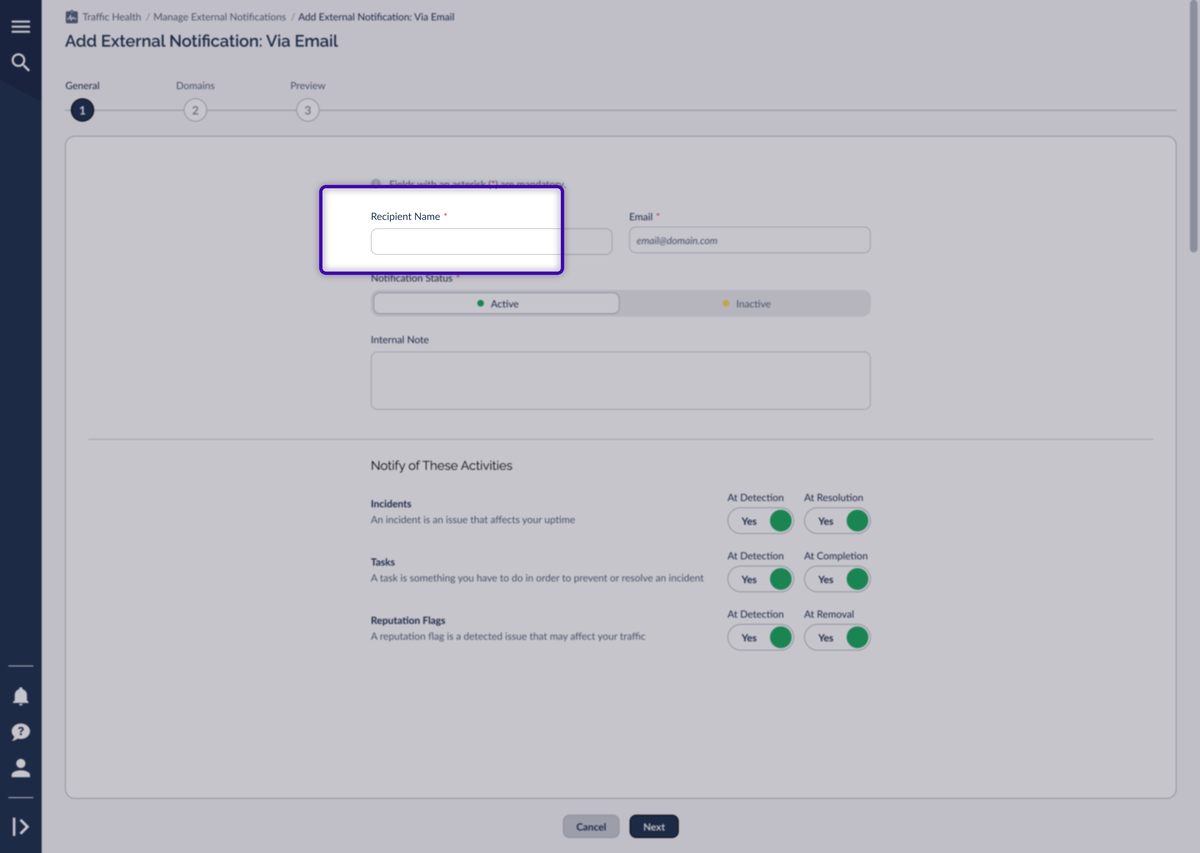
On the email wizard's General step, fill in who receives the alerts. Fields marked with an asterisk (*) are required.
Then choose which events trigger an email under Notify of These Activities, covered in Choosing What Triggers a Notification below. Click Next to scope the notification to domains.
Setting Up a Slack Notification
Choose Slack from the Notify Via menu. The General step is the same shape as Email, with one channel-specific field: instead of an email address you provide a Slack Webhook URL. This is the incoming-webhook URL you generate in Slack for the channel you want alerts posted to.
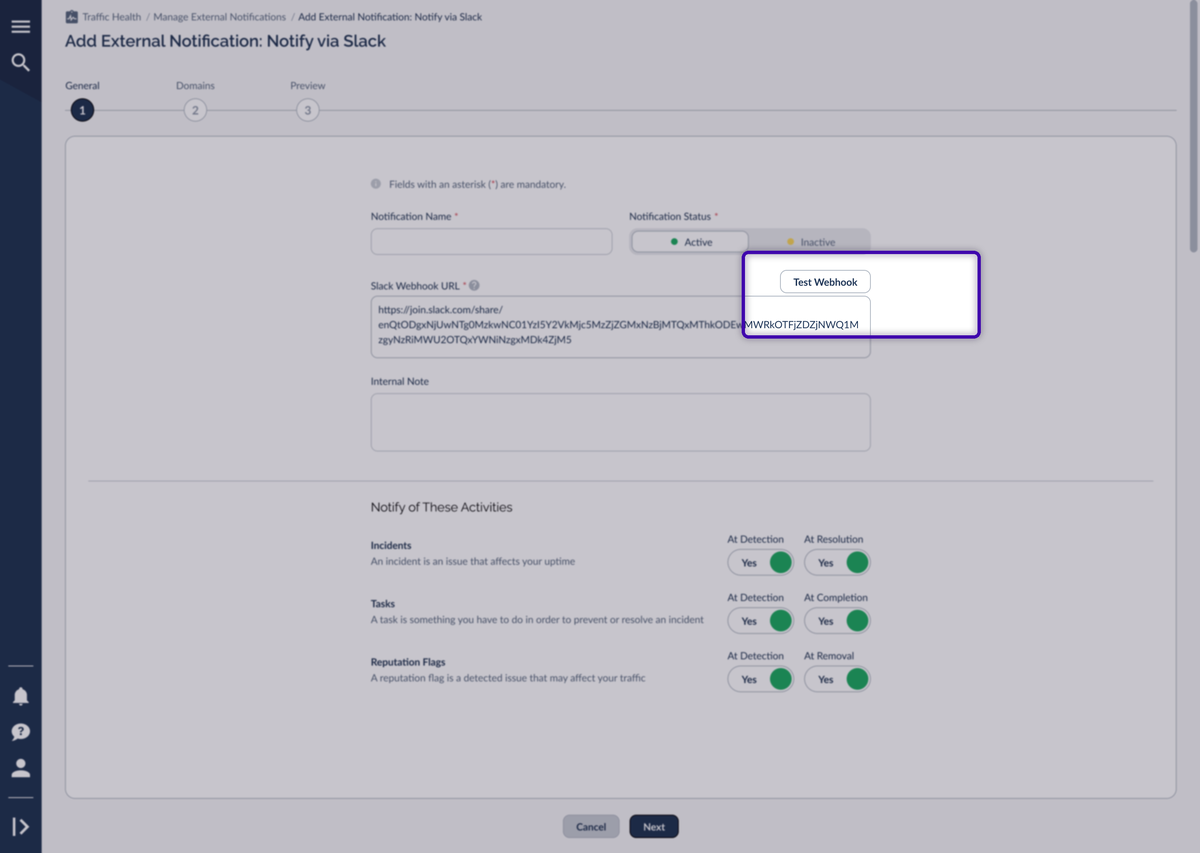
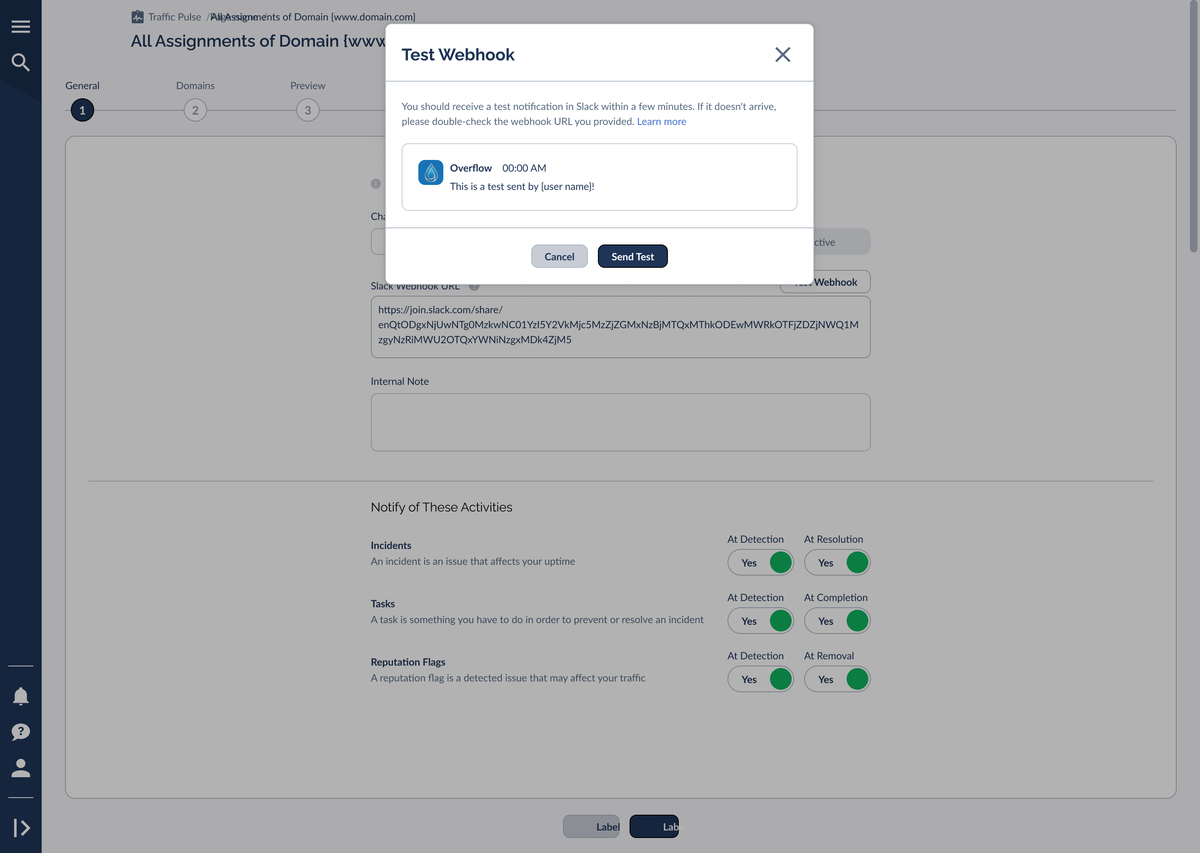
Before moving on, click Test Webhook. Traffic Health sends a sample message to the URL so you can confirm it lands in the right Slack channel. If nothing arrives within a few minutes, double-check the webhook URL.
Setting Up a Webhook Notification
Choose Webhook to send alerts as a JSON payload to any endpoint that accepts incoming webhooks, whether that's a custom service, an internal tool, or an app like Discord. The General step mirrors the others, with a generic Webhook URL field.
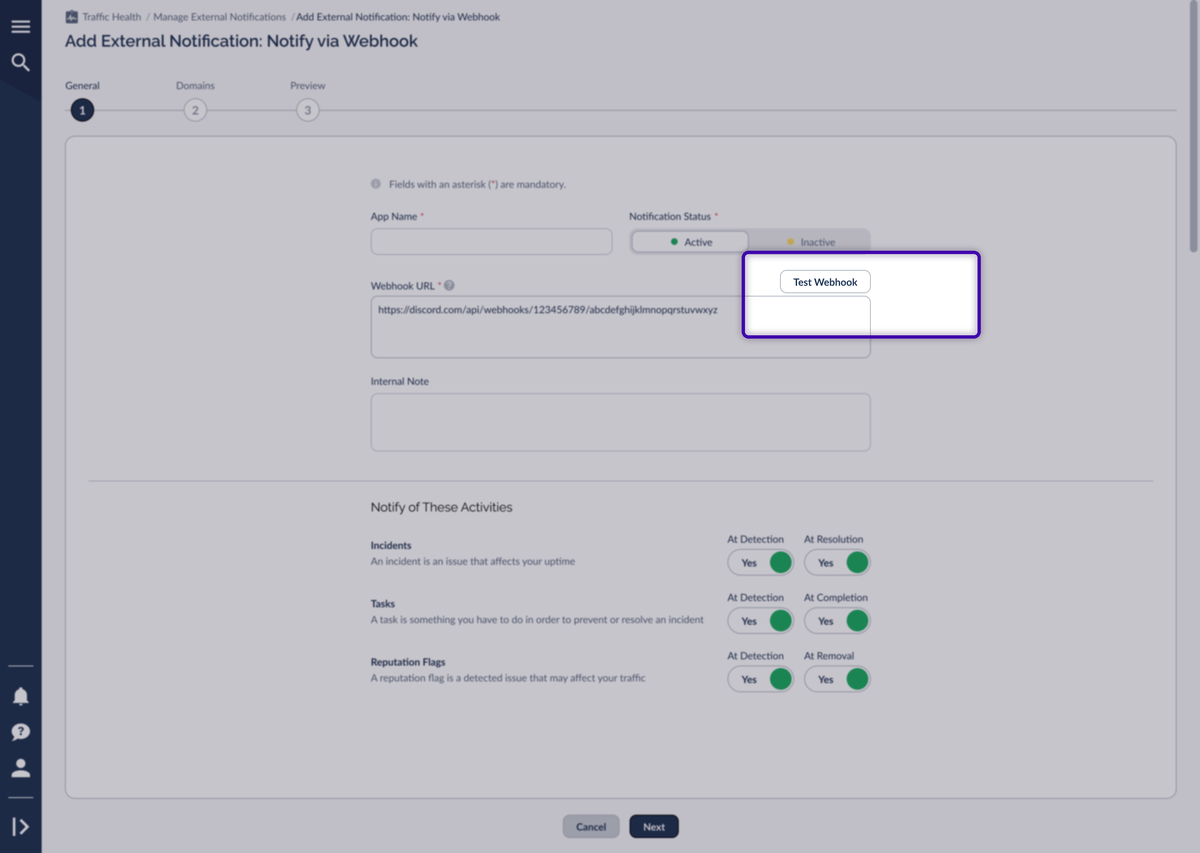
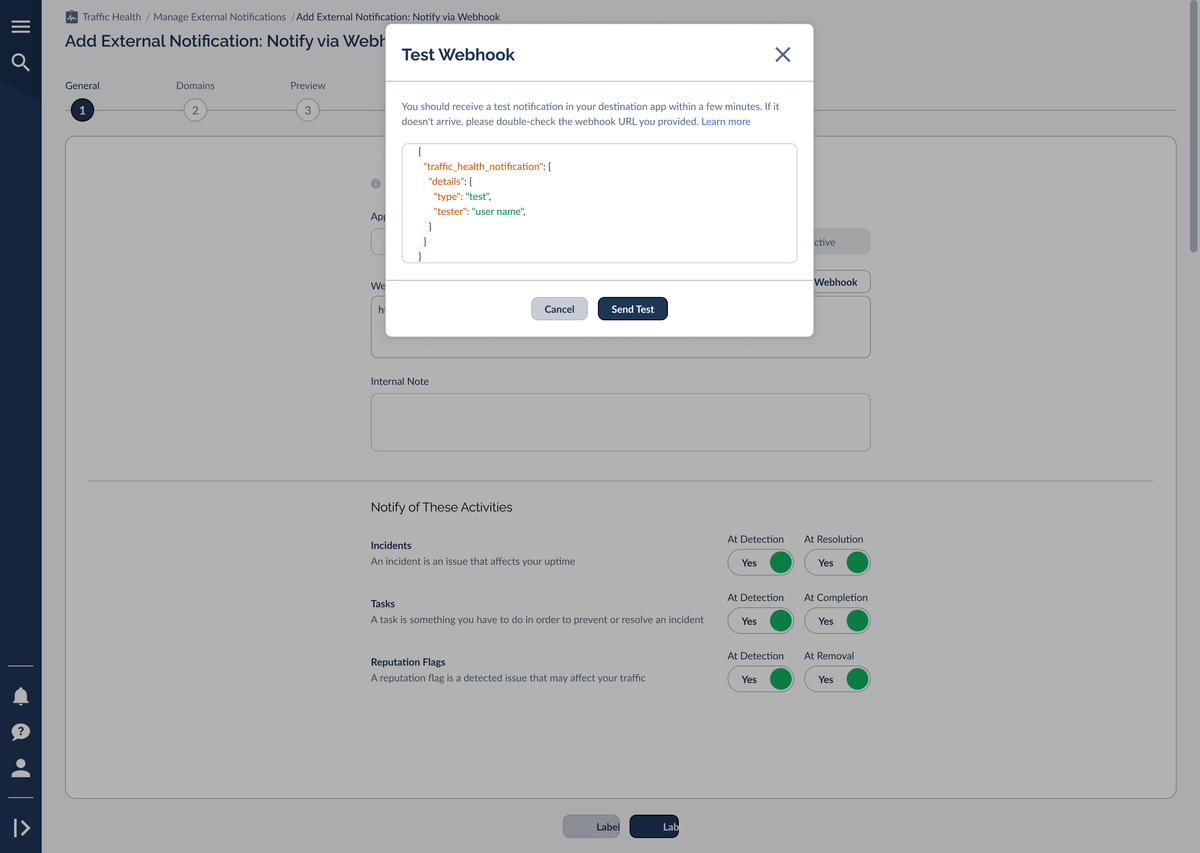
Click Test Webhook to send a small test payload to your endpoint. The test body identifies itself as a test so your receiving app can recognize it:
Webhook JSON Reference
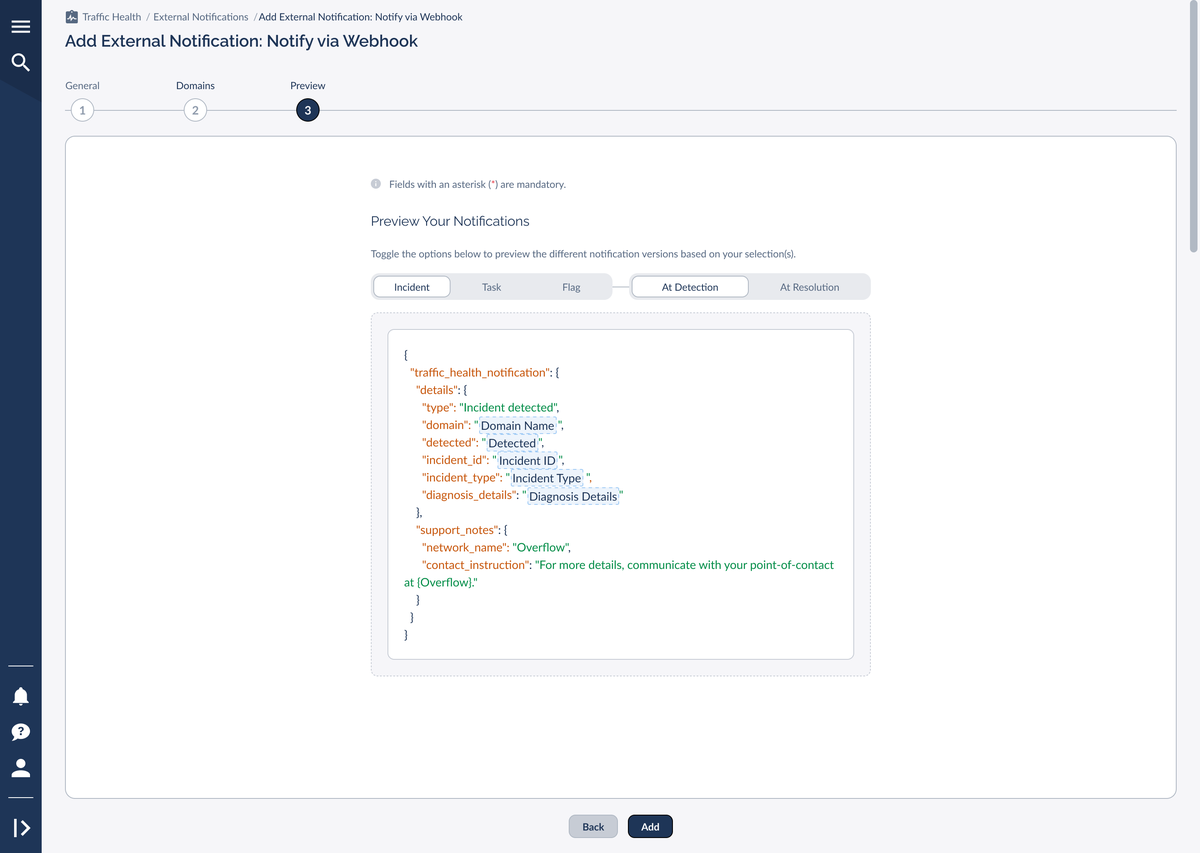
Live alerts arrive as a traffic_health_notification object with two parts: a details block describing the event, and a support_notes block with your network name and point-of-contact text. An incident-detected payload looks like this:
The keys inside details change with the activity type and lifecycle stage. Use this as a field reference when building your receiving logic:
detailstype, domain, detected, incident_id, incident_type, diagnosis_detailstype, domain, detected, task_id (plus task_status and instructions on detection)type, domain, detected, flag_type, flag_id, blacklist, blacklist_detailsThe support_notes block (your network name and contact instruction) is included on every payload regardless of activity type. The Preview step shows the exact JSON for each variant before you save, so confirm the shape there.
Choosing What Triggers a Notification
On the General step of any channel, the Notify of These Activities section is where you decide what actually fires an alert. There are three activity types, and each has two lifecycle hooks you turn on independently. So you can, for example, ping your on-call engineer the moment an incident is detected but stay quiet when it resolves.
Incidents
An issue that affects your uptime. Hooks: At Detection · At Resolution.
Tasks
Something you need to do to prevent or resolve an incident. Hooks: At Detection · At Completion.
Reputation Flags
A detected issue that may affect your traffic, like a blocklist hit. Hooks: At Detection · At Removal.
At least one hook must be on for an activity to send anything. The same three activities drive the Preview toggles on Step 3 and the Notify-of columns back on the list.
Scoping Notifications to Domains
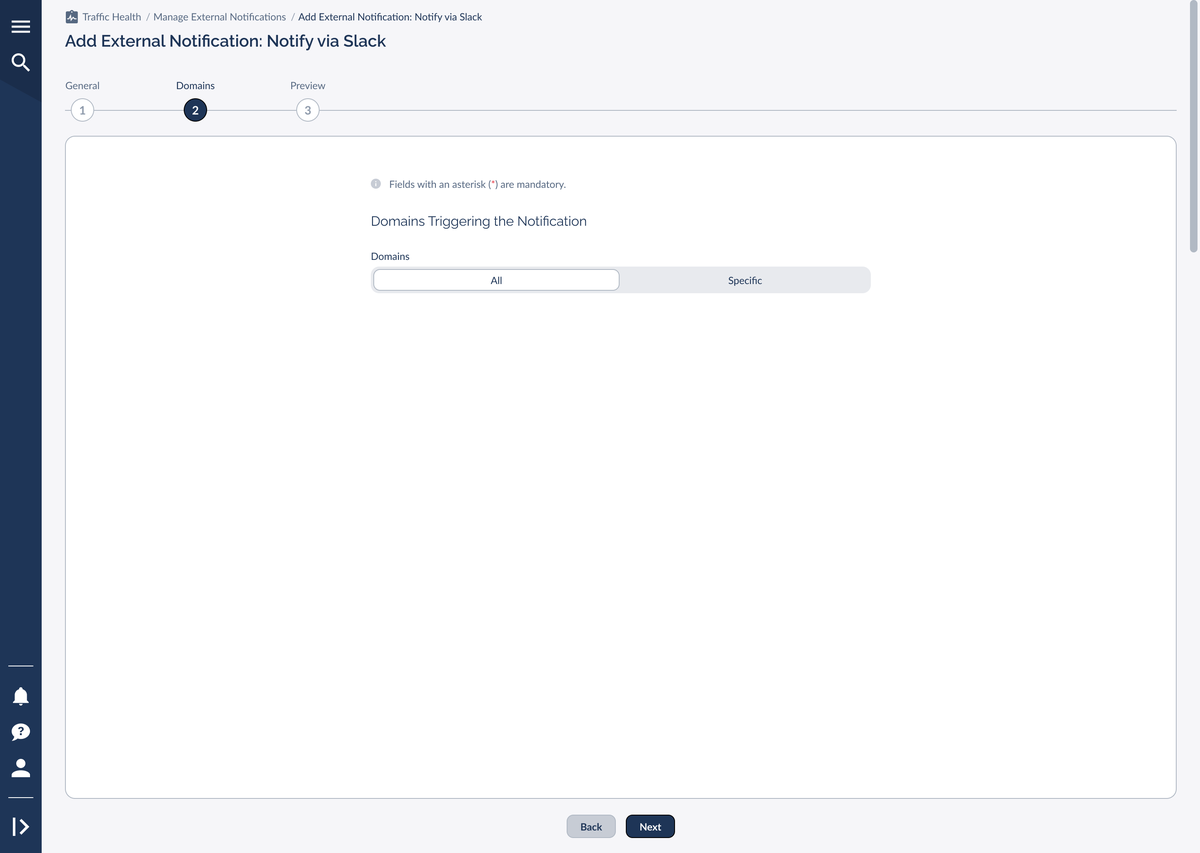
Step 2, Domains, decides which domains this notification covers. Under Domains Triggering the Notification, set the toggle to All or Specific.
Choose All to alert the recipient about activity on every domain in your network.
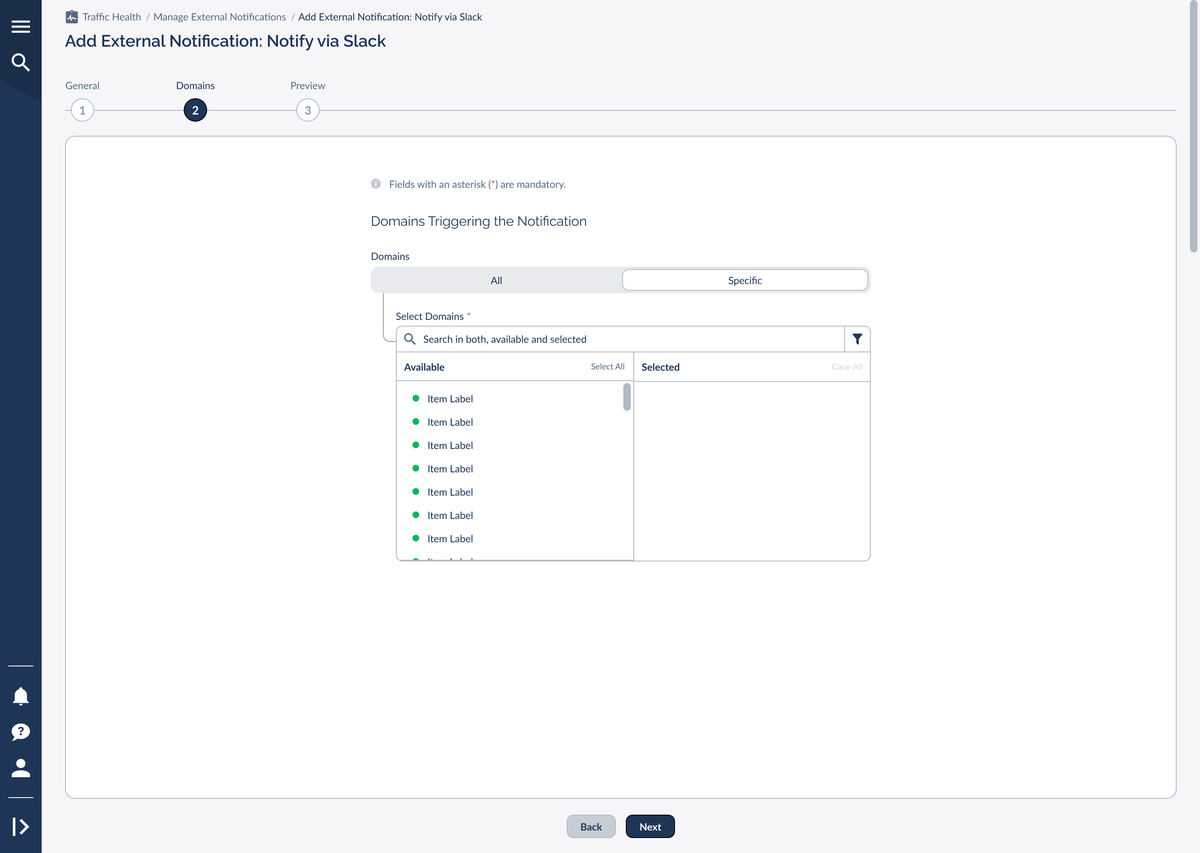
Choose Specific to pick individual domains from the Available → Selected picker. Search across both lists, use Select All or Clear All, and move only the domains this contact should hear about. This is how you route one client's domains to their own contact without flooding them with everyone else's alerts.
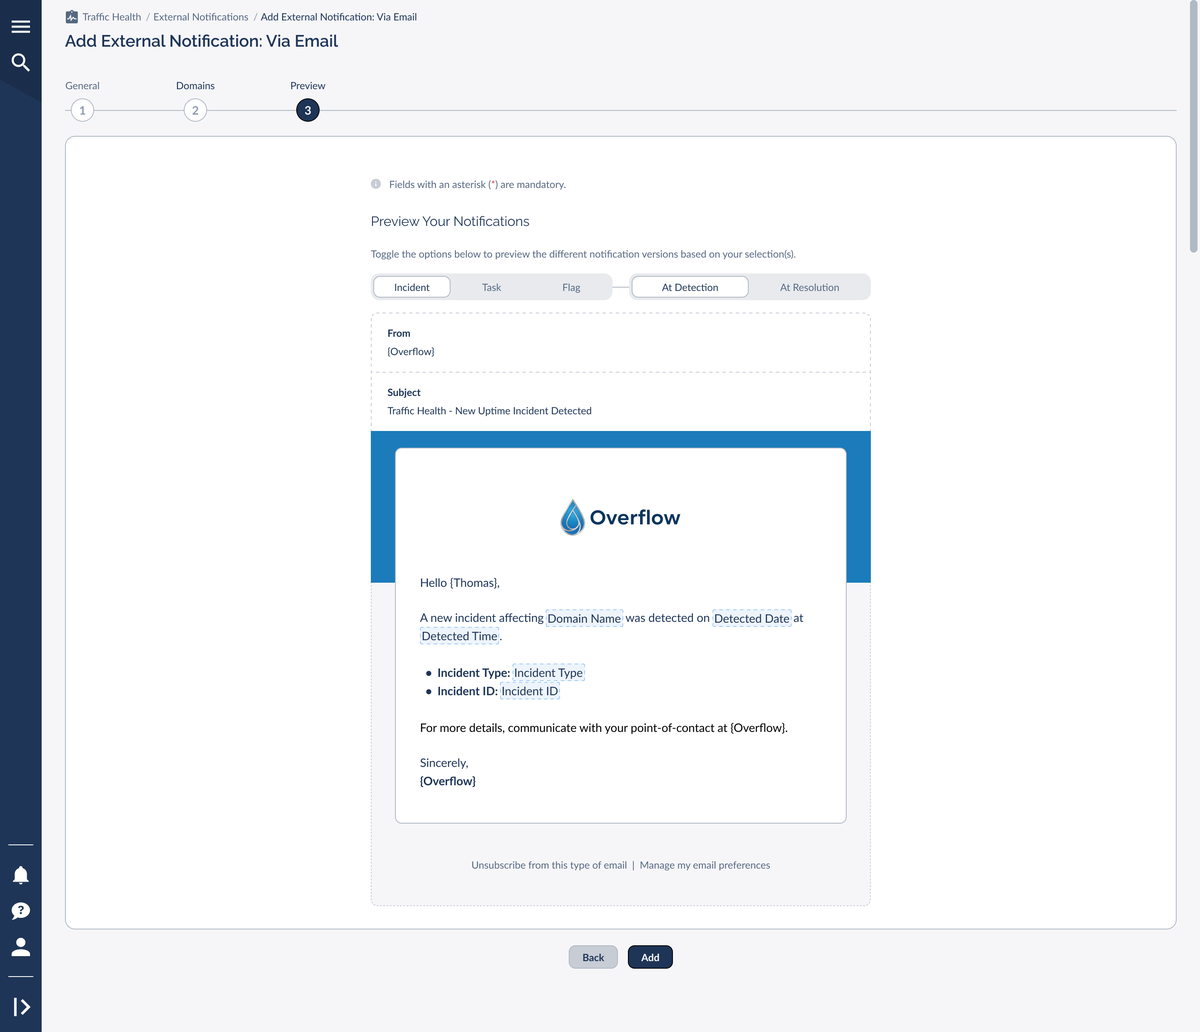
The Preview Step
Step 3, Preview, shows exactly what the recipient will receive before you commit. Use the toggles (Incident / Task / Flag on one axis and the lifecycle stage on the other) to flip through every version your settings will produce. The preview renders in the channel's native format:
When the preview looks right, click Add to save the notification. If its status is Active, it starts sending on the next matching event.
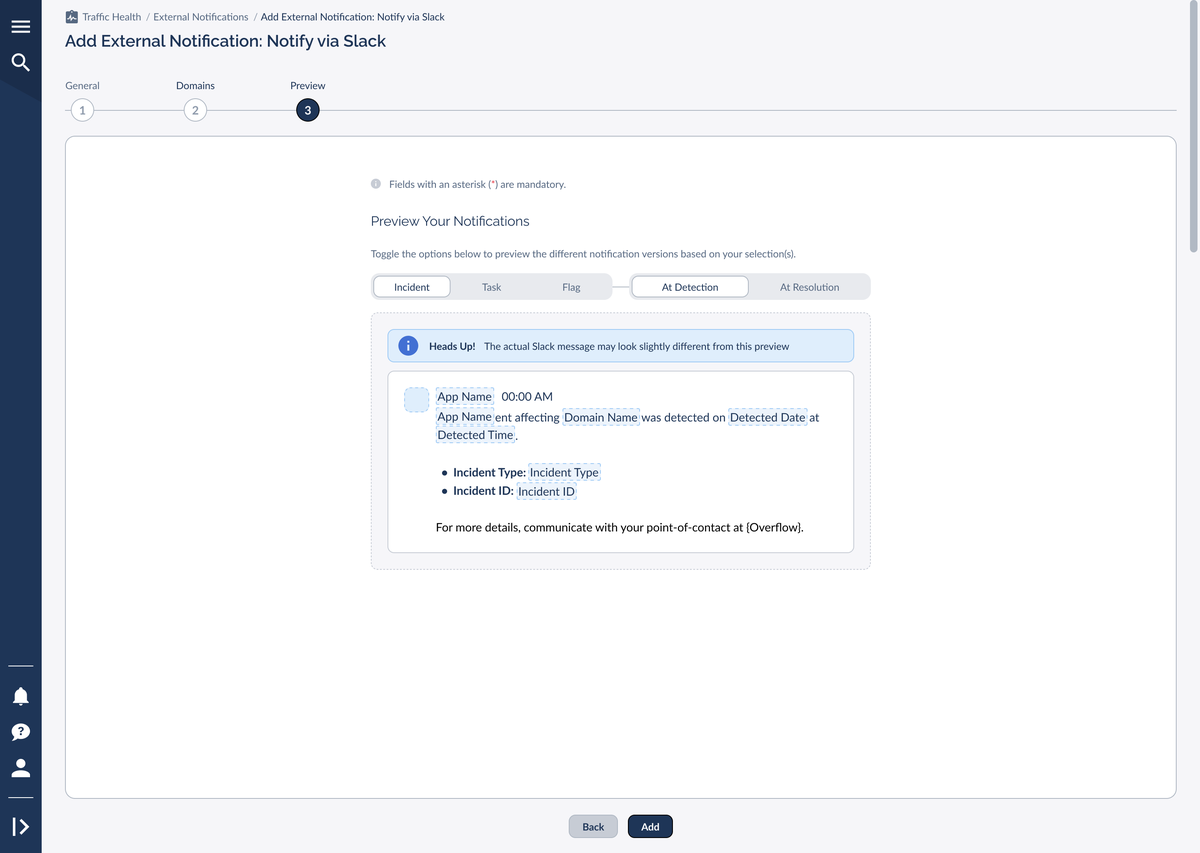
The Slack preview works the same way, showing the message card instead of an email:
Frequently Asked Questions
No. External Notifications are built specifically for key contacts who don't have an Everflow login. To change how you are notified instead, use My Notifications Preferences under your account settings.
Yes. Choose Specific on the Domains step and select just those domains from the picker.
Each notification targets a single recipient or destination. To alert several people, create one notification per recipient. They can share the same domains and activity settings.
On the General step, click Test Webhook. Traffic Health sends a sample message (Slack) or test payload (Webhook) so you can confirm it arrives before saving.
Use the row's kebab menu to Set as Inactive (pause it) or Delete (remove it permanently). You can also bulk-update status from the selection toolbar.
Related Articles
→ Introduction to Traffic Health


