
Overview
Now that you've connected your accounting software to Everflow Pay, there's one more concept to understand before we talk about syncs: Payee-to-Vendor mapping.
Mapping is how Everflow Pay knows which of your Payees correspond to which Vendors (or Contacts) in your accounting software. It's the link between the two systems, and without it, Everflow Pay can't sync financial data for that Payee. Their bills and payments simply won't appear in your books.
For step-by-step instructions on how to create, edit, and manage your mappings day-to-day, see Managing Payee-To-Vendor Mapping In Everflow Pay.
What Is Vendor Mapping?
In Everflow Pay, the affiliates or partners you're paying are called Payees. In your Accounting Software, those same people and companies are called Vendors/Contacts.
Mapping is the process of linking each Everflow Pay Payee to the correct record in your accounting software.
Why Mapping Matters
Without a mapping, Everflow Pay doesn't know which Vendor (or Contact) in your accounting software corresponds to a given Payee.
In other words: no mapping = no sync. It's that simple. Every Payee you want to appear in your accounting software needs a mapping. When a Payee is "mapped" to a Vendor, Everflow Pay knows exactly where to create financial records when payments are approved.
Accessing Vendor Mapping
During Initial Setup
Once you've configured your Expense Account and more in Step 1, as shown in the previous article, you'll be shown a view to map your Payees to Vendors in Step 2.
Mappings Tab (Post Setup)
If you've already gone through the initial setup, head over to
Creating & Editing Mappings
Please check our detailed guide on Managing Payee-To-Vendor Mapping In Everflow Pay to understand how to create, edit, & maintain existing mappings.
Mapping Status Reference
Every mapping has one of three statuses:
Payee is linked to a valid Vendor/Contact. Syncs work normally.
The Vendor/Contact is no longer available (deleted, deactivated, or archived). Syncs are blocked until you assign a new one.
No Vendor/Contact mapped. Syncs don't happen for this Payee until you create a mapping.
Map Payees to Vendors (Setup Wizard — Step 2)
This is the most detailed step. The page reads: "Map your [###] payees to your [Provider] account. You can select No Mapping and do this step later. Hover on the Payee name for an overview of their information."
How Mapping Works
You'll see a table with:
- Left column: Payee [###] — Your Everflow Pay Payees (with ID numbers)
- Right column: [Provider] Vendor — A search dropdown for each Payee
For each Payee:
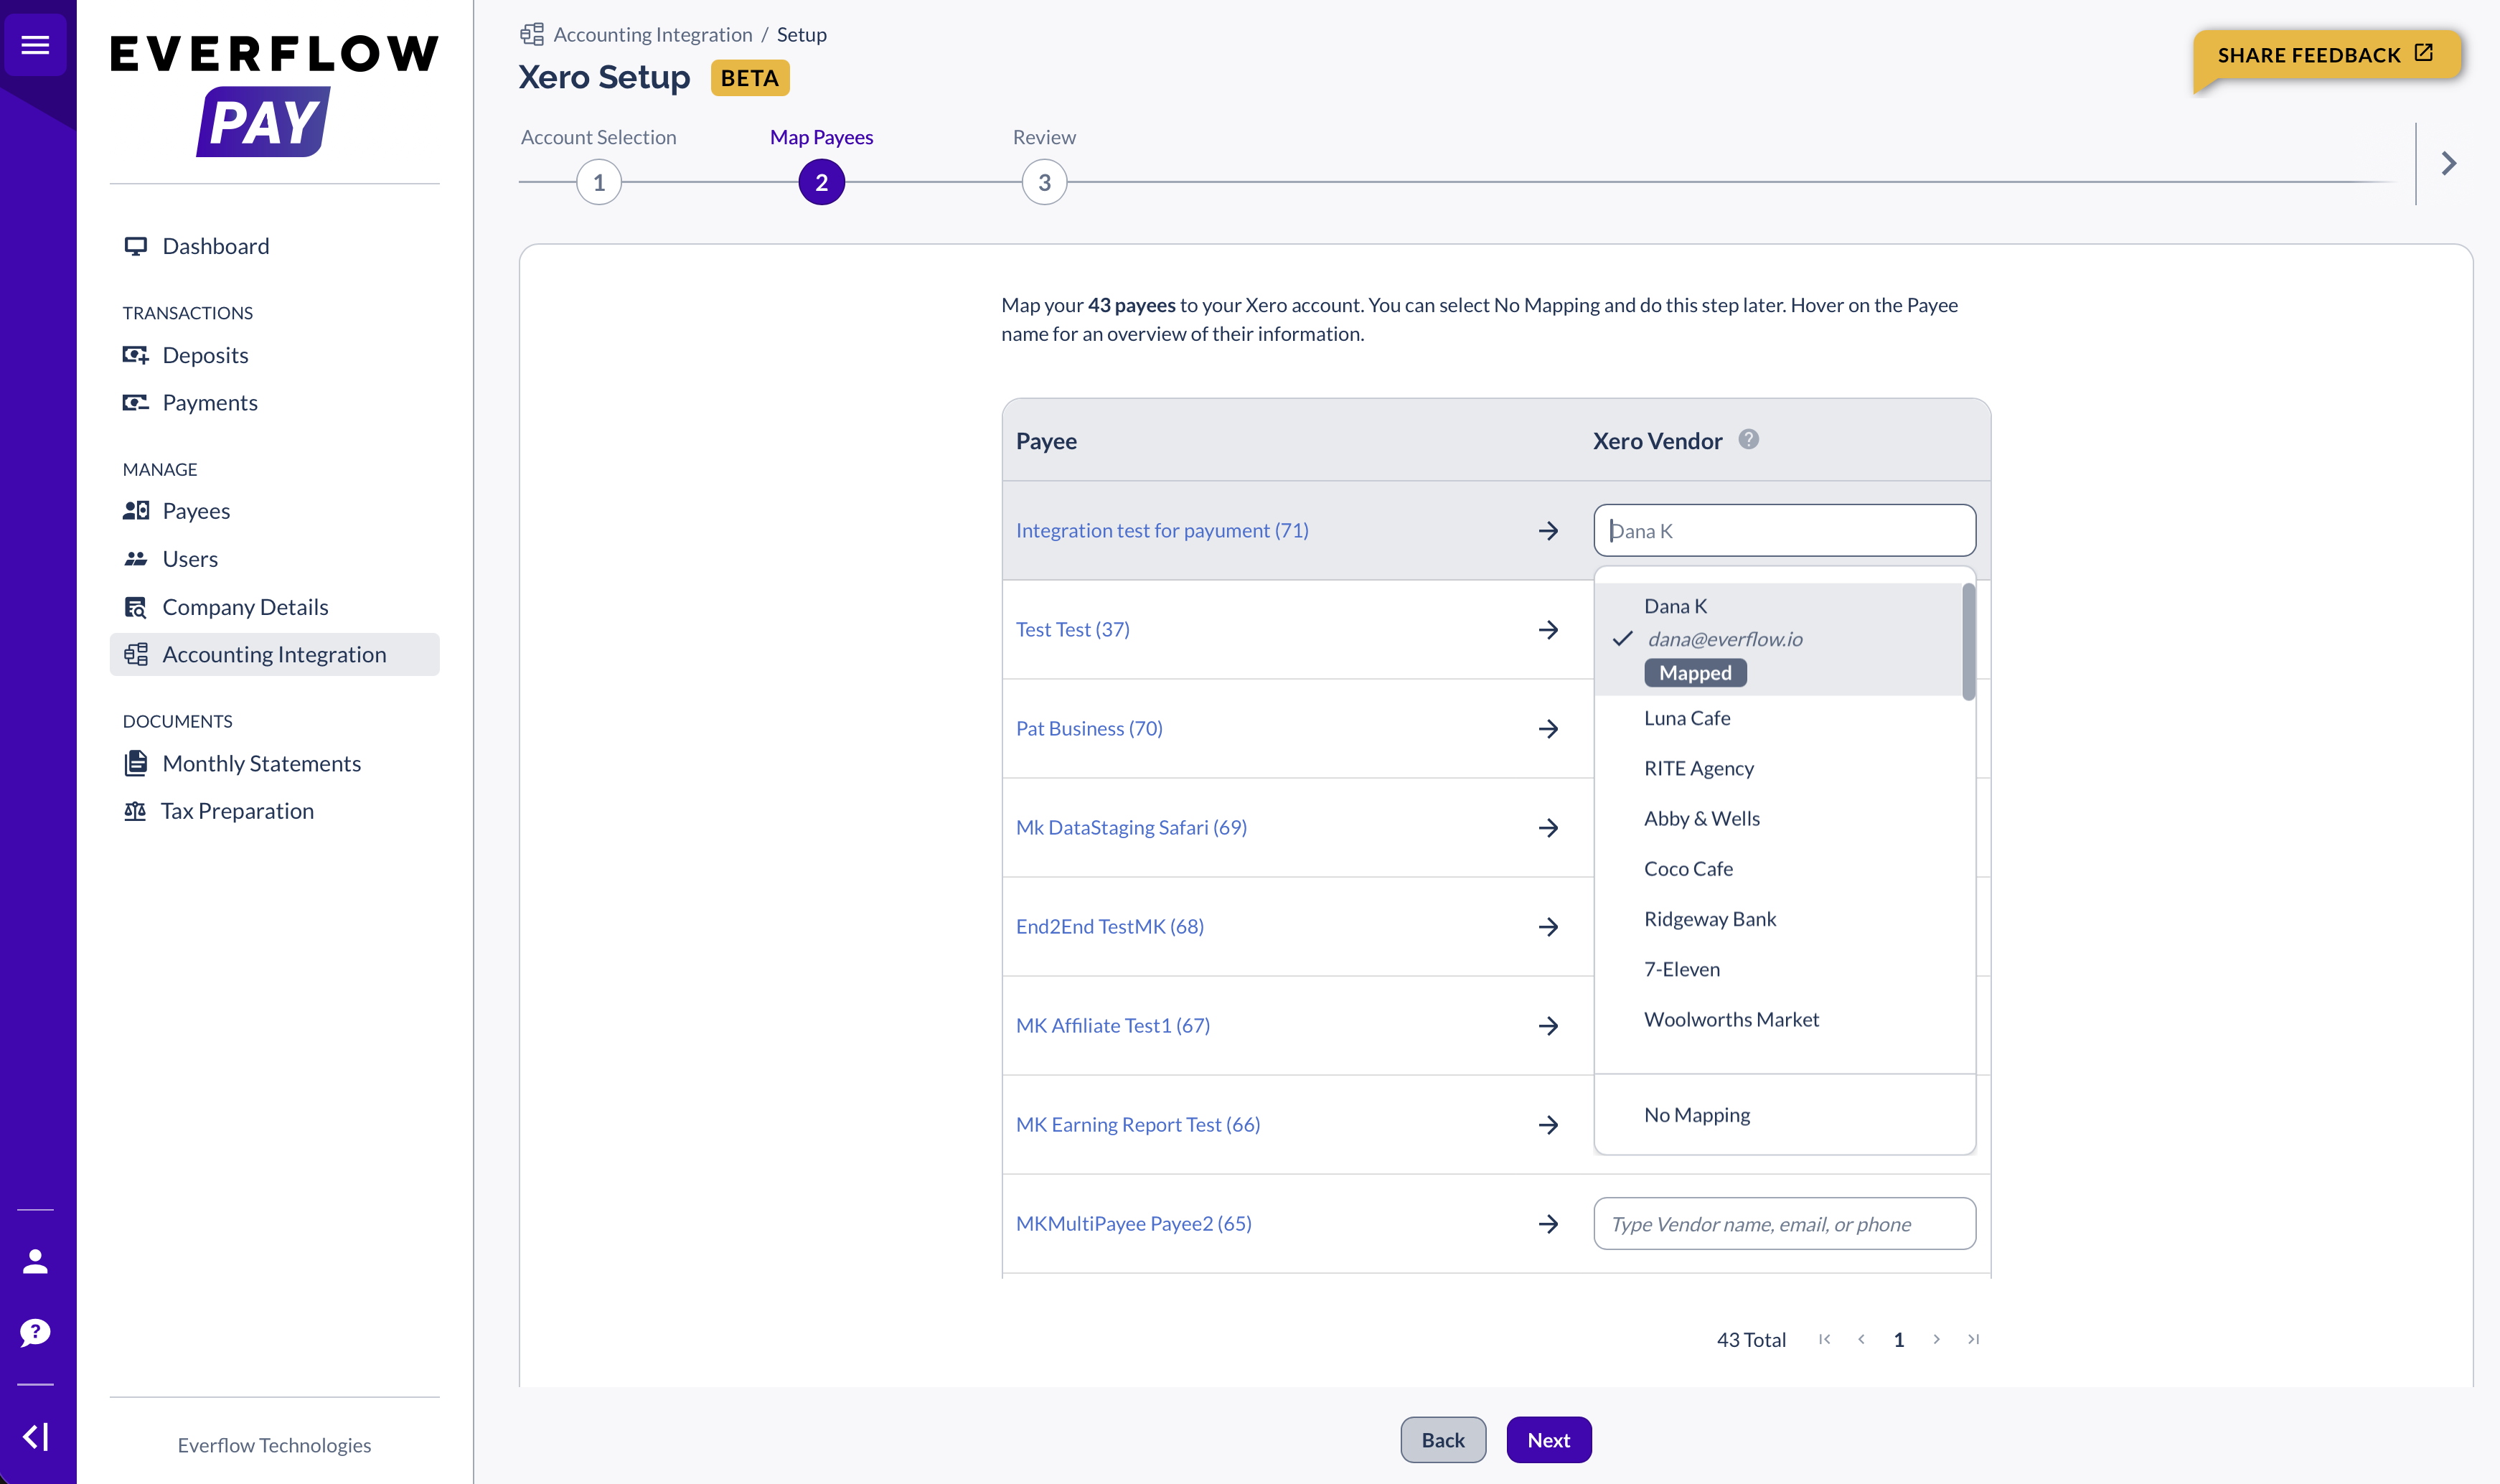
- Click the Vendor dropdown field ("Type Vendor name, email or phone")
- Search by name, email, or phone
- Select the correct Vendor from the dropdown results
- If a Vendor is already mapped to another Payee, you'll see a "Mapped" badge
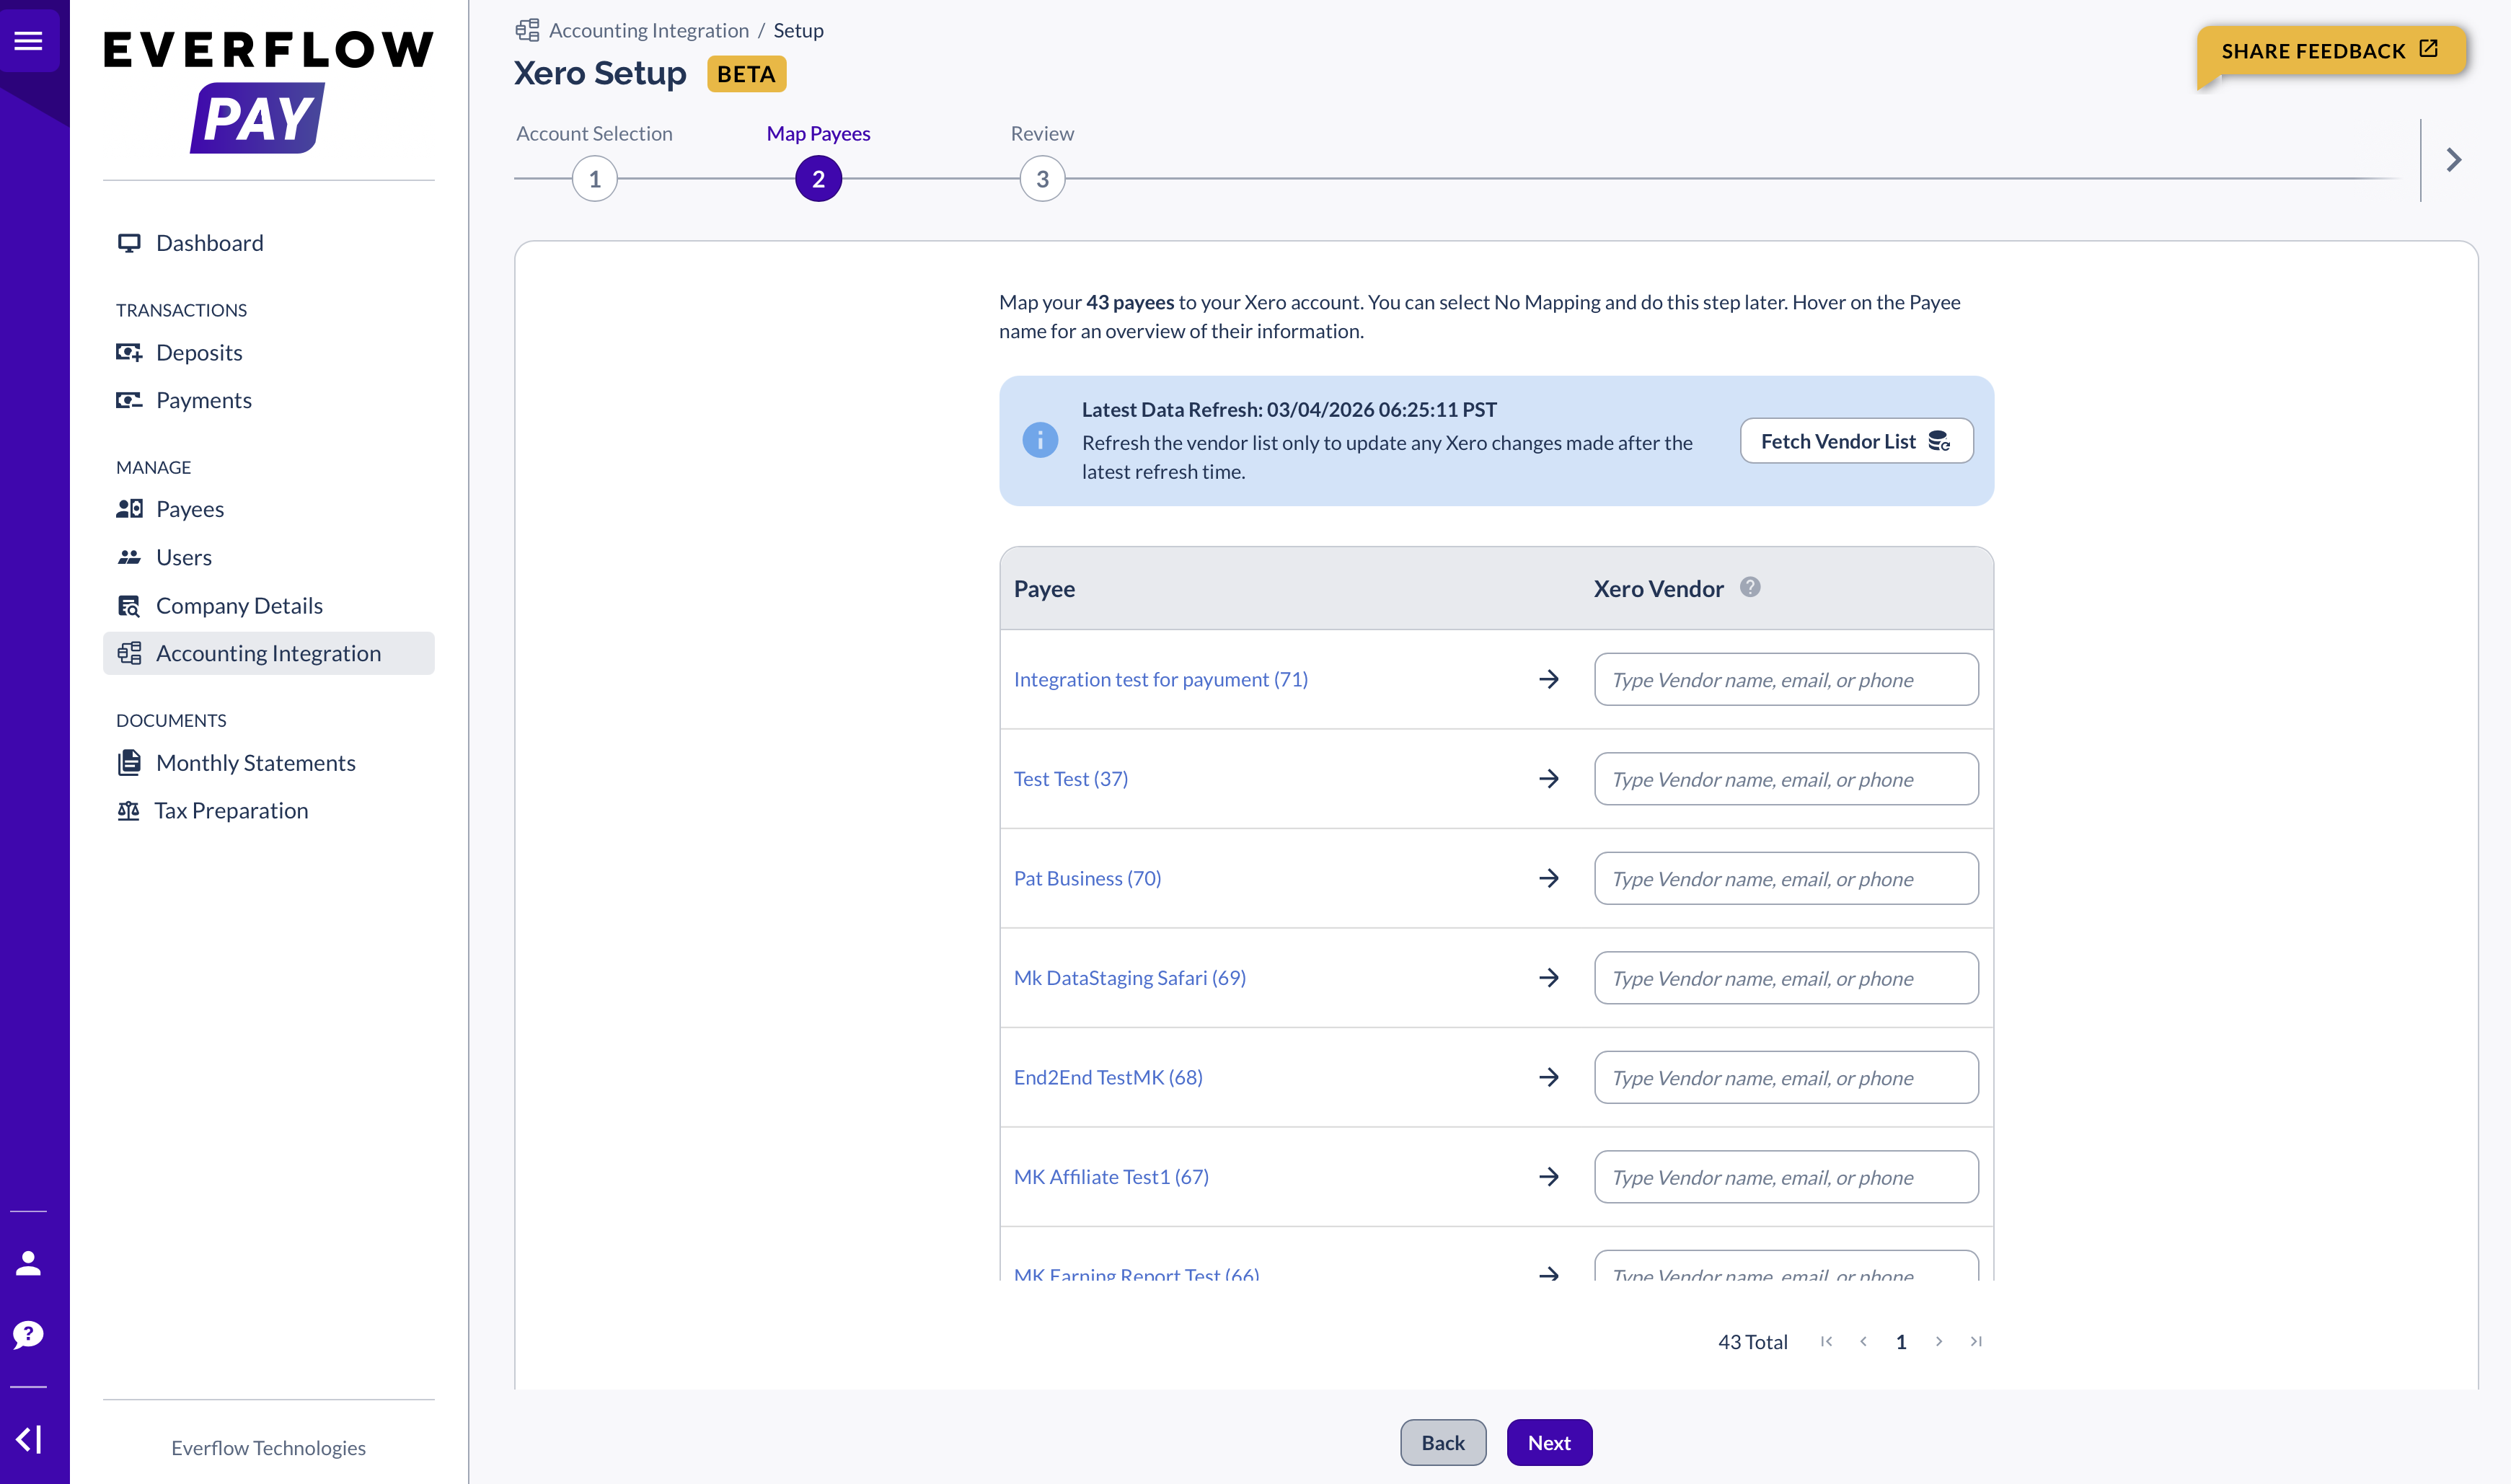
Fetching the Latest Vendor Data
Click the "Fetch Vendor List" button to refresh the list of Vendors from your accounting software. This ensures you're seeing the most up-to-date vendor data.
Viewing Payee Details
Hover on the Payee name to see a Payee Overview popup with the Payee ID, name, email(s), phone, and business structure. This helps you confirm you're mapping the right Payee to the right Vendor.
What If There's No Mapping?
If a Payee doesn't have a corresponding Vendor in your accounting software, you can select "No Mapping" to skip them. Unmapped Payees will not sync — bills and payments for those Payees won't appear in your accounting software until you create a mapping later. You can always map them from the Mappings tab. See: Managing Payee-To-Vendor Mapping.
Validation
If you try to proceed without selecting a Vendor for a Payee, you'll see a "Field required" error. Make sure each Payee has either a mapped Vendor or "No Mapping" selected before clicking Next.
Vendor Visibility
All vendors (also known as contractors) are displayed in the dropdown, whether related to Everflow Pay or not. This means you'll see your entire vendor list from your accounting software — not just the ones related to Everflow Pay.
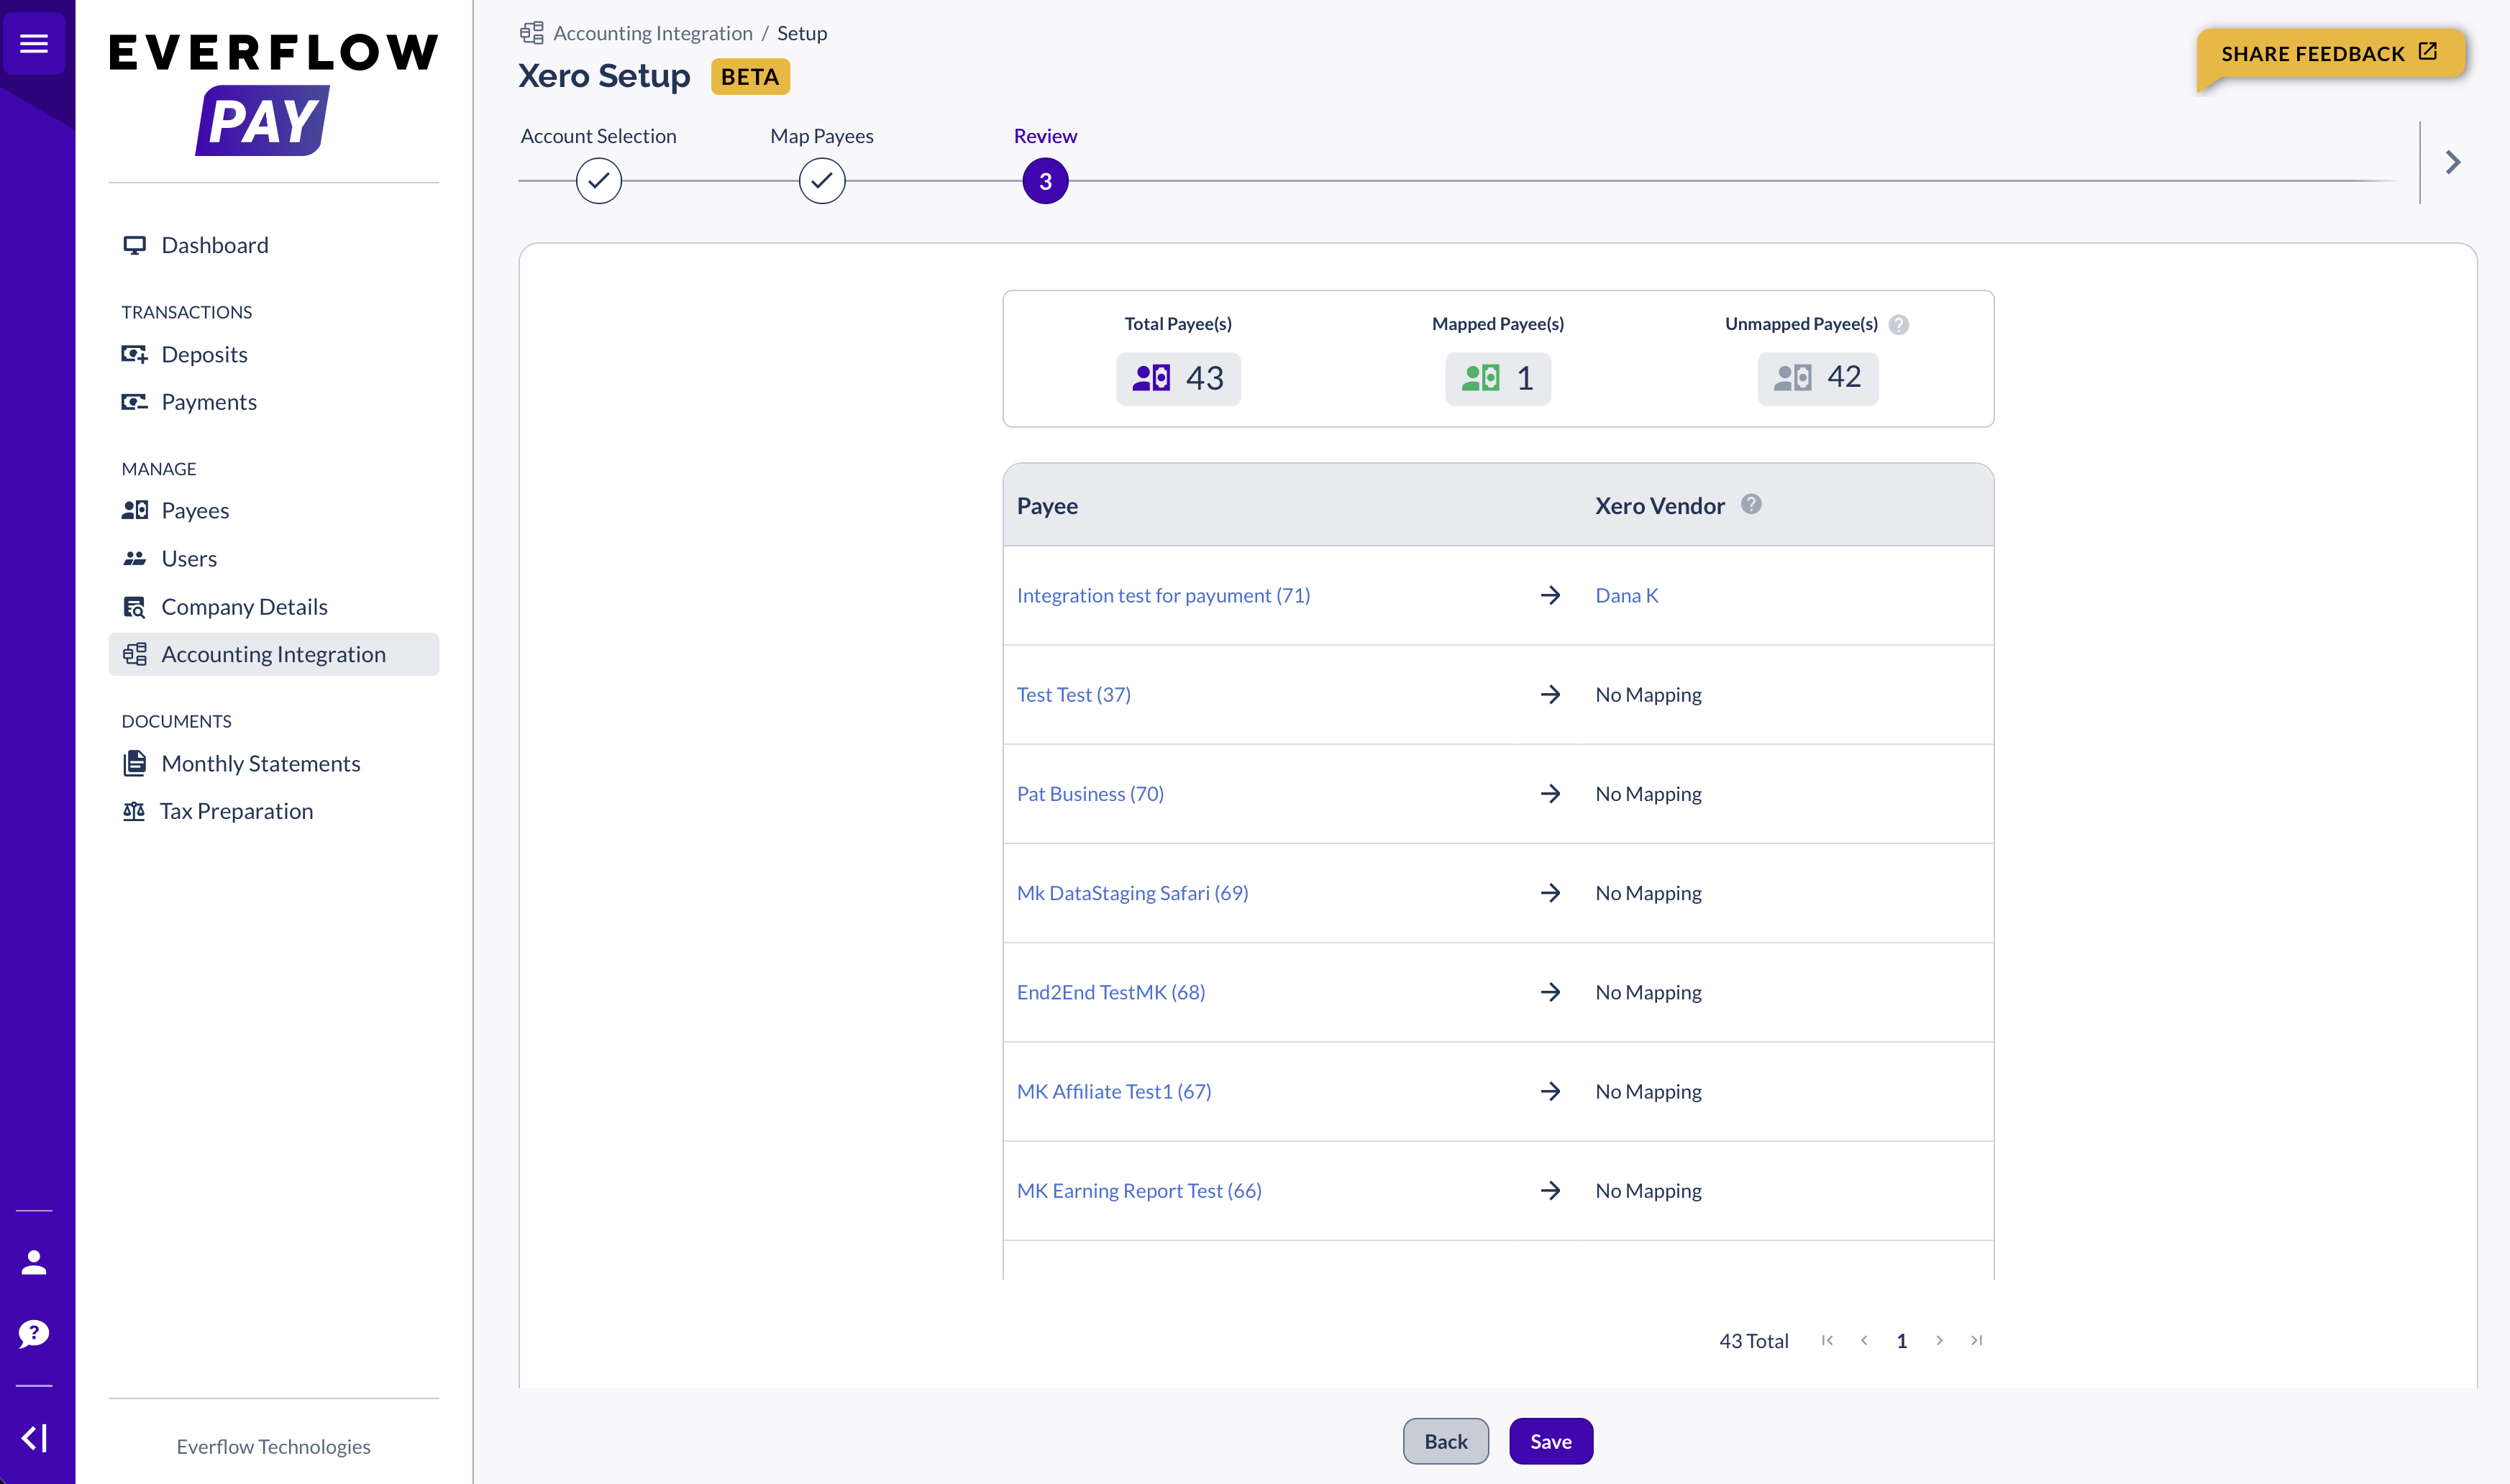
Review and Save (Setup Wizard — Step 3)
Before finalizing, you'll see a Review screen summarizing everything:
- Total Payee(s) — how many payees you have
- Mapped Payee(s) — how many are mapped to vendors
- Unmapped Payee(s) — how many are skipped (won't sync)
Below the summary, you'll see a read-only table showing all your Payee-to-Vendor mappings for final review. Click "Save" to complete the setup, or "Back" to return to Step 2 and make changes.
➤ What Are Accounting Integrations In Everflow Pay? — Feature overview
➤ Connecting Your Accounting Software To Everflow Pay — Initial setup
➤ Understanding Accounting Syncs In Everflow Pay — How Bills and Bill Payments are created automatically
➤ Managing Payee-To-Vendor Mapping In Everflow Pay — Step-by-step instructions for viewing, editing, and fixing mappings


