
Overview
Integrating Ringba with Everflow can significantly enhance your call tracking and performance marketing efforts.
Before diving into the integration process, it's crucial to determine whether you'll be using hard-coded phone numbers or dynamic number pools. This decision will impact your setup process and the level of tracking detail you can achieve.
Hard-Coded Numbers VS Dynamic Number Pools
Hard-coded number example:
*Number remains the same.

Dynamic number pools example:

*Number dynamically changes on the page.

Hard-Coded Numbers (Steps)
If you're using hard-coded phone numbers, follow these steps to integrate Ringba with Everflow:
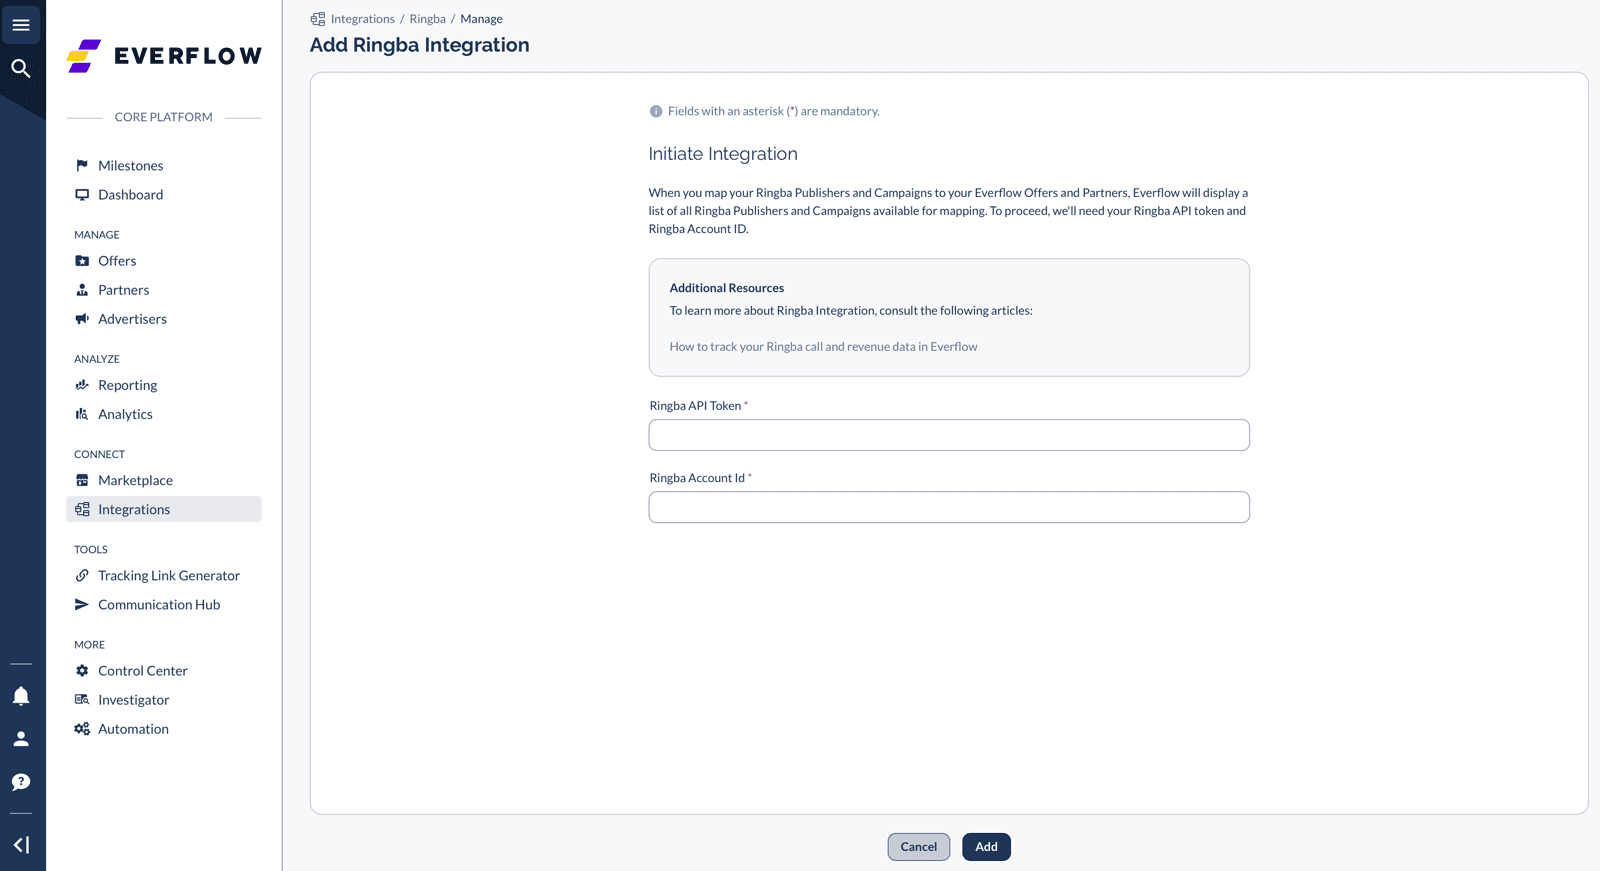
Step 1: Initiate Integration
- In Everflow, go to Integrations > Pay Per Call tab.
- Click "Connect Integration" for Ringba.
- Enter your Ringba Account ID and API Token.
To find your Ringba Account ID:
- Log in to Ringba dashboard
- Click your profile (top-right)
- Copy the ID next to your company name
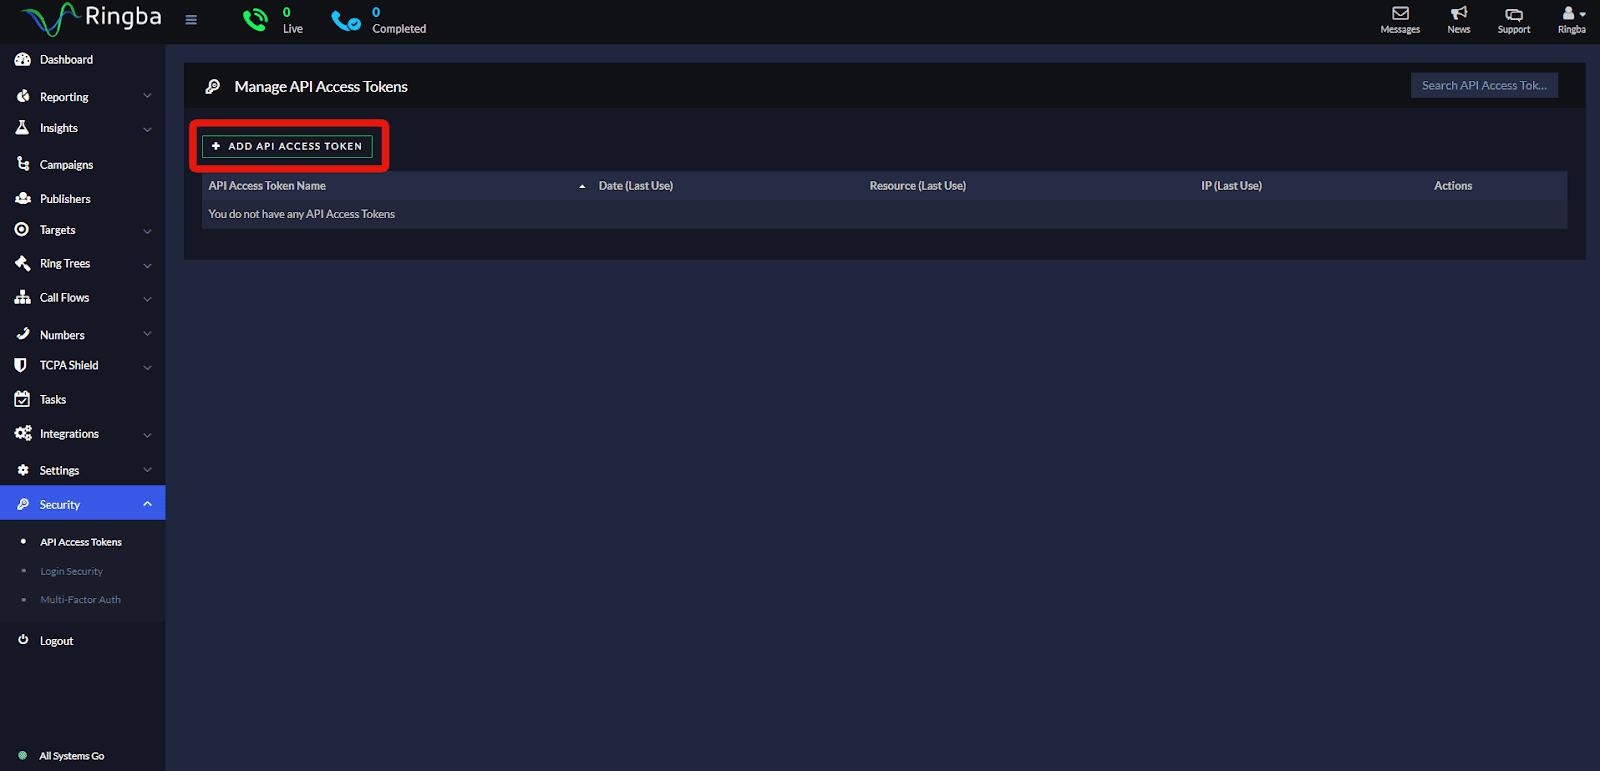
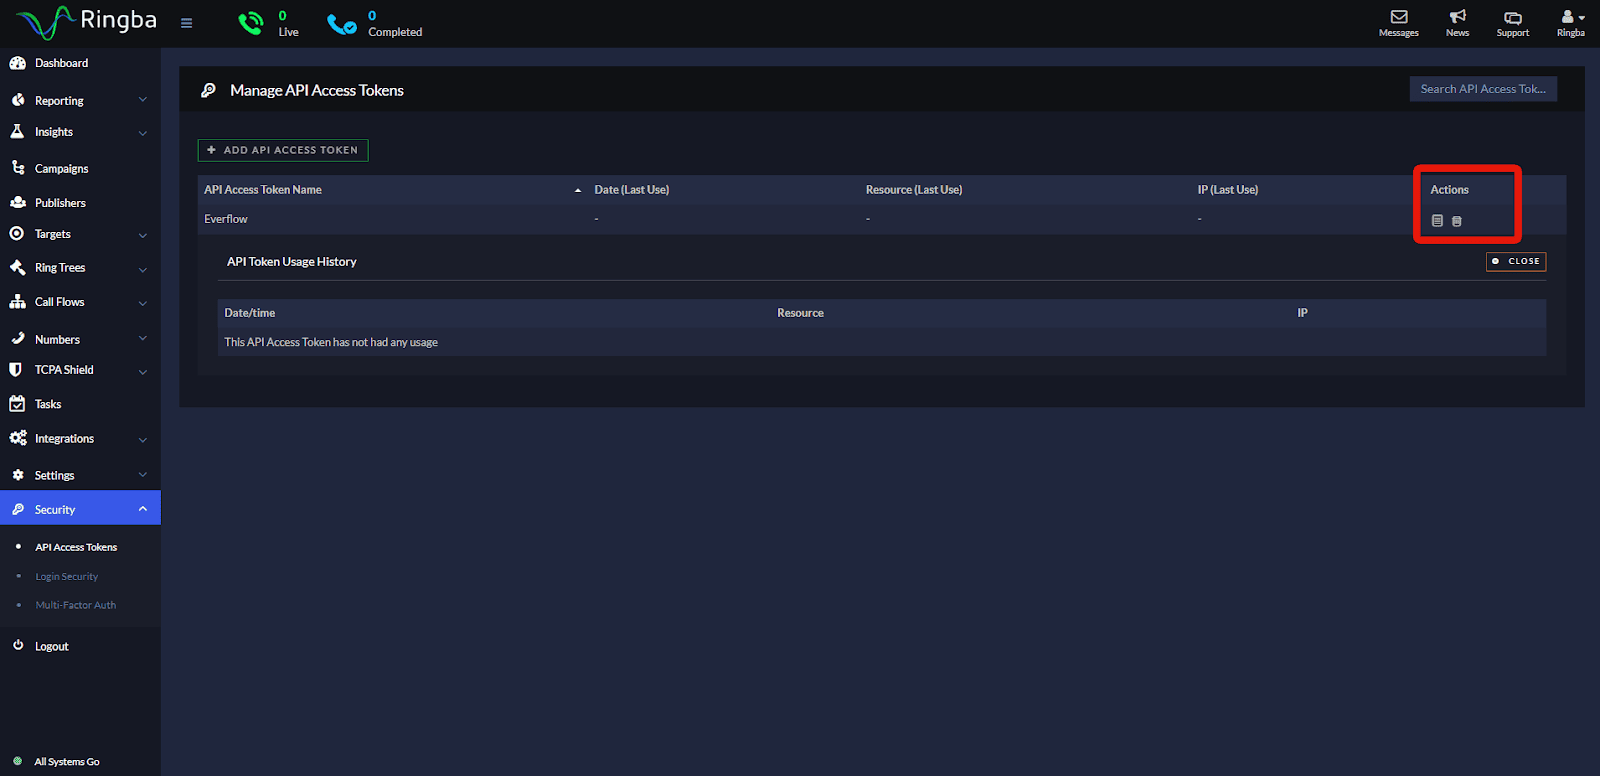
To generate a Ringba API Access Token:
- In Ringba dashboard, go to Security > API Access Tokens
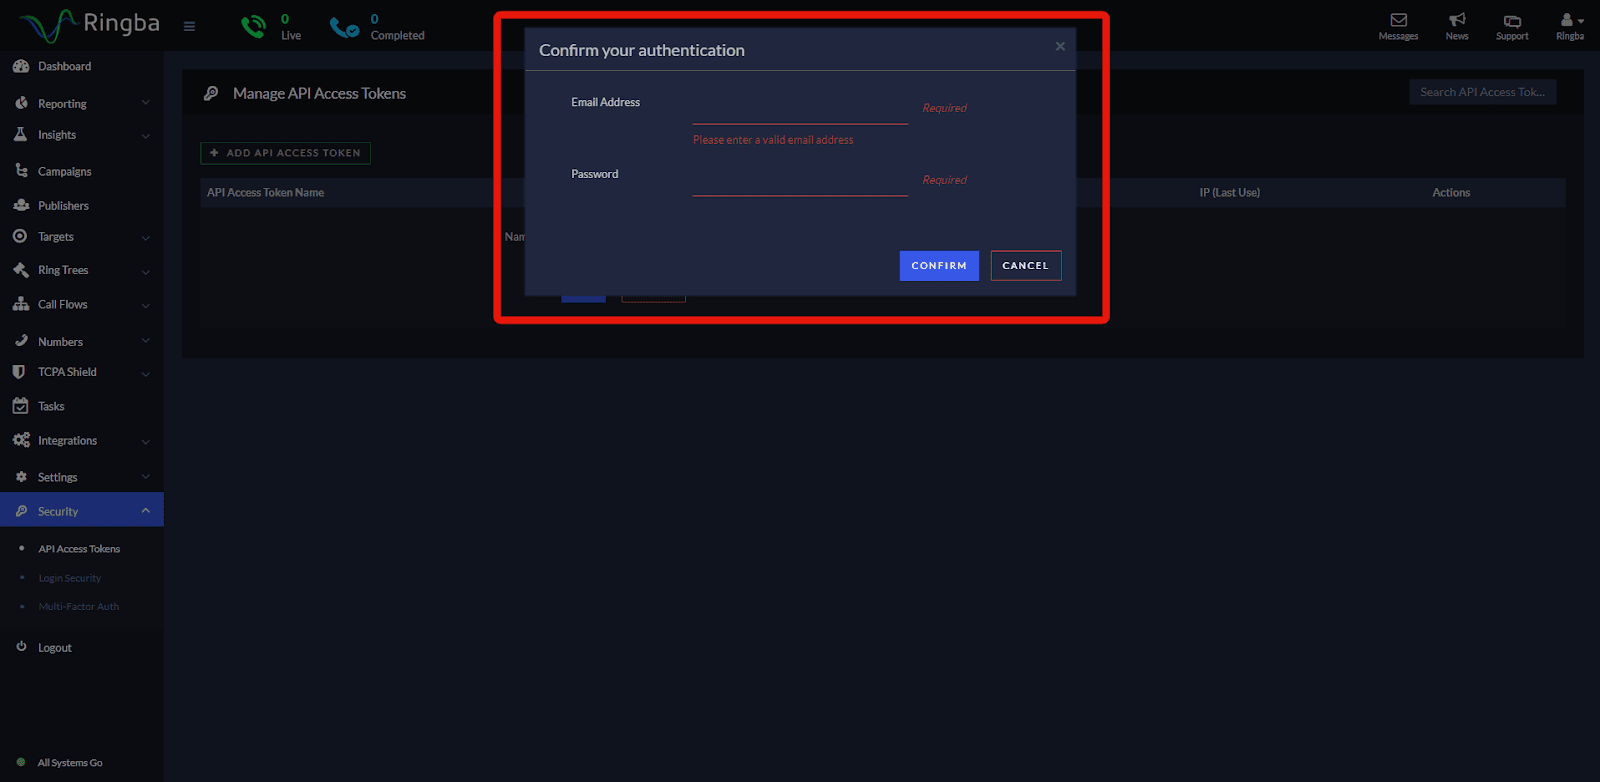
- Click "Add API Access Token"
- Enter credentials
- And copy the token (store securely)
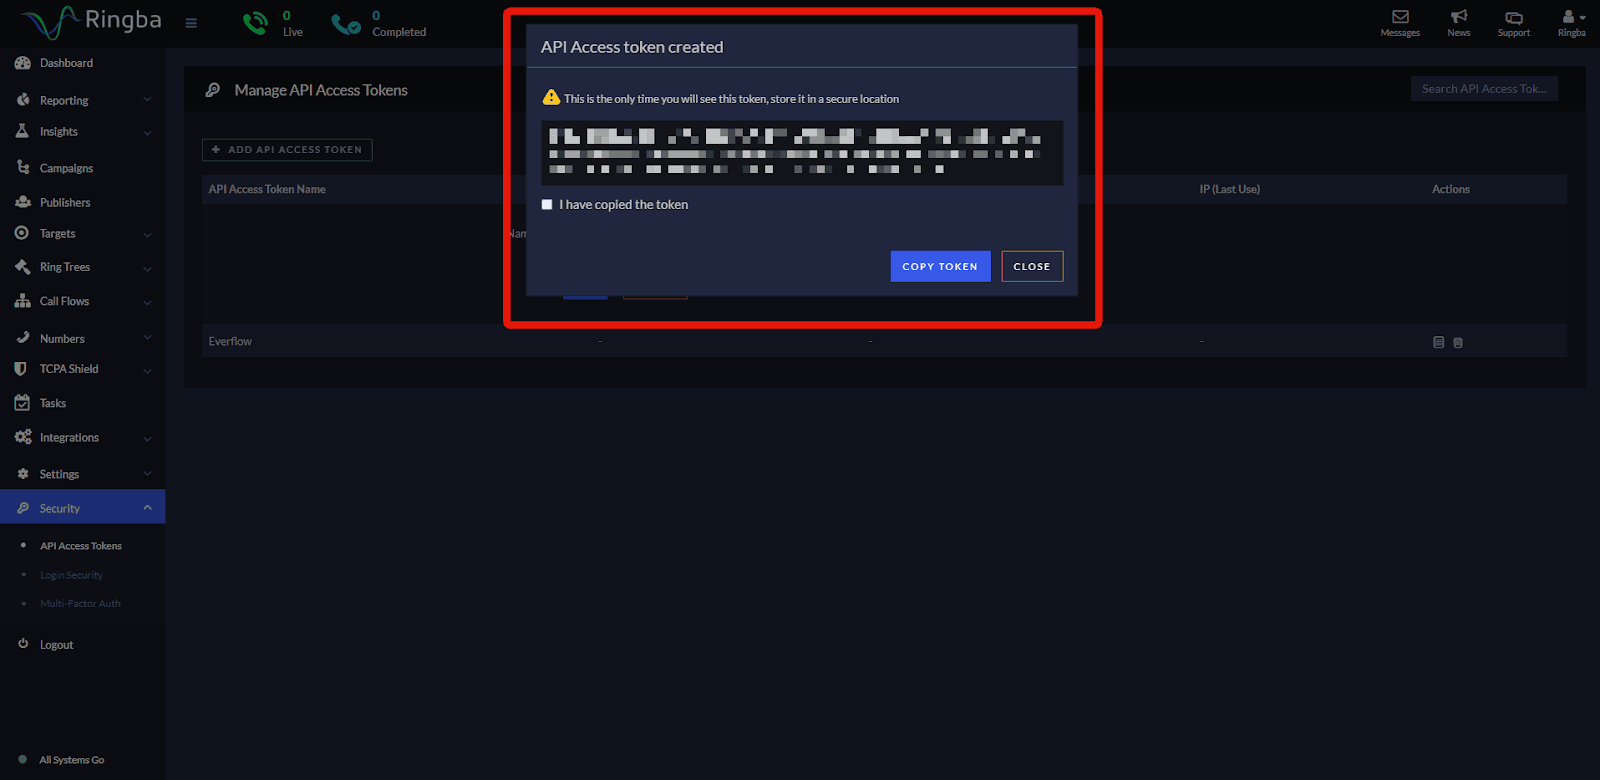
- After you have created the API Access Token, you can view and access the Token Usage Details from the "Actions" panel.
You need your API token to connect integration.
- Select Integrations -> Pay Per Call -> Ringba -> Connect Integration.
- Input Ringba API Token and Ringba Account id
Step 2: Offer Setup in Everflow
- Create an Offer in Everflow
- Add all Events tracked in Ringba
- Select Server Postback as Conversion Method
- Set Default Landing Page to Ringba's tracking URL (if applicable)
- If you're using hard-coded, set a placeholder URL for your Default Landing Page since it's a required field in Everflow.
Clicks can still be tracked using Redirect Link, but no relation between click and conversion will show in Everflow reporting.
Step 3: Tracking ID & Sub ID
Tracking ID (Offer ID):
- In Ringba, click Campaigns > Create Campaign
- Name and select the country for your campaign
- Click Create
- Under General Info, insert the Everflow Offer ID into the Tracking ID field
- Click Save

Sub ID (Affiliate ID):
- In Ringba, click Publishers > Add Publisher
- Name your publisher
- Insert the Everflow affiliate ID into the Sub ID field
- Click Add

Step 4: Server Postback
- Using OID and AFFID: Implement a server postback with this format:
https://trackingdomain.com/?nid=XX&oid=[tag:Campaign:TrackingId]&affid=[tag:Publisher:SubId]&amount=[Call:ConversionAmount]
- &amount is optional
To implement a server postback in Ringba:
- Navigate to Integrations - Pixels > + Create Pixel
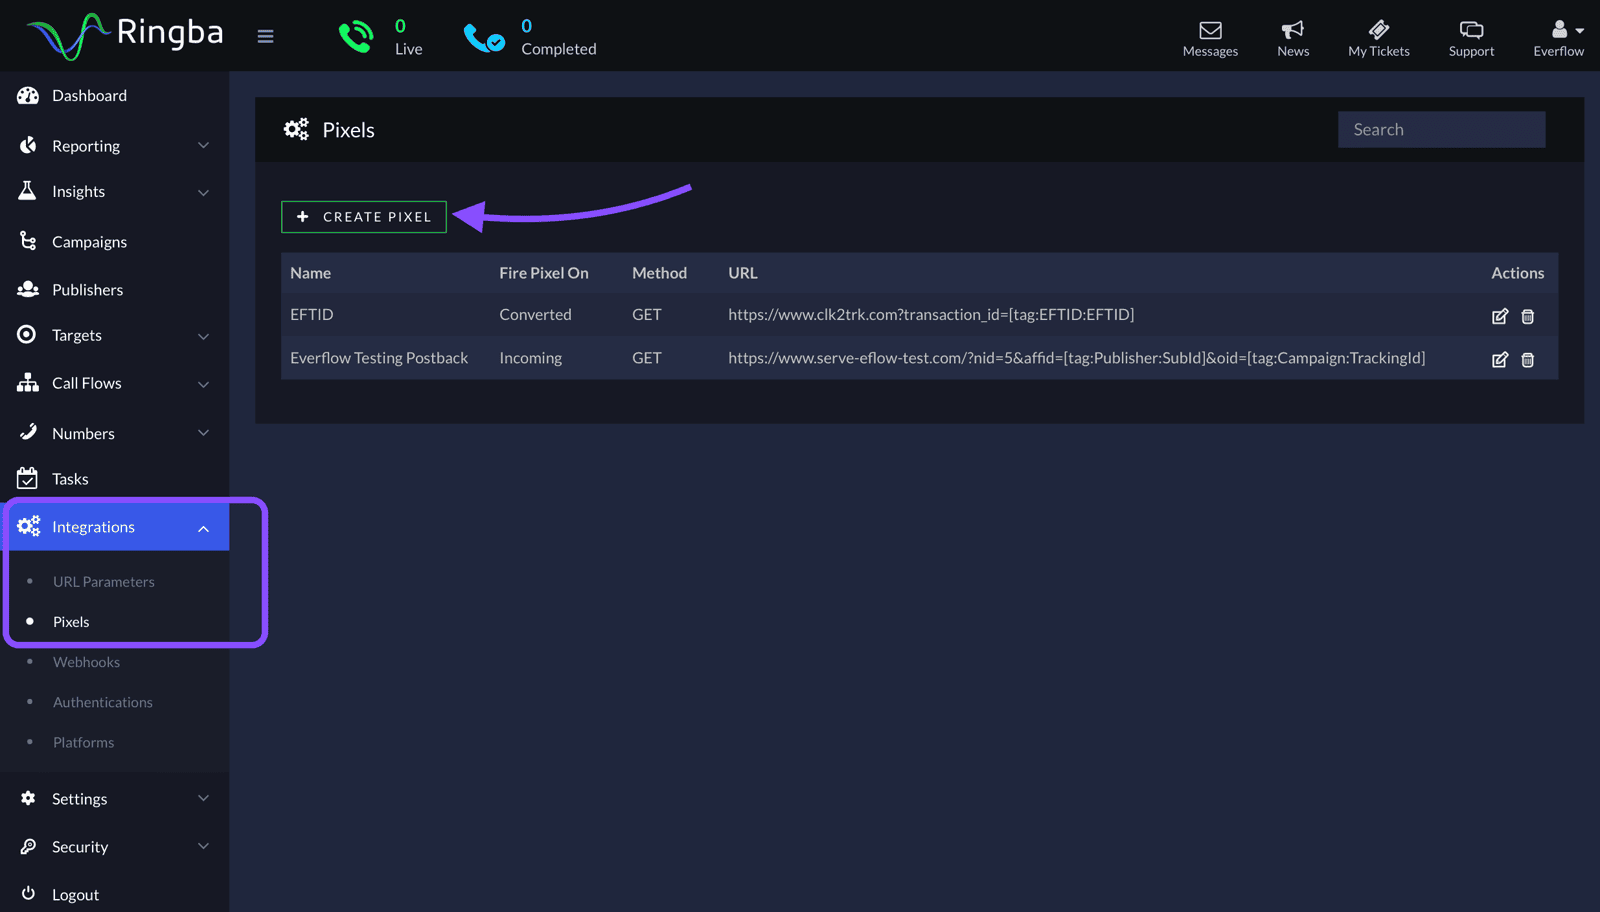
- Your postback should follow this format: https://trackingdomain.com/?nid=XX&oid=[tag:Campaign:TrackingId]&affid=[tag:Publisher:SubId]&amount=[Call:ConversionAmount]
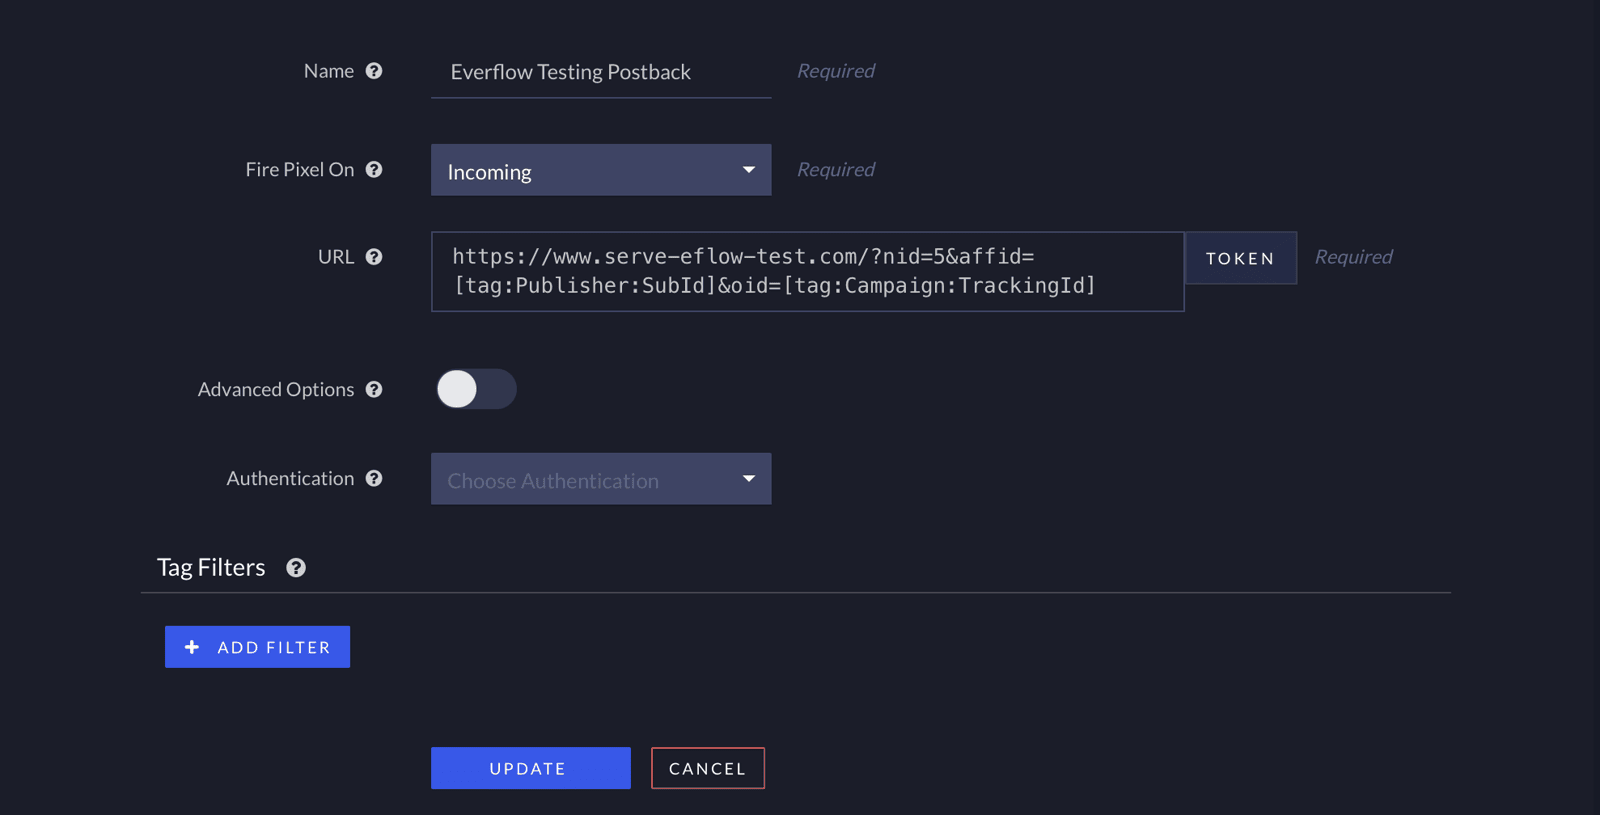
This was the postback from the example above: https://www.serve-eflow-test.com/?nid=5&affid=[tag:Publisher:SubId]&oid=[tag:Campaign:TrackingId]
Step 5: Campaign Mapping
Map Ringba campaigns and publishers to Everflow Offers and Partners
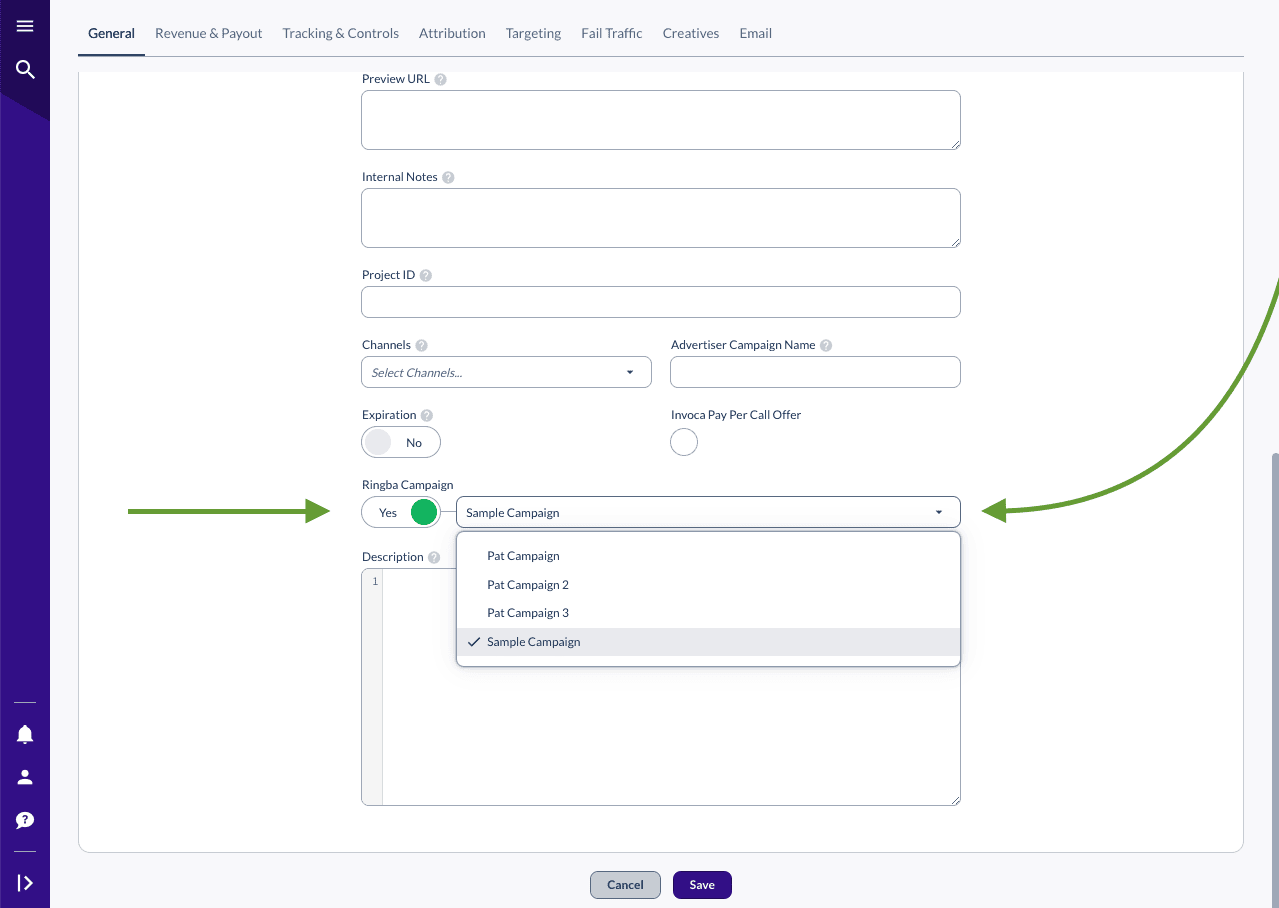

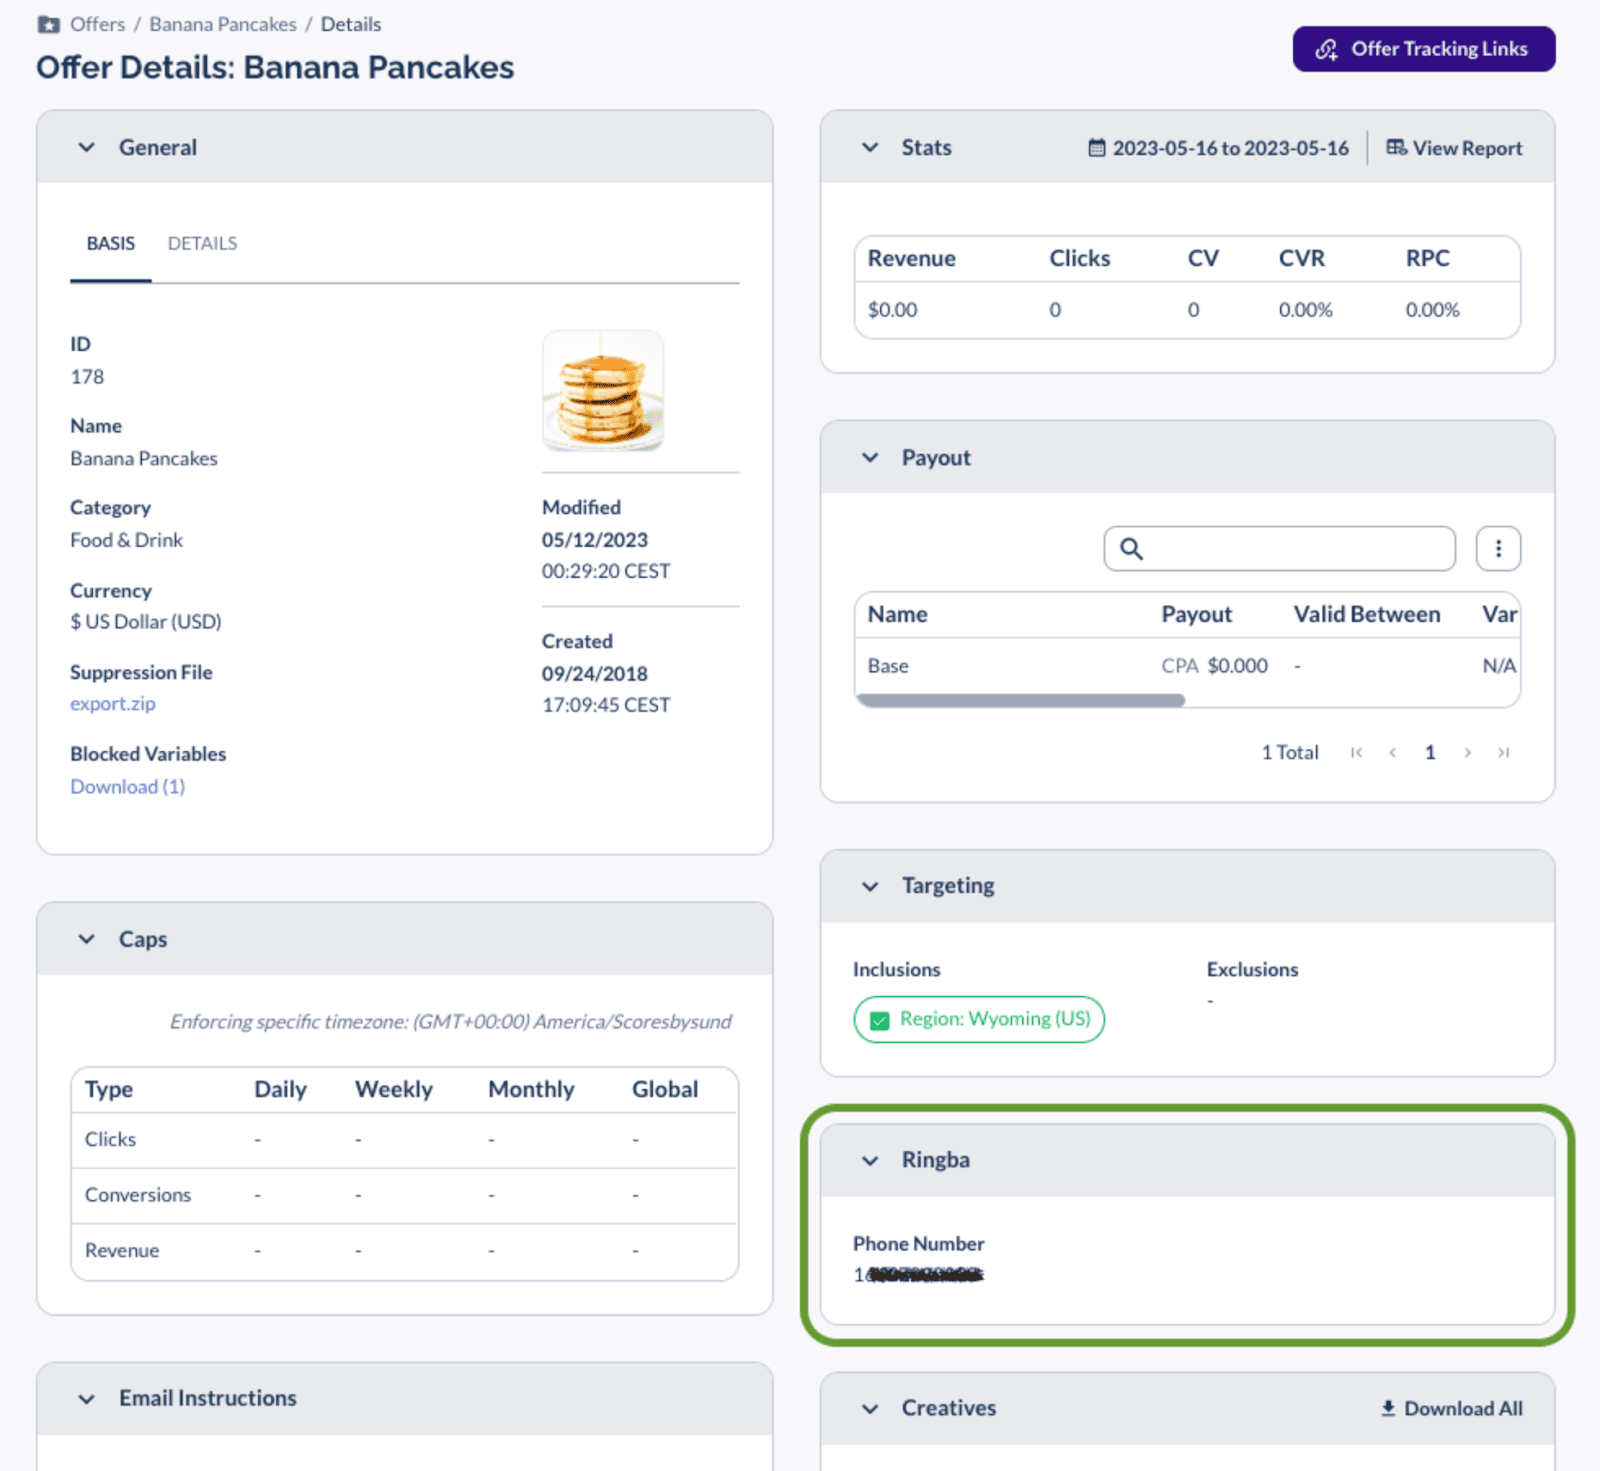
Verify integrated phone number display on the Offer in Partner Portal.
For assistance with bulk campaign mapping, contact Everflow support.
Dynamic Number Pools (Steps)
Dynamic number pools offer more advanced tracking capabilities, allowing you to associate unique phone numbers with individual visitors.
Here's how to set up and integrate dynamic number pools with Everflow:
Step 1: Create a Number Pool
- In Ringba, navigate to Numbers > Manage Pools.
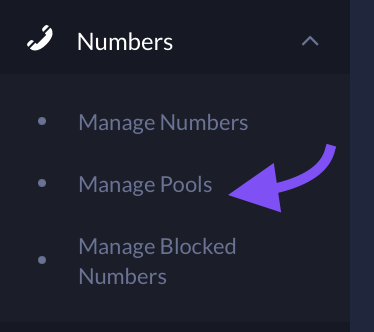
- Click the "+ CREATE NUMBER POOL" button.
- Complete the required fields:
- Name your pool
- Select the country (US/Canada by default; contact support for other countries)
- Configure additional settings as needed (e.g., session duration, idle timeout)
Step 2: Attach Number Pool
- Open your Campaign in Ringba.
- Under Publishers, click "+ ADD CALL TRACKING TAG".
- Configure the call tracking tag:
- Name the tag
- Set a Primary Number (used when pool numbers are exhausted)
- Specify the Number to Replace (typically the Primary Number)
- Toggle on "Capture User Data"
- Select your created Number Pool
Step 3: Implement JavaScript
- In Ringba, find your Campaign ID (edit campaign > General Info section).
- Add this script to the <HEAD> of your landing page:
<script src="//b-js.ringba.com/{Your campaign ID}" async></script>

- Replace {Your campaign ID} with your actual campaign ID.
Step 4: Set Up Offer in Everflow
- Create an Offer in Everflow.
- Add all Events you're tracking in Ringba.
- Select "Server Postback" as the Conversion Method.
- Set the Default Landing Page URL to your landing page with the Ringba script
https://yourlangingpage.com/?_ef_transaction_id={transaction_id}
Step 5: Everflow Tracking Script
Add the following script to your landing page, after the Ringba script:
Step 6: Set Up Postback
The one we recommend the most:
- In Ringba, go to Integrations > URL Parameters.

- Add a parameter to capture the transaction_id (eftid).
- Navigate to Integrations - Pixels > + Create Pixel
- Click the [Token] button and search for the parameter you added (eftid).
- Then add it to your postback URL like this:
- using &transaction_id=[Tag:User:eftid] instead of oid and affid
https://trackingdomain.com/?nid=XX&transaction_id=[Tag:User:eftid]
This setup ensures that Ringba captures the Everflow transaction ID and can pass it back in the conversion postback.
Step 7: Test and Verify
- Visit your landing page through an Everflow tracking link.
- Verify that the phone number on the page is replaced with a number from your pool.
- Make a test call and check that it's tracked correctly in both Ringba and Everflow.
By following these steps, you'll have successfully integrated Ringba's dynamic number pools with Everflow, allowing for detailed call tracking and attribution across your marketing campaigns.


