
Overview
Effective segmentation is key to managing your network efficiently. Each segmentation tool serves specific purposes for different team members:
➔ Categories: Public classifications that help Partners find relevant Offers
➔ Channels: Essential for media buyers to track and optimize traffic sources
➔ Business Units: Administrative tool for organization-wide structure and reporting
By using these tools together, your team can transform raw data into actionable insights, streamline workflows, and improve Partner relationships.
Labels
Labels are custom "tags" that you can add to Partners, Advertisers, or Offers for internal reporting, searching, or filtering.
Creating Labels
Option 1: Through Partner, Advertiser, or Offer pages
Option 2: Through Control Center
Example
If you label both Offer A and Partner X as "Premium," reports will only show data for Offer A's traffic from Partner X. However, if you only apply "Gaming" to Offers, reports will show all gaming offers regardless of partner.
Categories
Categories group Offers together for easy searching and reporting, both internally and externally. Since Categories are visible to Partners, they help Partners browse available offers by type.
Managing Categories
Common Category Examples
- Gaming
- Lead Generation
- Retail
- Finance
- Entertainment
Assigning a Category to an Offer
- When adding or editing an Offer, go to the General tab
- Select a category from the drop-down list
- Save your changes
Using Categories in Reporting
- In any report, select Category as a Filter to see only results from specific categories
- This makes it easier to analyze performance by offer type
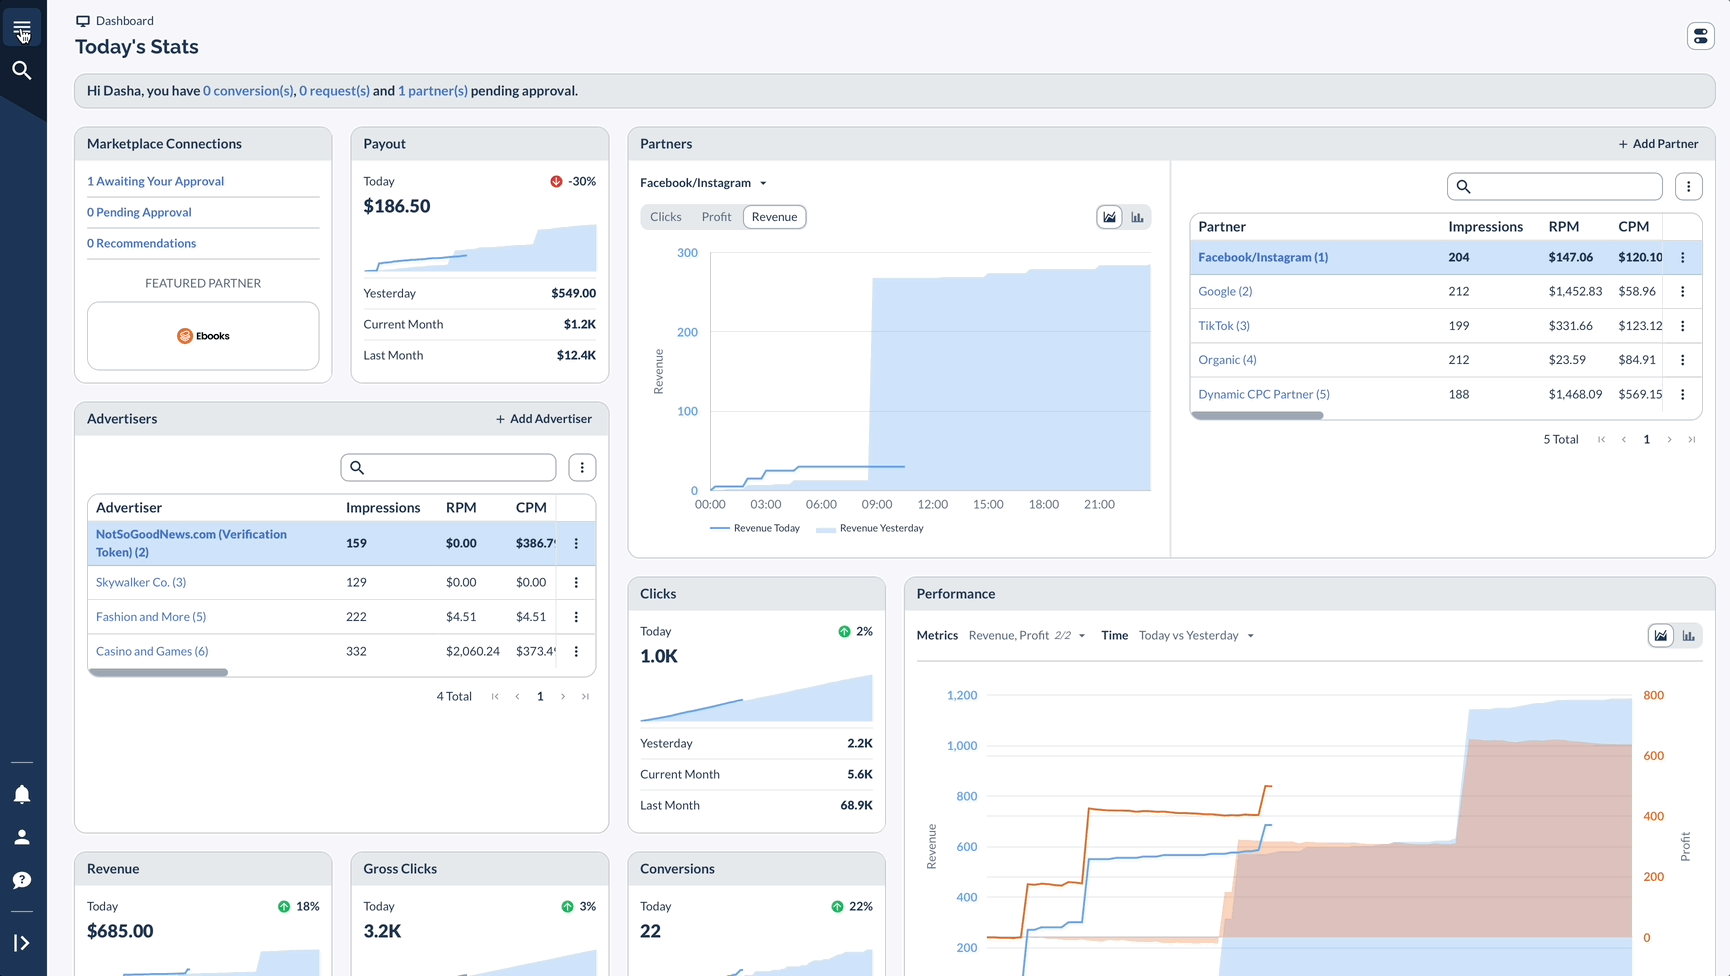
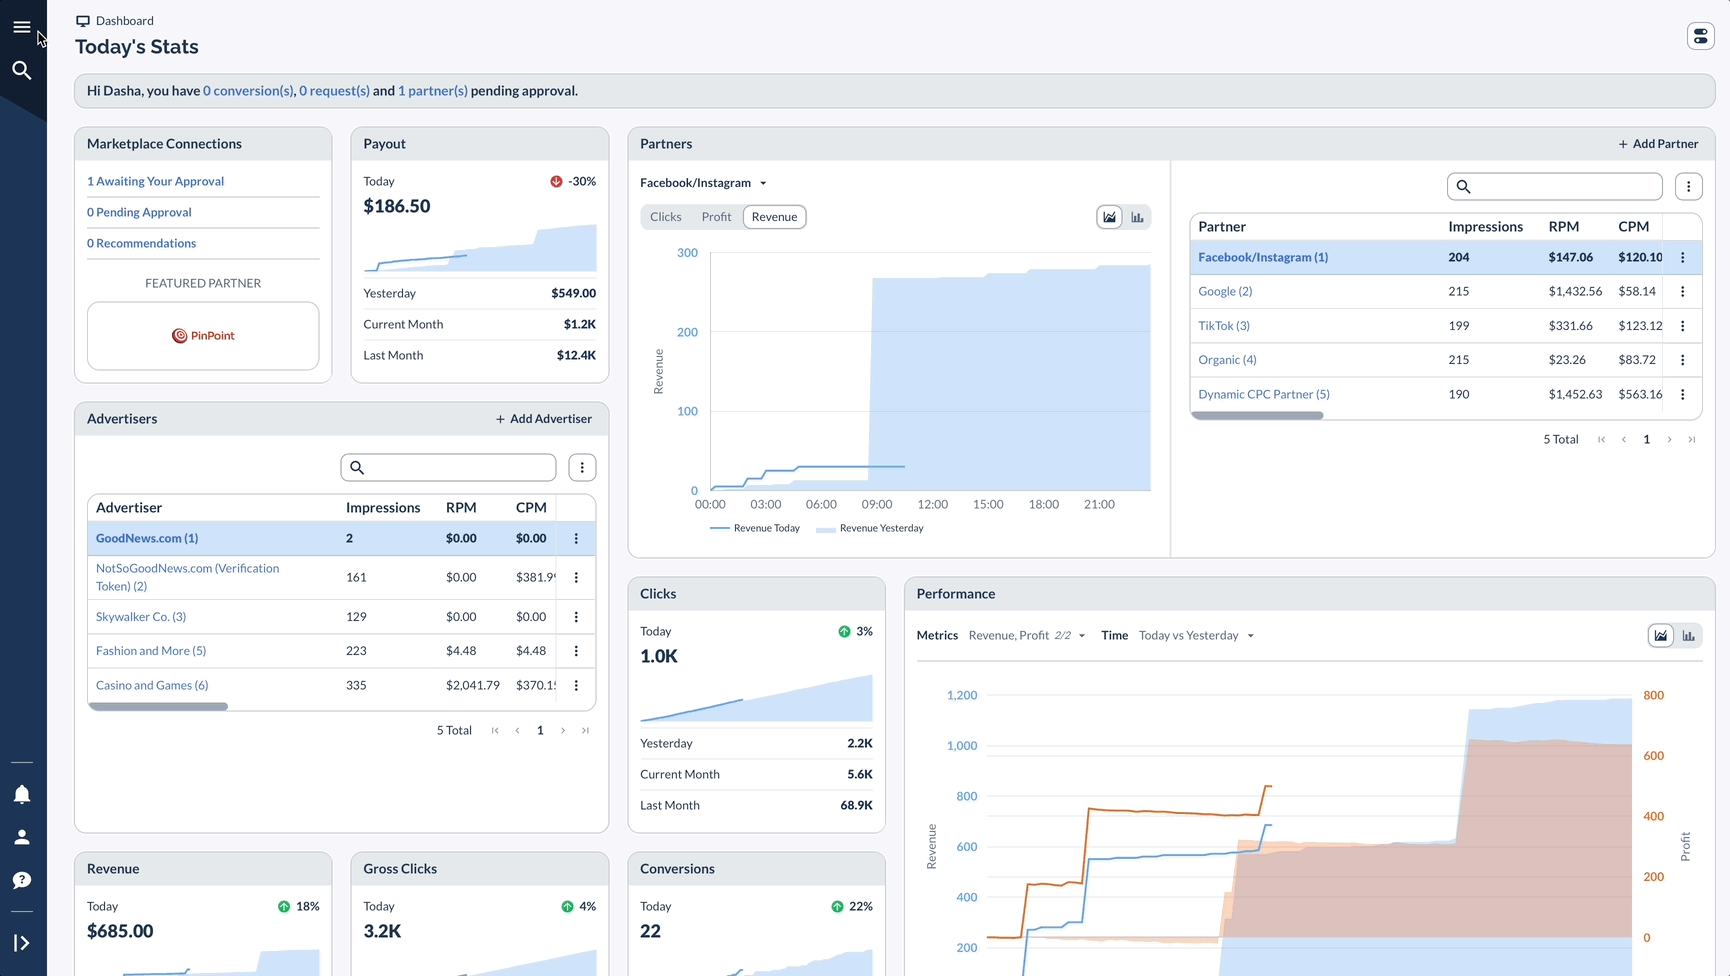
Channels
Channels help you identify and group different types of traffic sources at the Partner level.
Managing Channels
Using Channels
- Assign Partners to specific channels to categorize where your traffic comes from
- Use channels in reports to analyze performance by traffic source
- Common channel examples include:
- Social Media (Facebook, TikTok, Instagram)
- Search (Google, Bing)
- Affiliate

Business Units
Business Units help you categorize the internal structure of your Networks, making it easier to manage teams and reporting.
Managing Business Units
Common Business Unit Examples
- Finance
- Sales
- Marketing
- European Department
- APAC Team
Using Business Units
- Assign team members to specific business units
- Filter reports by business unit to see performance by team
- Use business units to organize workflows and responsibilities
Real-World Example
Imagine your network promotes mobile gaming apps across multiple regions:
- Media Buyer: Uses Channels to compare performance between TikTok and Instagram traffic, discovering that TikTok delivers 30% higher conversion rates for gaming apps
- Content Team: Creates a "Mobile Games Q1" Label to bundle related Offers together, allowing them to analyze overall content performance for that initiative
- Partners: Browse the "Gaming" Category to find all relevant Offers in one place
- Executives: View reports filtered by "European Department" Business Unit to evaluate regional performance
Tips for Effective Segmentation
- Be consistent with your naming conventions across all segmentation options
- Keep it simple - don't over-complicate your organizational structure
- Review periodically - clean up unused labels, categories, channels, and business units
- Train your team on how to use these features effectively
Start with the basics and add more complex segmentation as needed


