
Overview
Need to control who sees and promotes your Offers? You're in the right spot.
Good visibility settings help you protect your high-value Offers, prevent fraud, and make sure the right Partners promote the right Offers.
We'll cover how to set up Offer visibility and review Partner applications - all the stuff you need to build a solid Partner program that scales.
-> Partner: Affiliates, publishers, etc. who promote Offers (these can be your Media Buying channels as well, but you hardly need to approve those applications).
-> Visibility Settings: Controls that determine which Partners can see and access Offer.
-> Questionnaire: A customizable form for screening potential Partners.
adv1–adv10 (and sub1–sub10) instead of adv1–adv5. The global default at Control Center → Platform Configurations → Global → Set Macro Parameter Visibility for Partners and the per-Partner override at Partners → Manage → [partner] → Set Macro Parameter Visibility both apply across the expanded range.Understanding Visibility Settings
Managing Offer Access
From the Partner Profile
From the Offer Settings
Managing Sensitive Data Visibility
By default, sensitive advertiser parameters (adv1-adv10) and Sale Amount are hidden from all Partners because they often carry internal business logic, payout rules, or even PII. Some Partners (like meta-networks or specialized ad platforms) need access to these fields to function — so you can now override global visibility on a per-Partner basis.
Settings apply in this order: Partner-level override beats the Global setting. sub1-sub10 remain always visible and aren't affected by these controls.
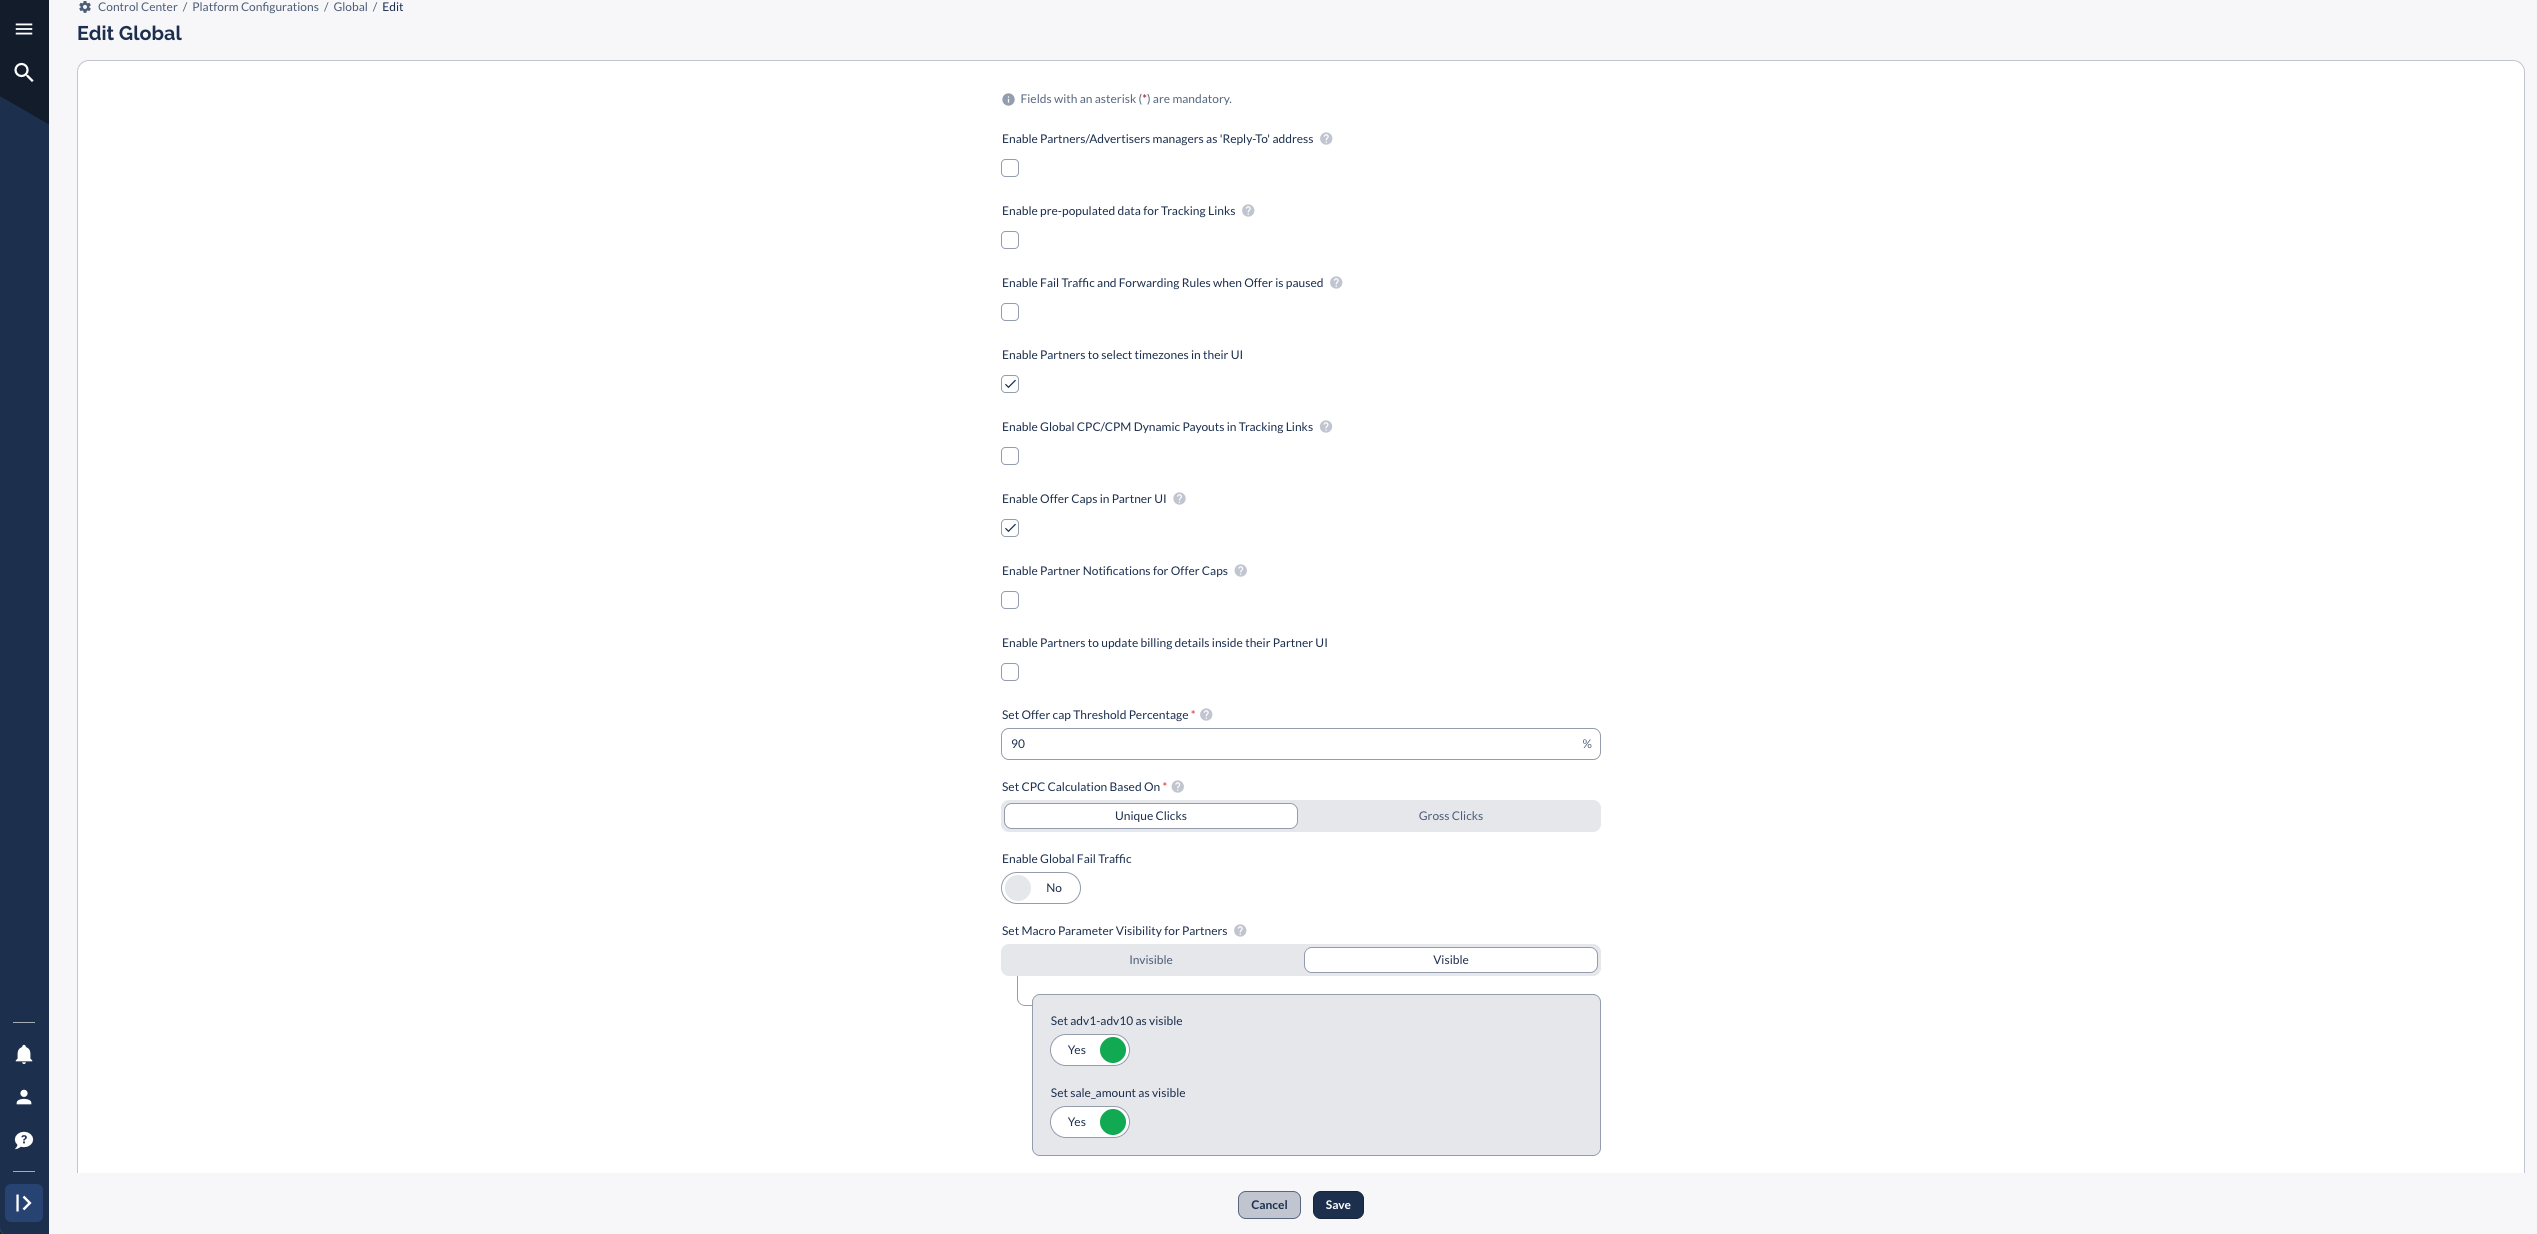
adv1-adv10 and sale_amount from this Partner, even if the global setting has them visible.adv1-adv10 and sale_amount to this Partner.
adv1-adv10 or sale_amount, they'll see those as togglable columns in their Conversion Report (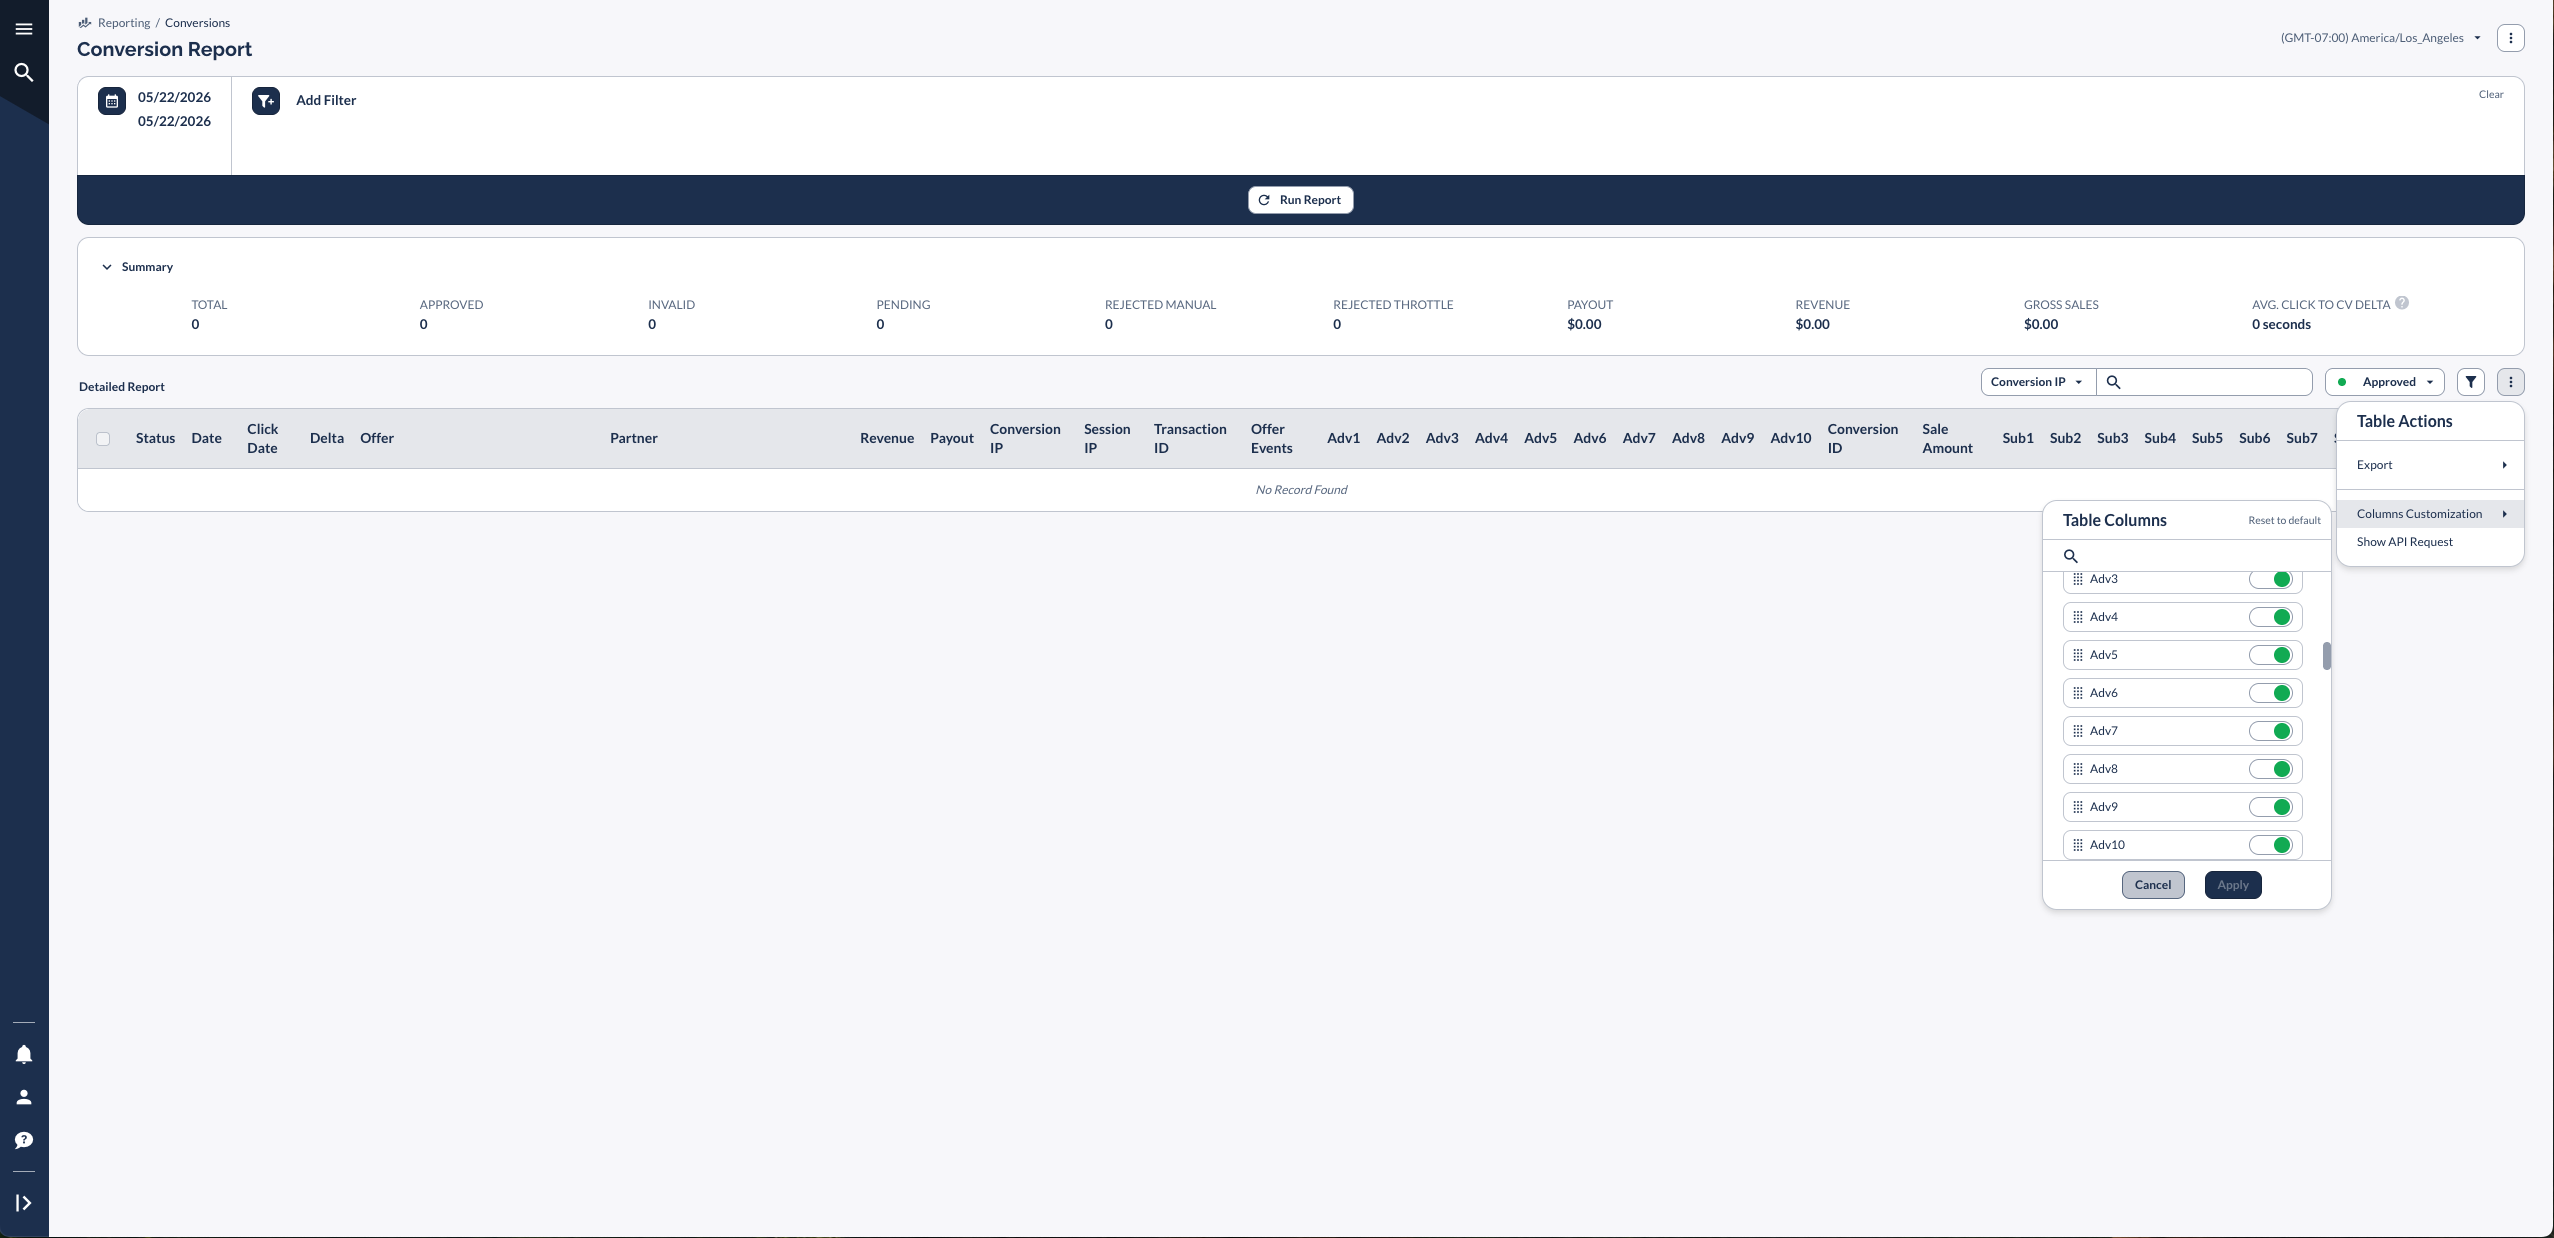
Setting Up Your Application Process
Basic Setup
Creating Application Questionnaires
Setting Up Applications
Setting Up Terms & Conditions
Terms & Conditions can be enabled on the Offer or Partner level.
On The Offer Level
.gif)
On The Partner Level
Best Practices
Before Making Visibility Changes
- Save current Partner approvals
- Write down current settings
- Plan how you'll tell Partners
When Changing Settings
- Understand the impact:
- Public to Private: All access removed
- Public to Require Approval: New applications are needed and you'll need to manually add desired partners to the Offer
- Private to Public: Everyone gains access
Tracking Changes and History
Real-Life Example: Tiered Subscription Box Program
Let's explore how a beauty subscription box company effectively implements tiered visibility settings for their Partner program.
This real-world example demonstrates how to strategically control Offer access based on Partner quality and promotion value.
By structuring their program with increasing exclusivity across tiers, this company maintains broad reach while protecting their premium Offers.
This approach allows them to scale efficiently while ensuring their most valuable promotions are handled only by their best-performing Partners.
What Partners See
Your Partners will see different options based on your settings:
- Public: Immediate access to tracking links
- Require Approval: "Apply" button available
- Private: Only visible after approval
- T&Cs Required: Must accept terms first
Tips
Review your visibility settings regularly to keep them current. Document your approval criteria clearly so your team can make consistent decisions. Use email templates for responses to save time and maintain consistency.
Create application FAQs to answer common questions before they're asked. Monitor Partner performance after approval to ensure they're meeting expectations.
Finally, adjust your requirements based on results to continually improve your program's effectiveness.


