


.svg)

Overview
The Mailgun integration lets you send emails from your branded Mailgun domain, have replies sent to your preferred email address, and maintain a consistent brand experience in all your communications with Partners, team members, and Advertisers.
Without this integration (or other similar ones like SendGrid and Mandrill / Mailchimp), all your Everflow / Communication Hub emails will be sent from the default no-reply@via-everflow.io address.
Why You Need This Integration
You need the Mailgun integration if you want your partner emails and Communication Hub messages to be sent from your own custom email address instead of the generic Everflow one. This makes your communications more professional and branded.
Setting Up Your Mailgun Integration
1
Access the Email Integration Settings
Log into your Everflow account
Go to
-> Integrations
Select
Email
from the tabs2
Connect Mailgun
Find Mailgun
Click the
Connect Integration
buttonToggle the
Enable
switch to ON3
Get Your Mailgun Information
You'll need five pieces of information from your Mailgun account:
To find your API Key:
To find your Domain:
To find your API Key:
Log into your Mailgun account
Go to
Dashboard -> API Keys
(this section is located at the bottom right of your Dashboard)Copy your existing API key or create a new one
API keys are only fully displayed once when created. So be sure to save your API key once it’s generated.
To find your Domain:
Go to the
Dashboard
in MailgunLook for
Sending Domains
section (at the bottom left)Select and copy the domain you want to use
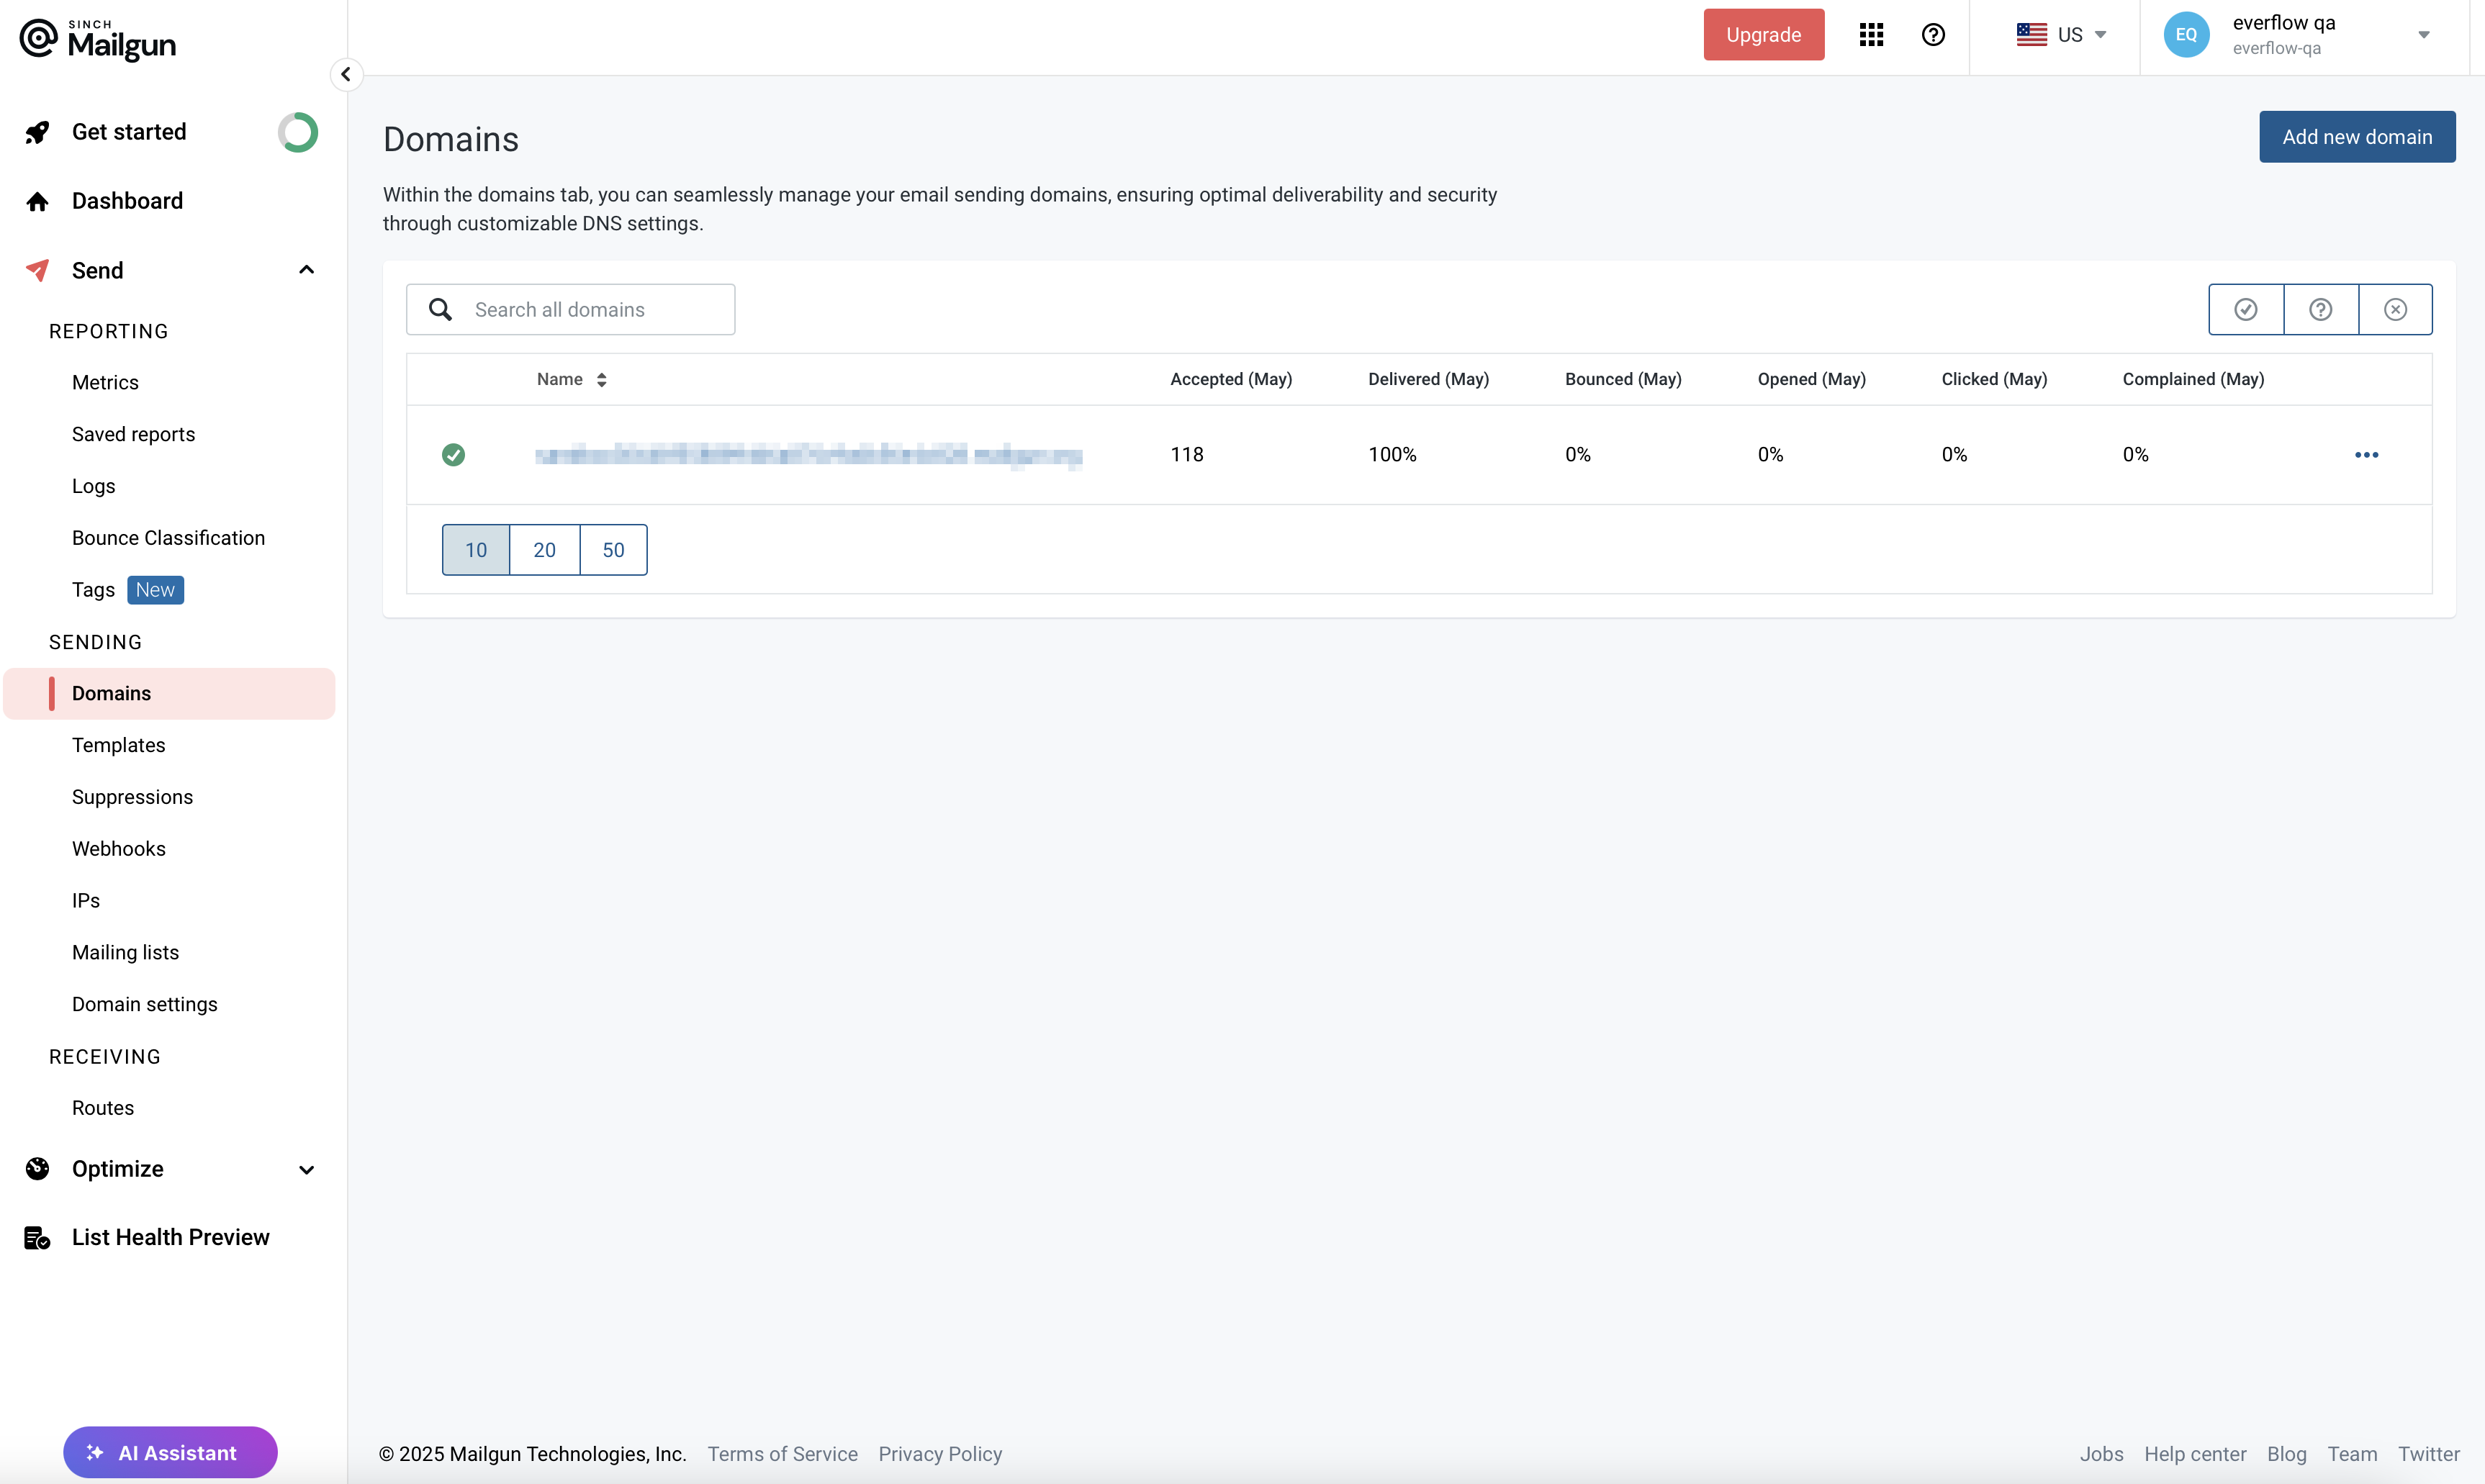
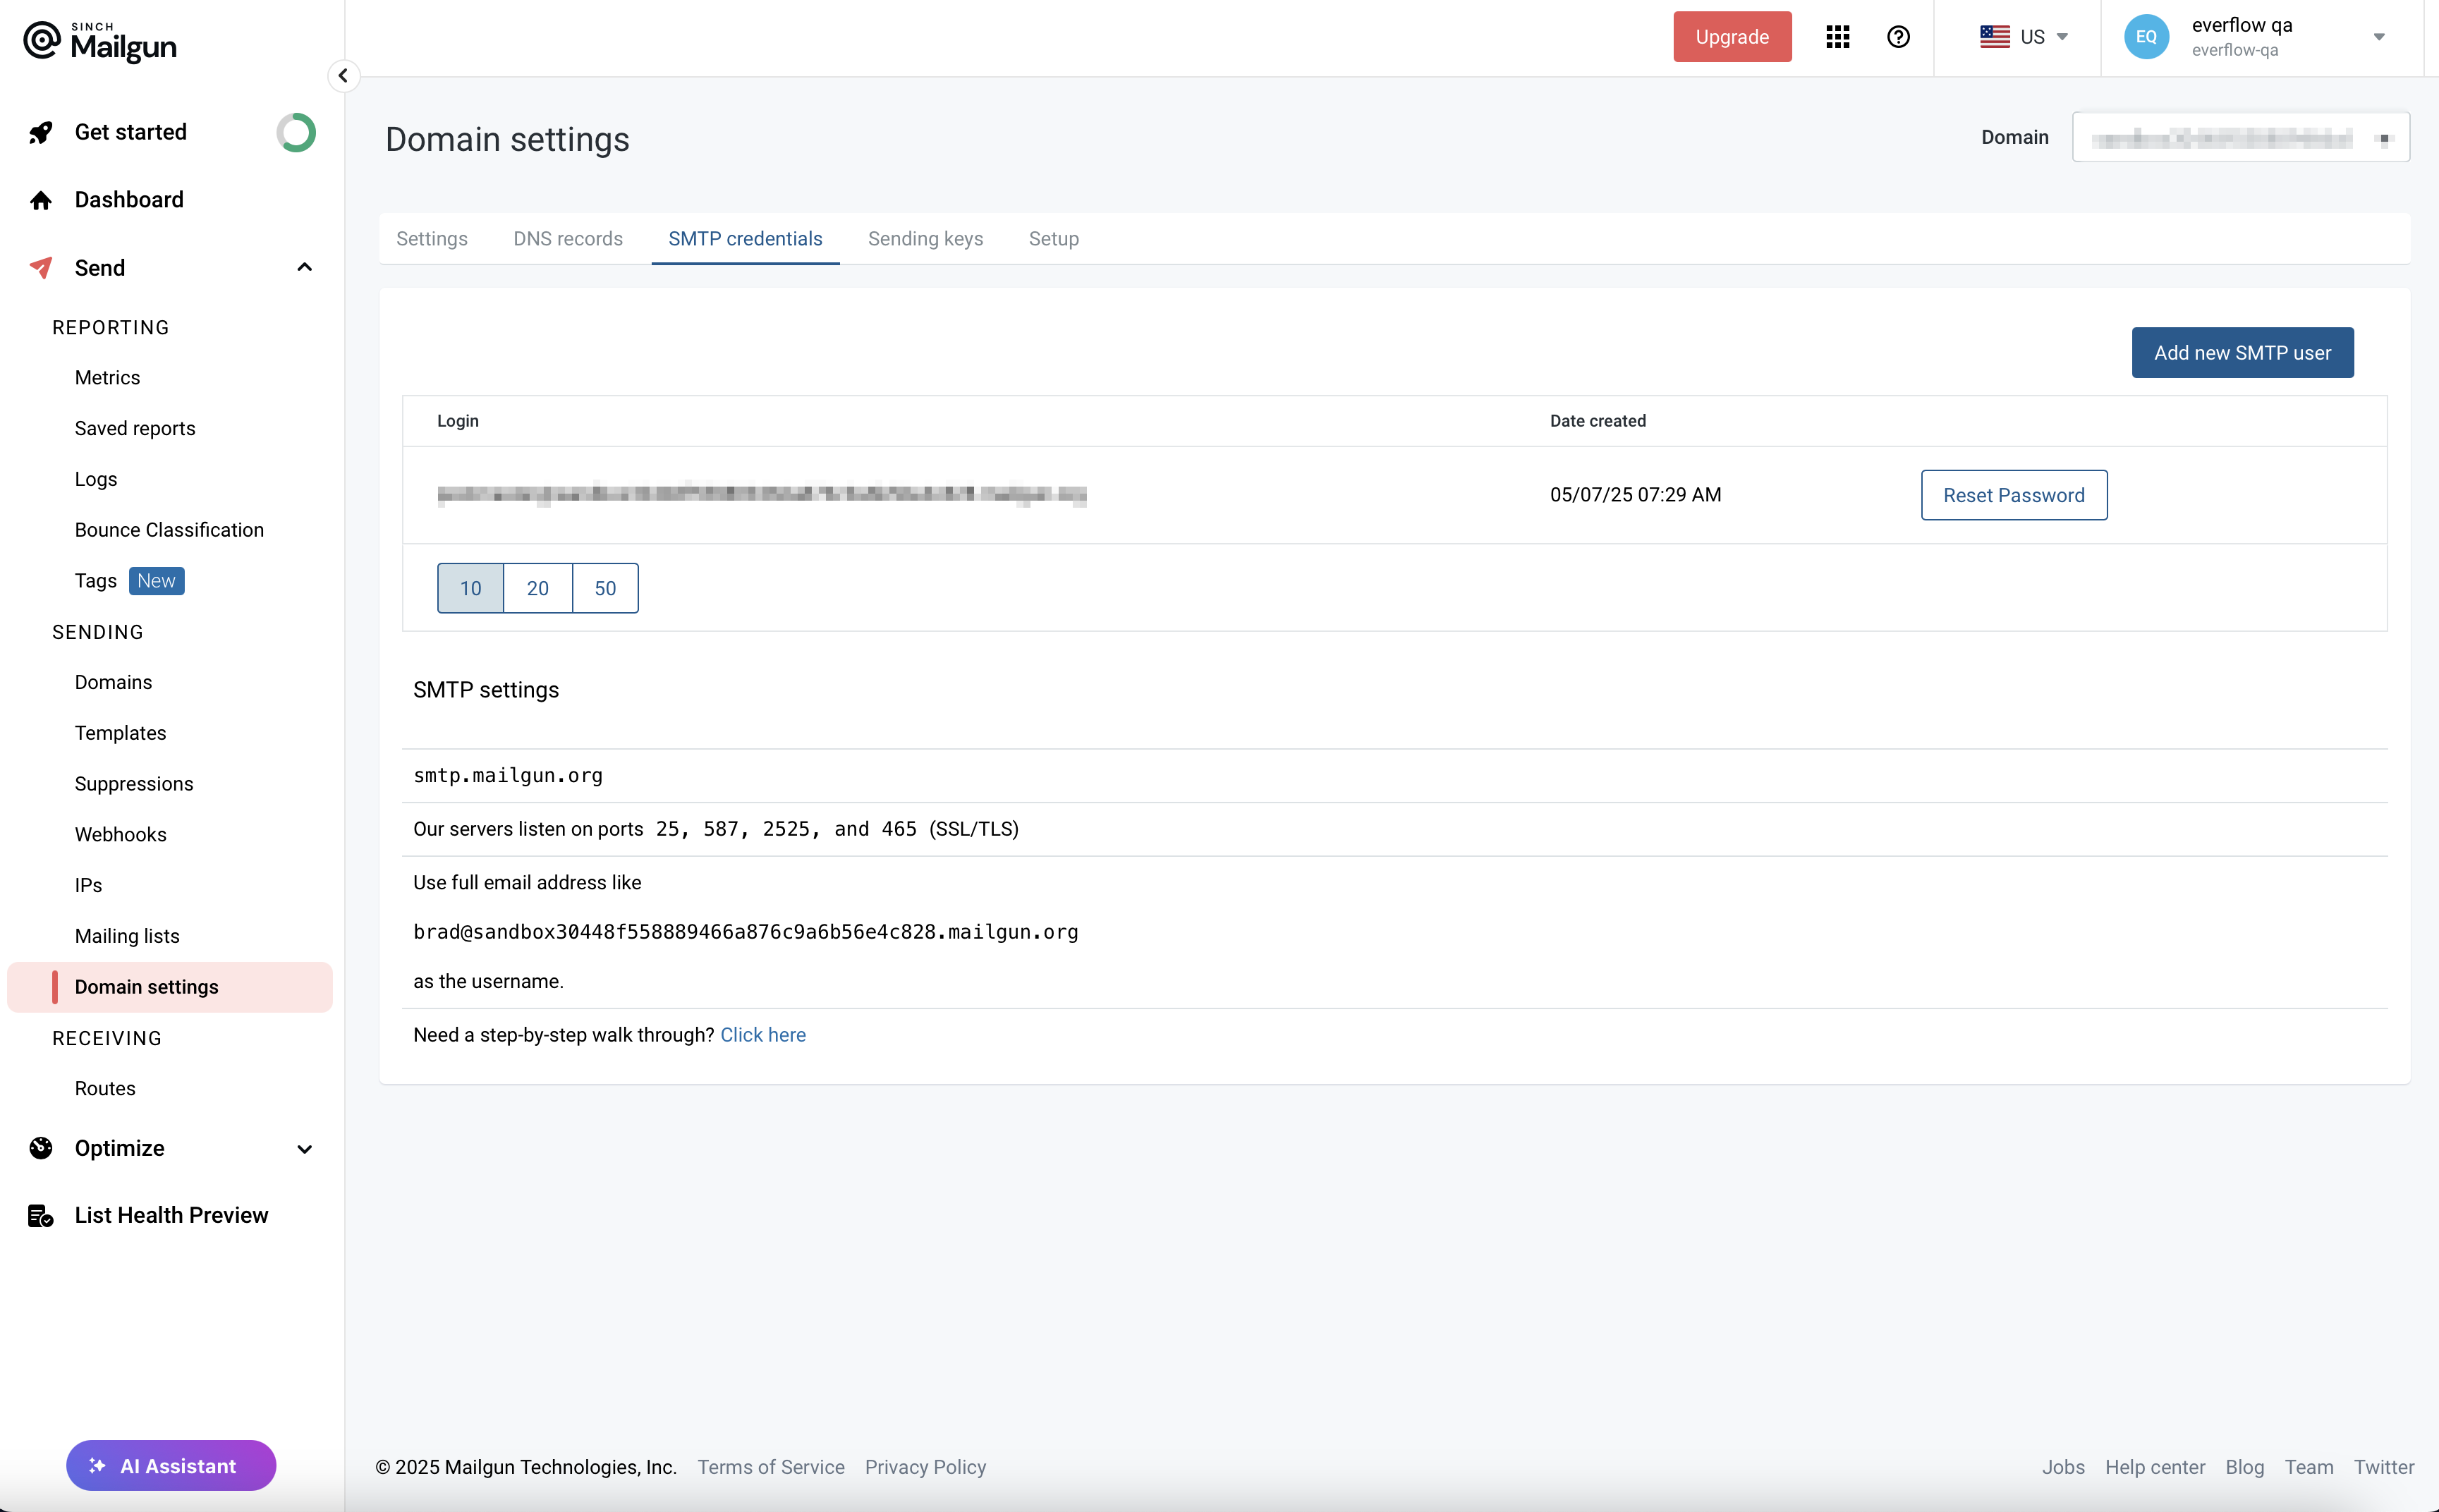
To find your From Address:
Navigate to
SEND -> SENDING -> Domain settings
in MailgunLook for the
SMTP Credentials
sectionFind the email address you want to use as your sender
4
Configure in Everflow
Now it’s time to use all the information you have copied from Mailgun.
Enter your
API Key
in the field providedEnter your
Domain
in the domain fieldEnter your
From Name
(e.g. your company name or your name)Enter your
From Address
(the email that will appear as the sender)Optionally, add a
Reply To Address
if you want replies sent somewhere different (If left empty, replies will go to the From Address)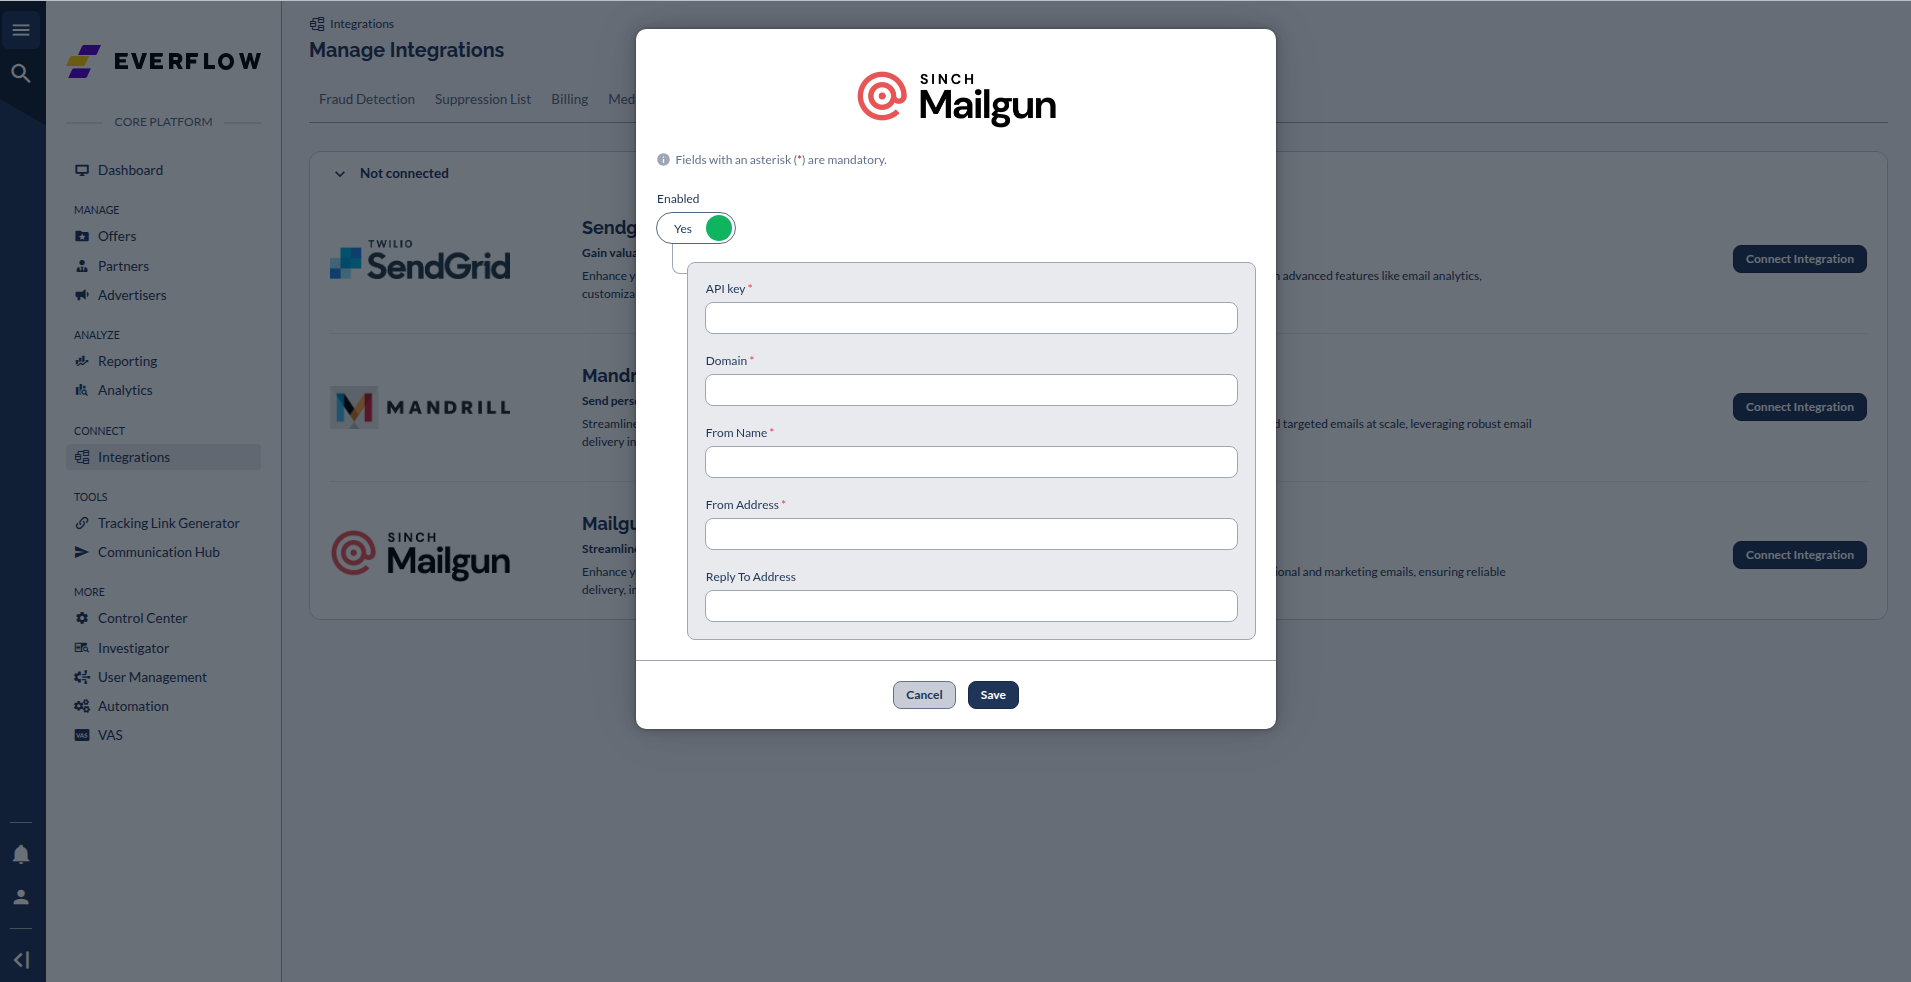
5
Save Your Settings
Click the
Save
button to apply your changes
You can only have one email integration active at a time
If you disable the Mailgun integration, your system will automatically return to using the default Everflow email
If you disable and then want to re-enable Mailgun, you'll need to enter all your settings again
To switch between different email integrations (like SendGrid or Mandrill), you must first disable your current integration
Testing Your Integration
After setting up Mailgun:
- Send a test email through Communication Hub or create a test Partner to send them an account creation link
- Check the received email - it should now show your custom From Address
- Try replying to confirm your reply routing is working correctly


