Home
Communication Hub & Alerts
Communication Hub
How To Create Partner Platform Banners In Communication Hub

SERIES:

Getting Started With Communication Hub

How To Create Partner Platform Banners In Communication Hub

Learn how to use Communication Hub Partner Banners to deliver critical messages, promotions, and personalized offer details directly to your partners' dashboards, ensuring your communications are never missed.

The Challenge: Are Your Best Offers Getting Seen?

Imagine this: you have a high-performing offer ready for your top partners. Your goal is to get it in front of them immediately to drive revenue. The obstacle? You're relying on an email that might get buried in a crowded inbox. It’s a strategy based on hope. You send the message and hope the right people see it in time.

What if you could move from hope to certainty?

The Solution: Direct Dashboard Messaging

Instead of hoping your message is seen, Communication Hub Partner Platform Banners let you place it where it can’t be missed: directly on your partners' dashboards.

They transform your communication from a passive request into an active, unmissable announcement in your partner's workspace. This is how you ensure your best campaigns get the attention they deserve.

How to Create a Targeted Partner Banner

This guide walks through creating an 'Offer Showcase' banner, but the process is similar for all types.

1
Create the Banner Message
First, you'll build the visual part of the banner.
Navigate to
Communication Hub
in the left-hand menu.
Under
Create Partner Banner
, click the
Quick Start
button.
Select
Use Design Guides
from the dropdown menu.
Choose
Offer Carousel Guide
. This template is the fastest way to promote offers, as it automatically creates a clean layout with offer details and tracking links.
Enter a
Banner Name
for your own reference (e.g., "Q4 Insurance Offer").
Click the
Select the Offer(s) you want to share
button.
In the window that appears, check the boxes next to the offers you want to feature and click
Save Selection
.
The offers will now appear in the editor as pre-formatted cards. Add any additional text you need.
Click
Next
to proceed.
2
Define Your Audience
This is where you move from blasting everyone to targeting precisely. Instead of a generic message, you'll show this banner only to the specific partners you want to reach.
On the
Audience
screen, click
Add Audience Group
.
Click
Audience Rule
to open the rule builder.
Set the
Condition
for your rule. For example, to target only your active partners who work in the
Insurance
vertical, you would set two rules:
Rule 1:
Status
>
is
>
Active
Rule 2:
Labels
>
is
>
Insurance
Click
Add Rule
after setting up each one. The list of
Potential Recipients
on the right will update to show exactly who will see this banner.
Once your audience is defined, click
Next
.

Audience Conditions Explained

Condition
Explanation
Labels
Target partners based on custom labels you've created (e.g., 'Insurance', 'TikTok').
Status
Target partners by their account status (e.g., Active, Inactive).
Account Execs
Target partners assigned to specific internal team members.
Channel
Target partners by their promotional channel (e.g., Content, Social).
Last Login
Target partners based on their last login date.
Date Added
Target partners based on when they joined your platform.
Total Conversions
Target partners by their total number of conversions.
Total Clicks
Target partners by their total number of clicks.
Total Revenue
Target partners by the total revenue they have generated.
Total Payout
Target partners by the total payout they have received.
__wf_reserved_inherit
3
Review and Schedule
Finally, you'll preview the banner and set its publication schedule.
On the
Review
screen, you will see a preview of your banner.
Use the
View as the recipient
dropdown to select a specific partner and confirm the banner appears correctly for them.
Click the
Save, Publish or Schedule
button.
In the pop-up window, select the
Schedule
tab.
Set a
Start Date
and an
Expire Date
for the banner. You really have full control on the scheduling and can also specify a specific timezone.
You can also set the banner as High Priority, which means it will appear at the front of the carousel for a partner when they log in.
Click
Confirm
. Your banner is now scheduled.

Customizing Your Offer Carousel

Your partners don't need to see every detail about an offer. A clean, targeted view is the best way to drive action.

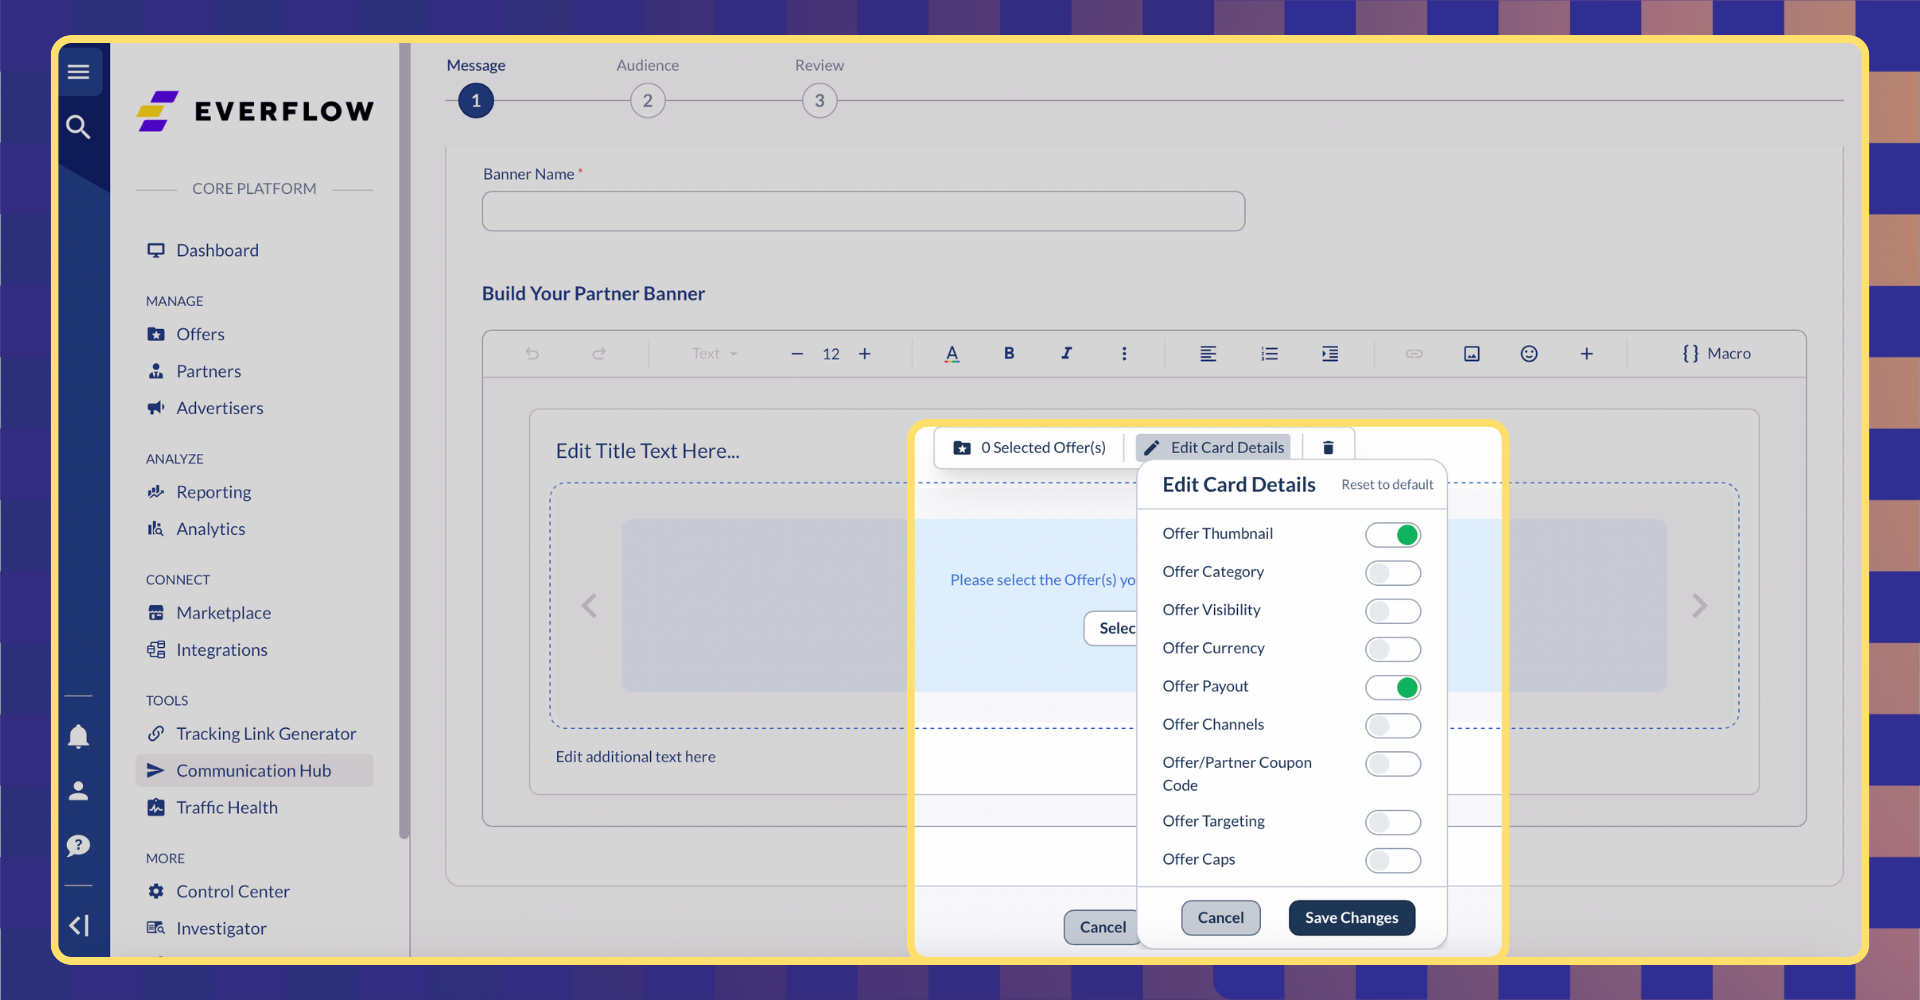
That's why Everflow gives you complete control over what your partners see in the offer carousel. When you're editing your banner, you're not just selecting offers. You're curating the data that goes with them.

You have the power to select which offer details are visible to partners, including:

  • Thumbnail: A small image to represent the offer.
  • Category: The vertical or niche of the offer (e.g., Finance, Gaming).
  • Visibility: Whether the offer is public, private, or visible to a specific group.
  • Currency: The currency in which the payout is made.
  • Payout: The exact amount or percentage a partner will earn per conversion.
  • Channels: The allowed promotion methods for the offer.
  • Coupon Codes: Any special codes associated with the offer.
  • Targeting: Any geo-targeting or platform targeting rules.
  • Caps: Any daily or monthly conversion limits. The Caps option will only say 'enabled' on the partner's side, and they can click to view the full offer area.
__wf_reserved_inherit

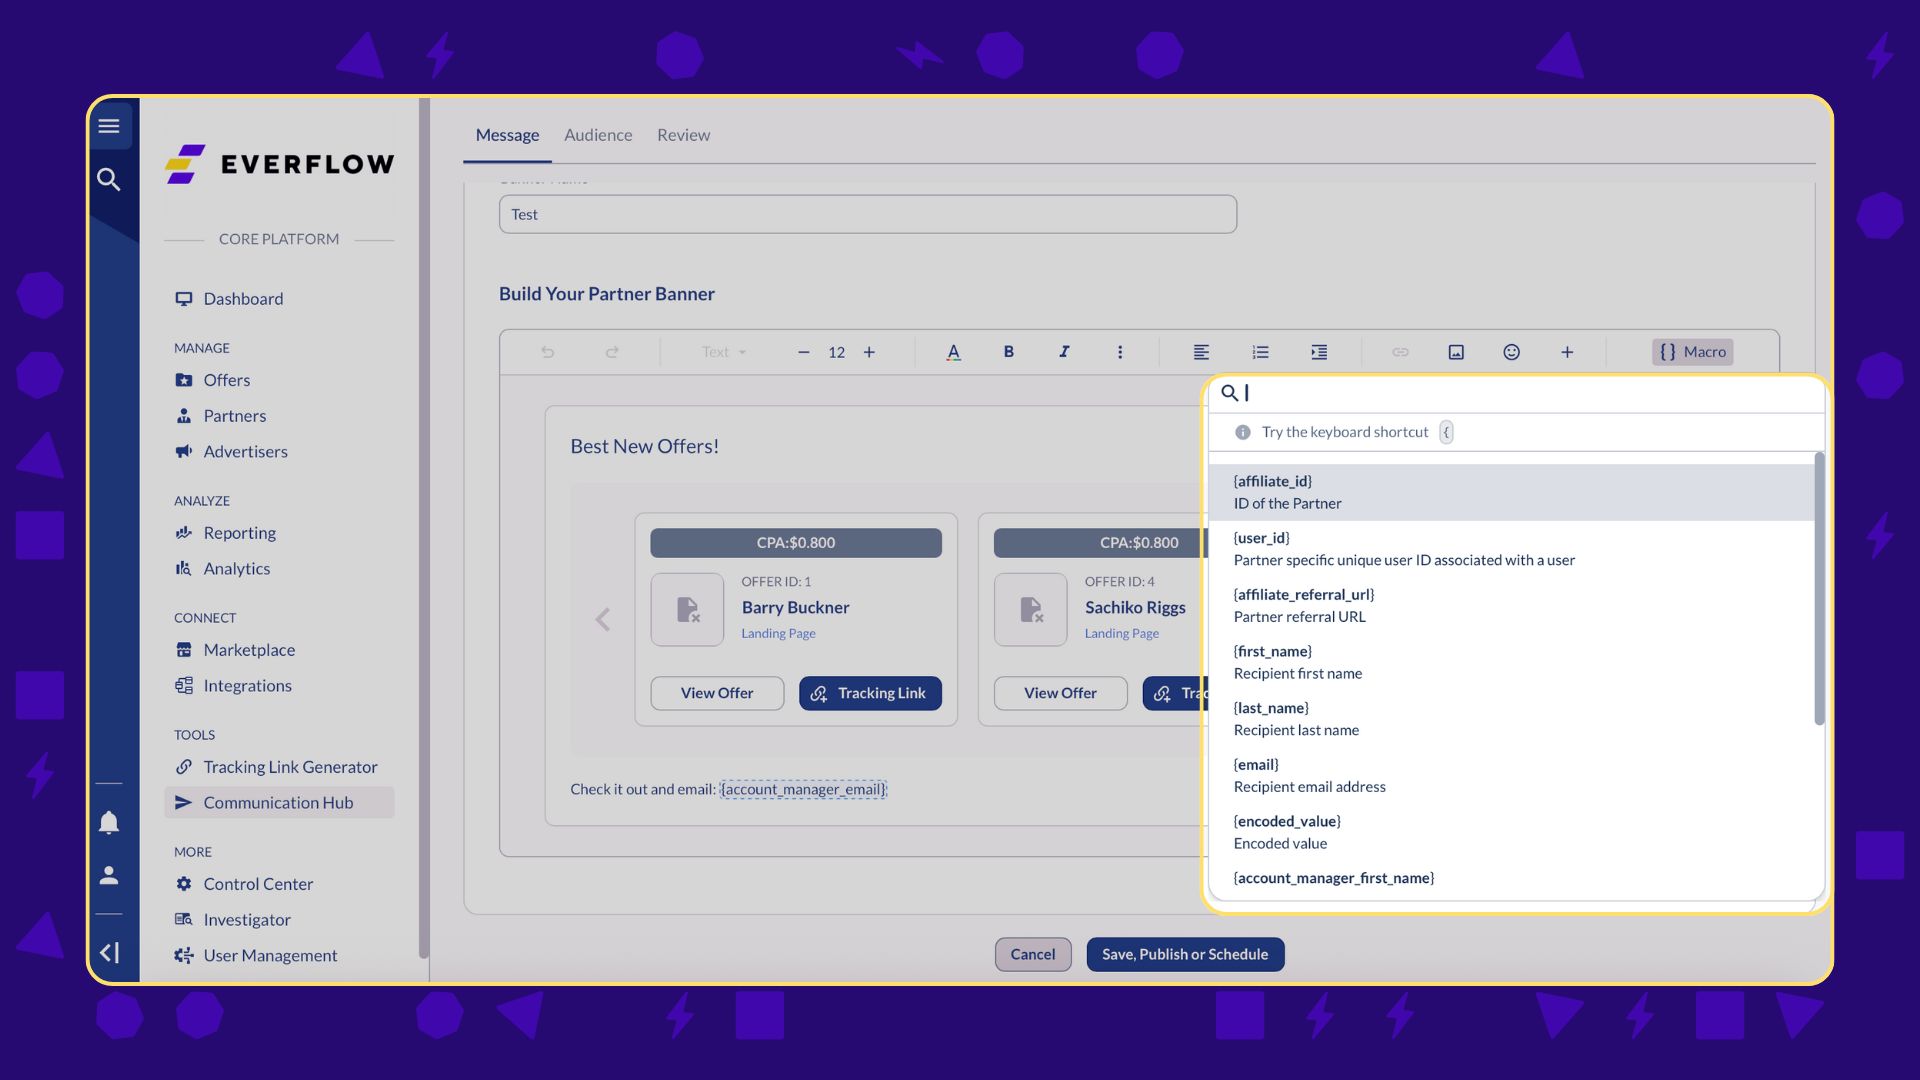
Macros are the secret sauce here. When you add an offer to the banner, the system automatically inserts a macro (a small piece of code) that acts as a placeholder. For example, a macro like {partner_tracking_link} automatically gets replaced with the correct, unique tracking link for each individual partner.

This means you only need to build the banner once, and the system handles the rest, ensuring every partner gets their own specific link without any extra work on your end.

Note
When it comes to offers in your carousel, the system has built-in smarts to handle partner access. This ensures that your partners only ever see what they are supposed to. Here’s how it works:
If an offer is set to
Require Approval
, partners will see an
Apply
button on the offer card instead of a tracking link.
If a private offer is in the carousel and a partner has not been added to it, they simply will not see that offer. It is automatically hidden from their view.

The Bottom Line

The challenge isn't just having great offers; it's making sure the right partners know about them. By using Partner Banners, you shift from hoping your emails get read to knowing your message is seen. You can stop guessing and start targeting, turning uncertainty into predictable results.