Home
Partner Platform
Everflow Essentials For Partners
Setting Up Your Everflow Pay Account

Setting Up Your Everflow Pay Account

A guide for direct Partners/Affiliates on how to set up their Everflow Pay (EFPay) payee account from within the Partner Platform 'Billing' section.

Overview

You’re probably here because the brand or company you're working with has chosen to use Everflow Pay, our in-house payment solution, to process your payouts.

To get set up, you will need to complete your payee configuration from the Billing page within your Partner Platform account. Once completed, you'll be all set to receive payments through Everflow Pay.

How to Set Up Your Account

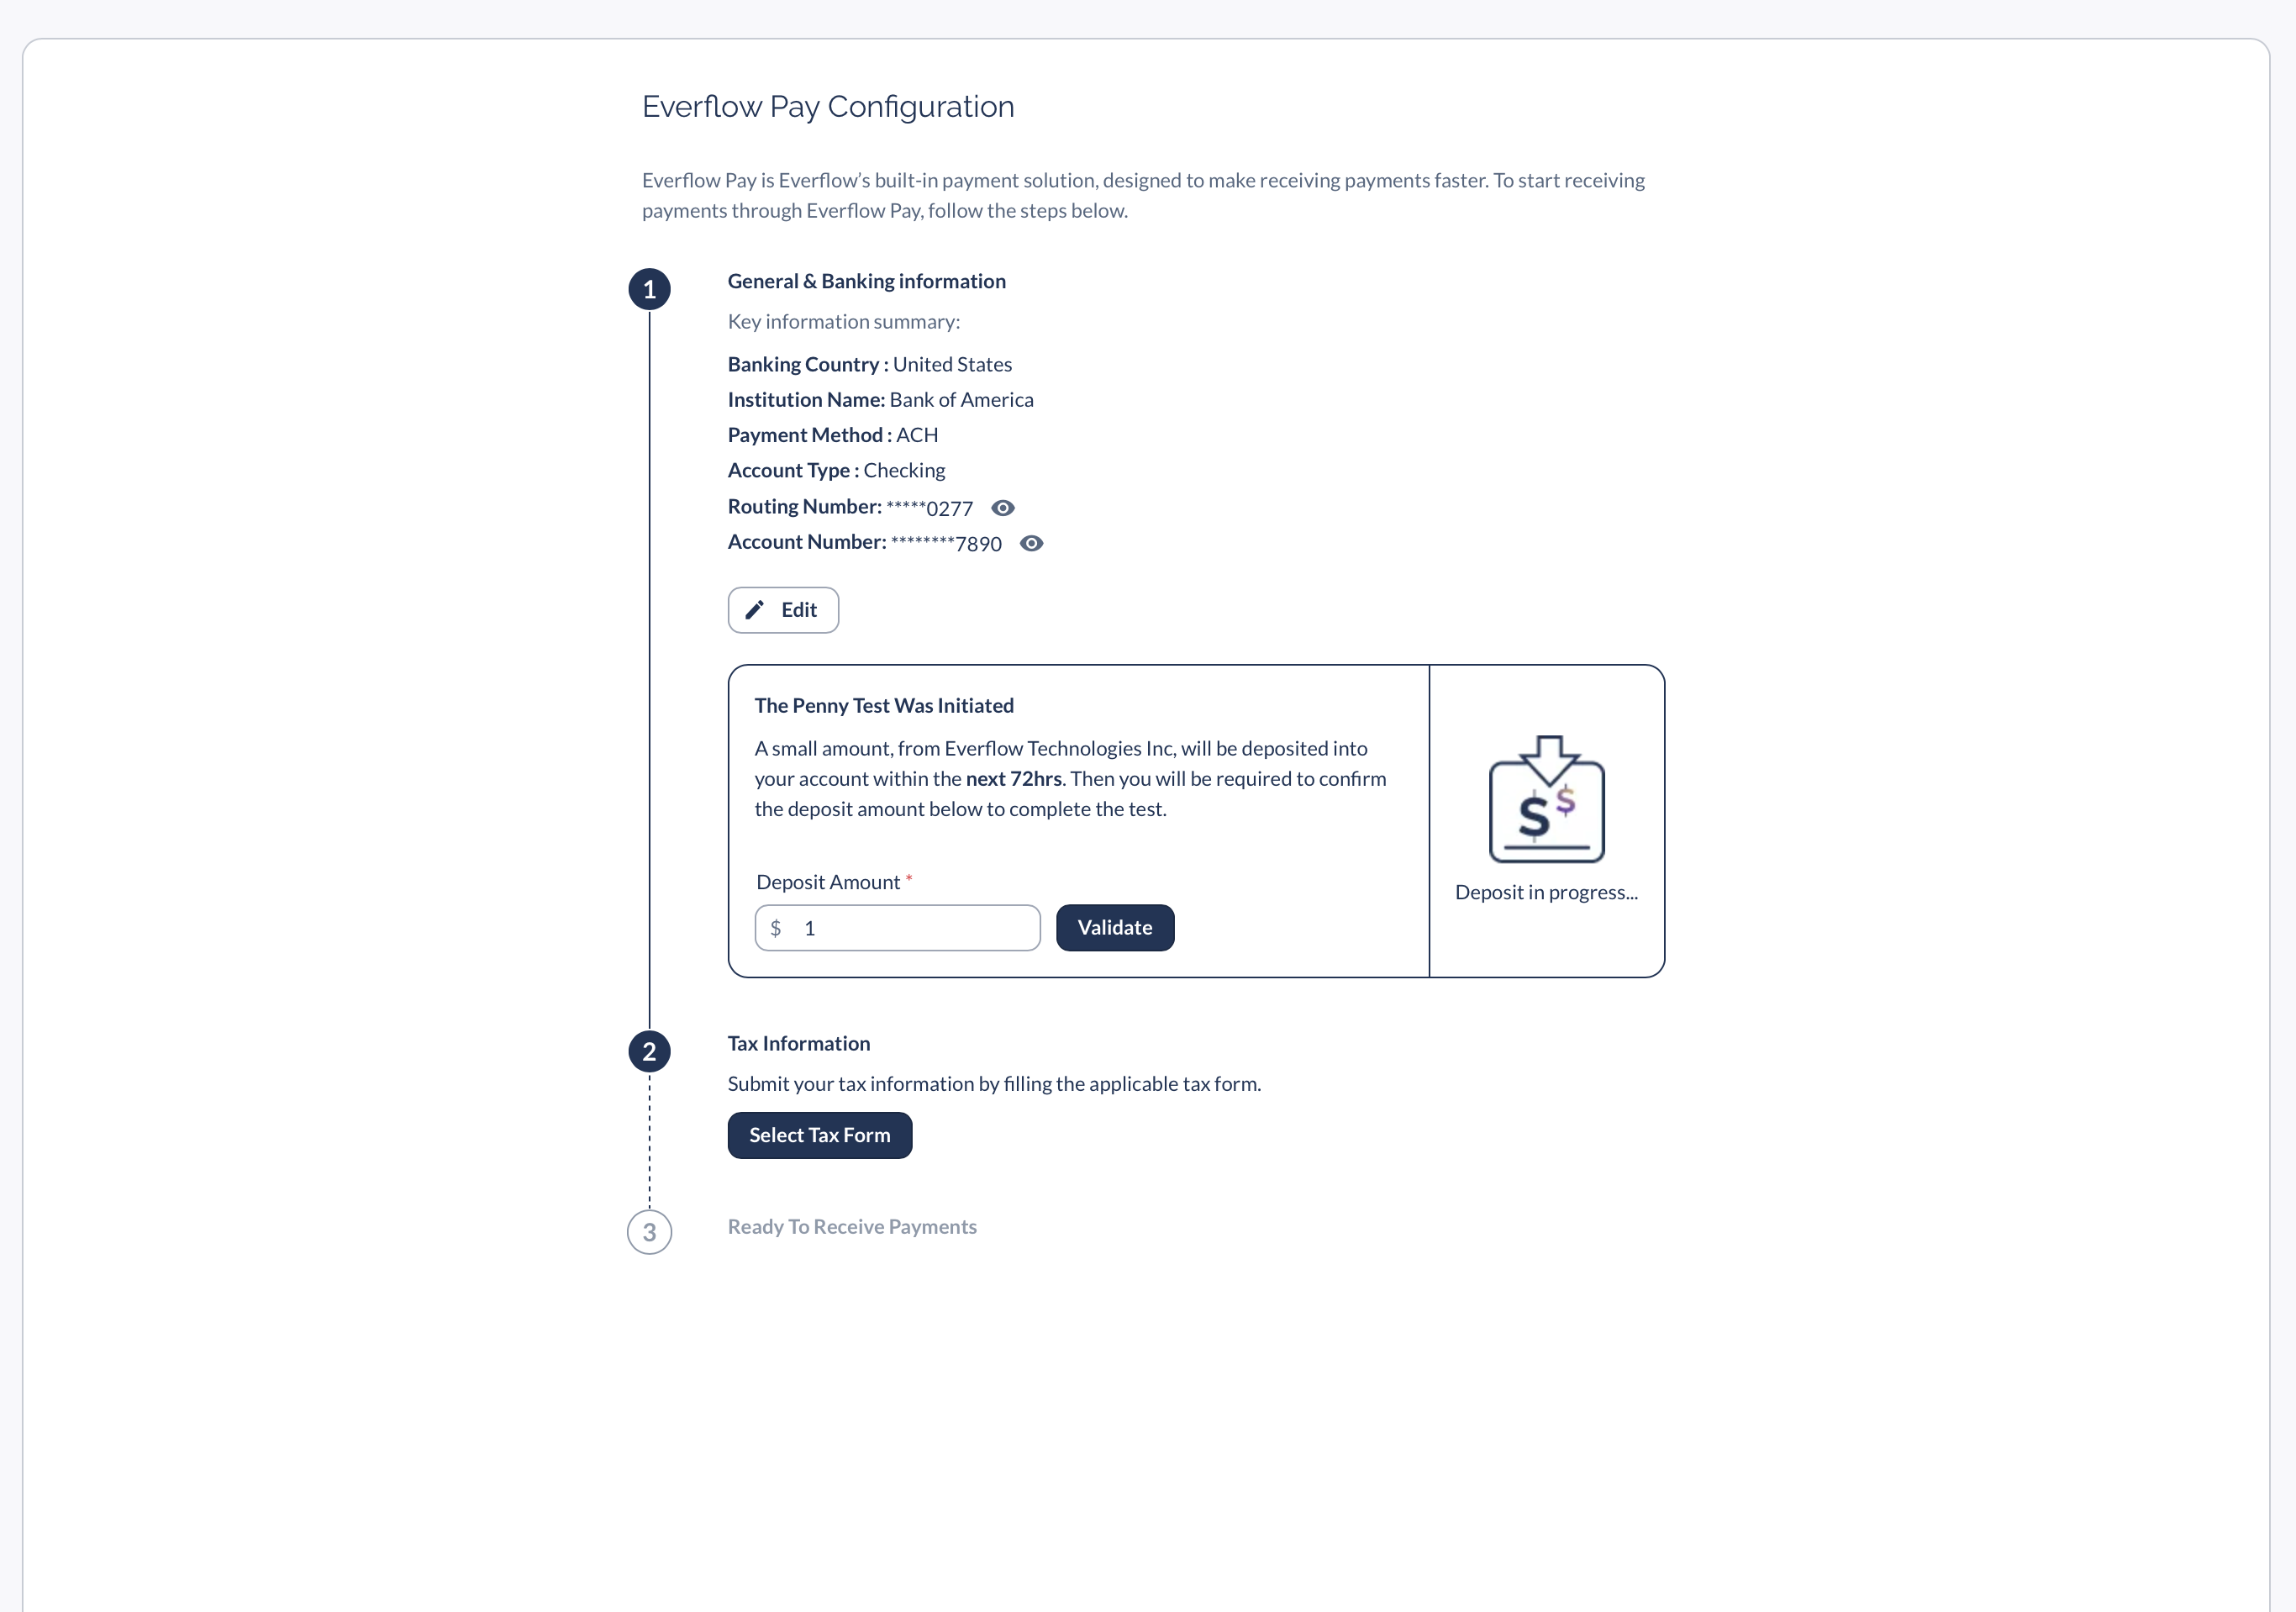
The setup is a simple, three-step process to enter your details, provide tax information, and verify your account.

⏱️ Setup Time: 5-10 Minutes
You'll need your banking information and tax details ready to go.
⚠️ If You See a Warning Banner
You may see a warning on your dashboard: "Your payment method configuration is incomplete. Please enter your tax information in the Company Settings → Billing Section." This means you need to complete the setup below.
Dashboard warning banner
Warning banner appears when setup is incomplete
1

Navigate to Billing & Start Setup

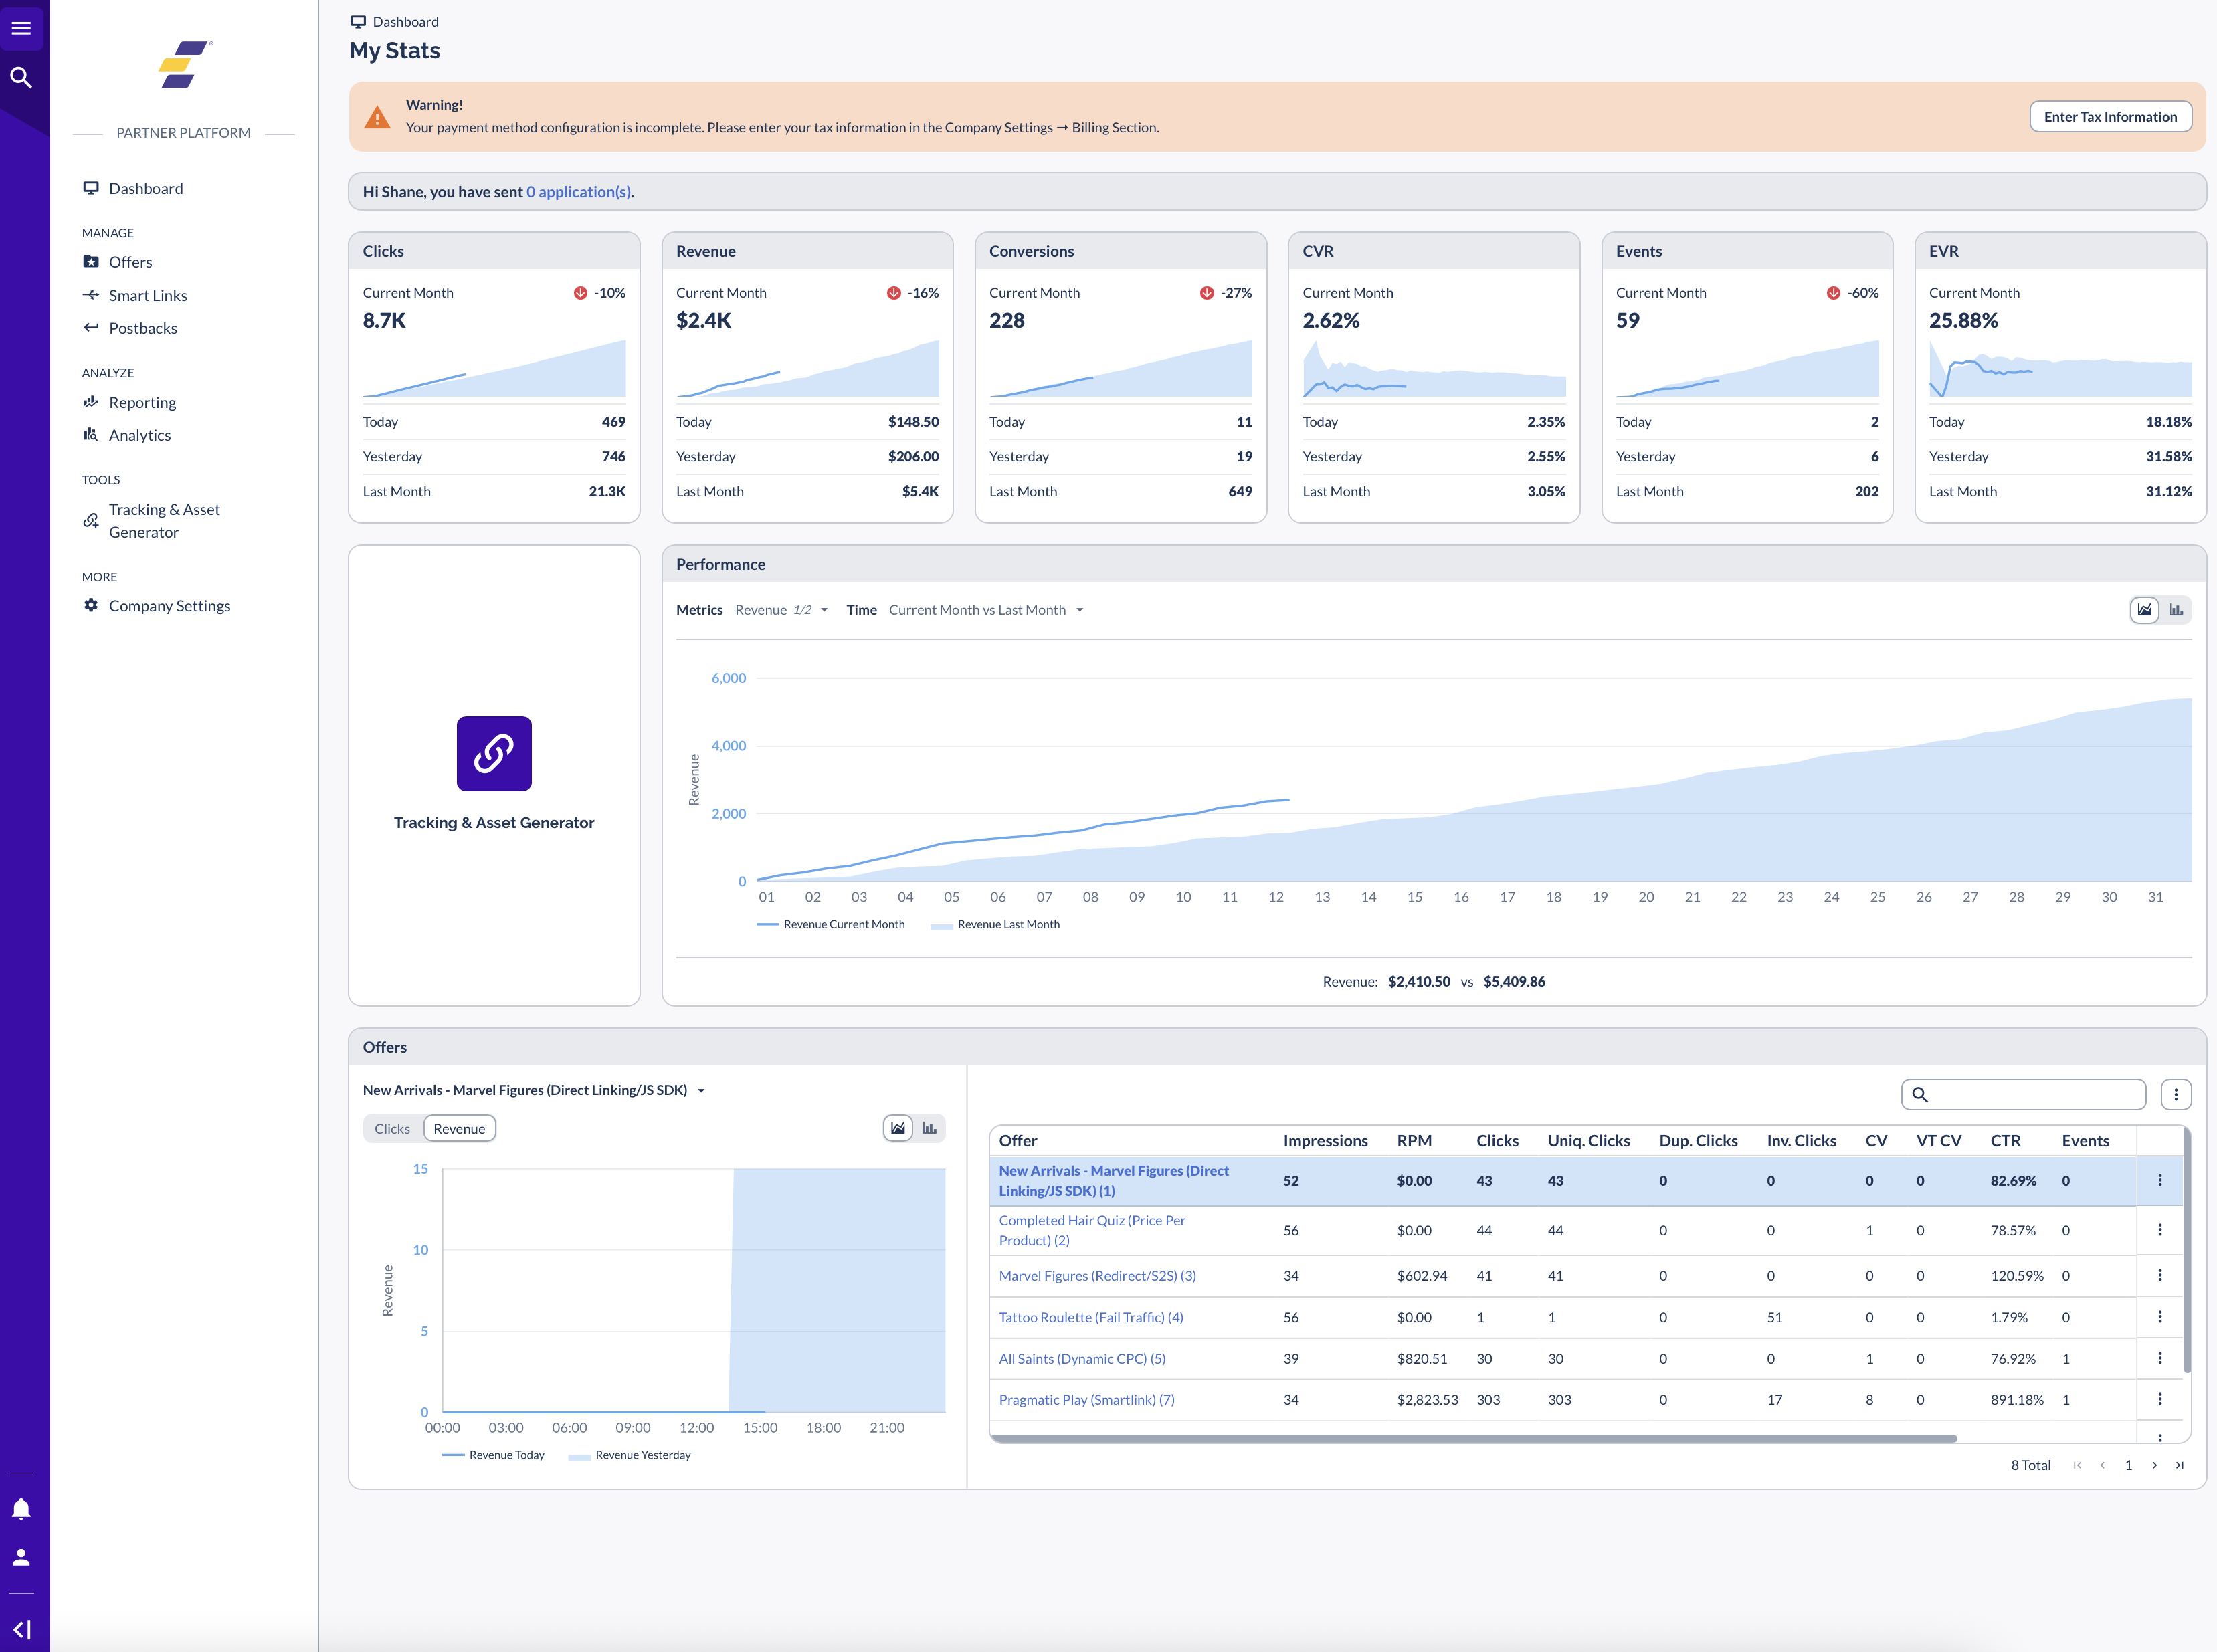
From your Partner Platform, navigate to Company Settings → Billing. You'll see the Everflow Pay Setup section with a "Start" button.

Partner Billing Page with Start button
Click "Start" under Everflow Pay Setup to begin

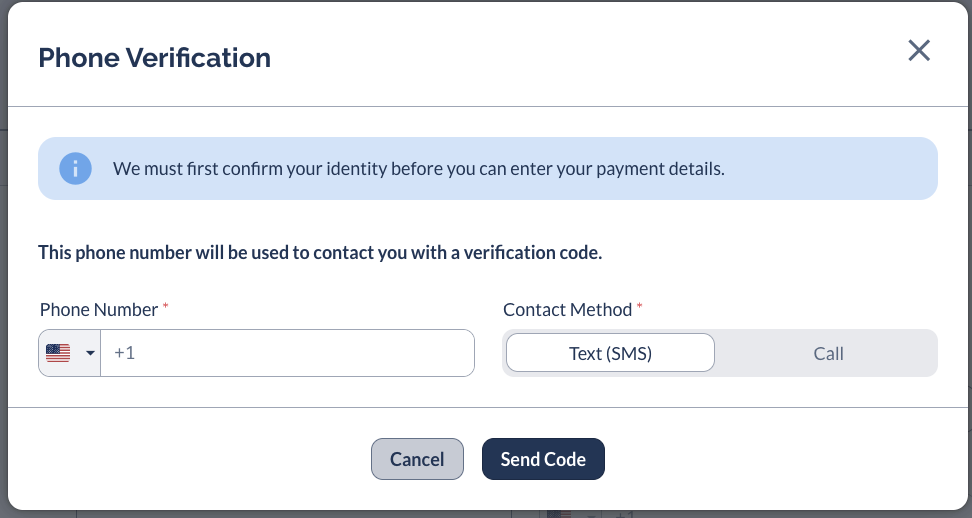
After clicking Start, you'll see a phone verification modal to confirm your identity before entering payment details.

Phone verification modal
Verify your identity via text (SMS) or call
💡 Quick Tip
Text (SMS) is usually faster than receiving a call. Make sure you have access to your phone before starting.
2

Complete Your Payee & Banking Details

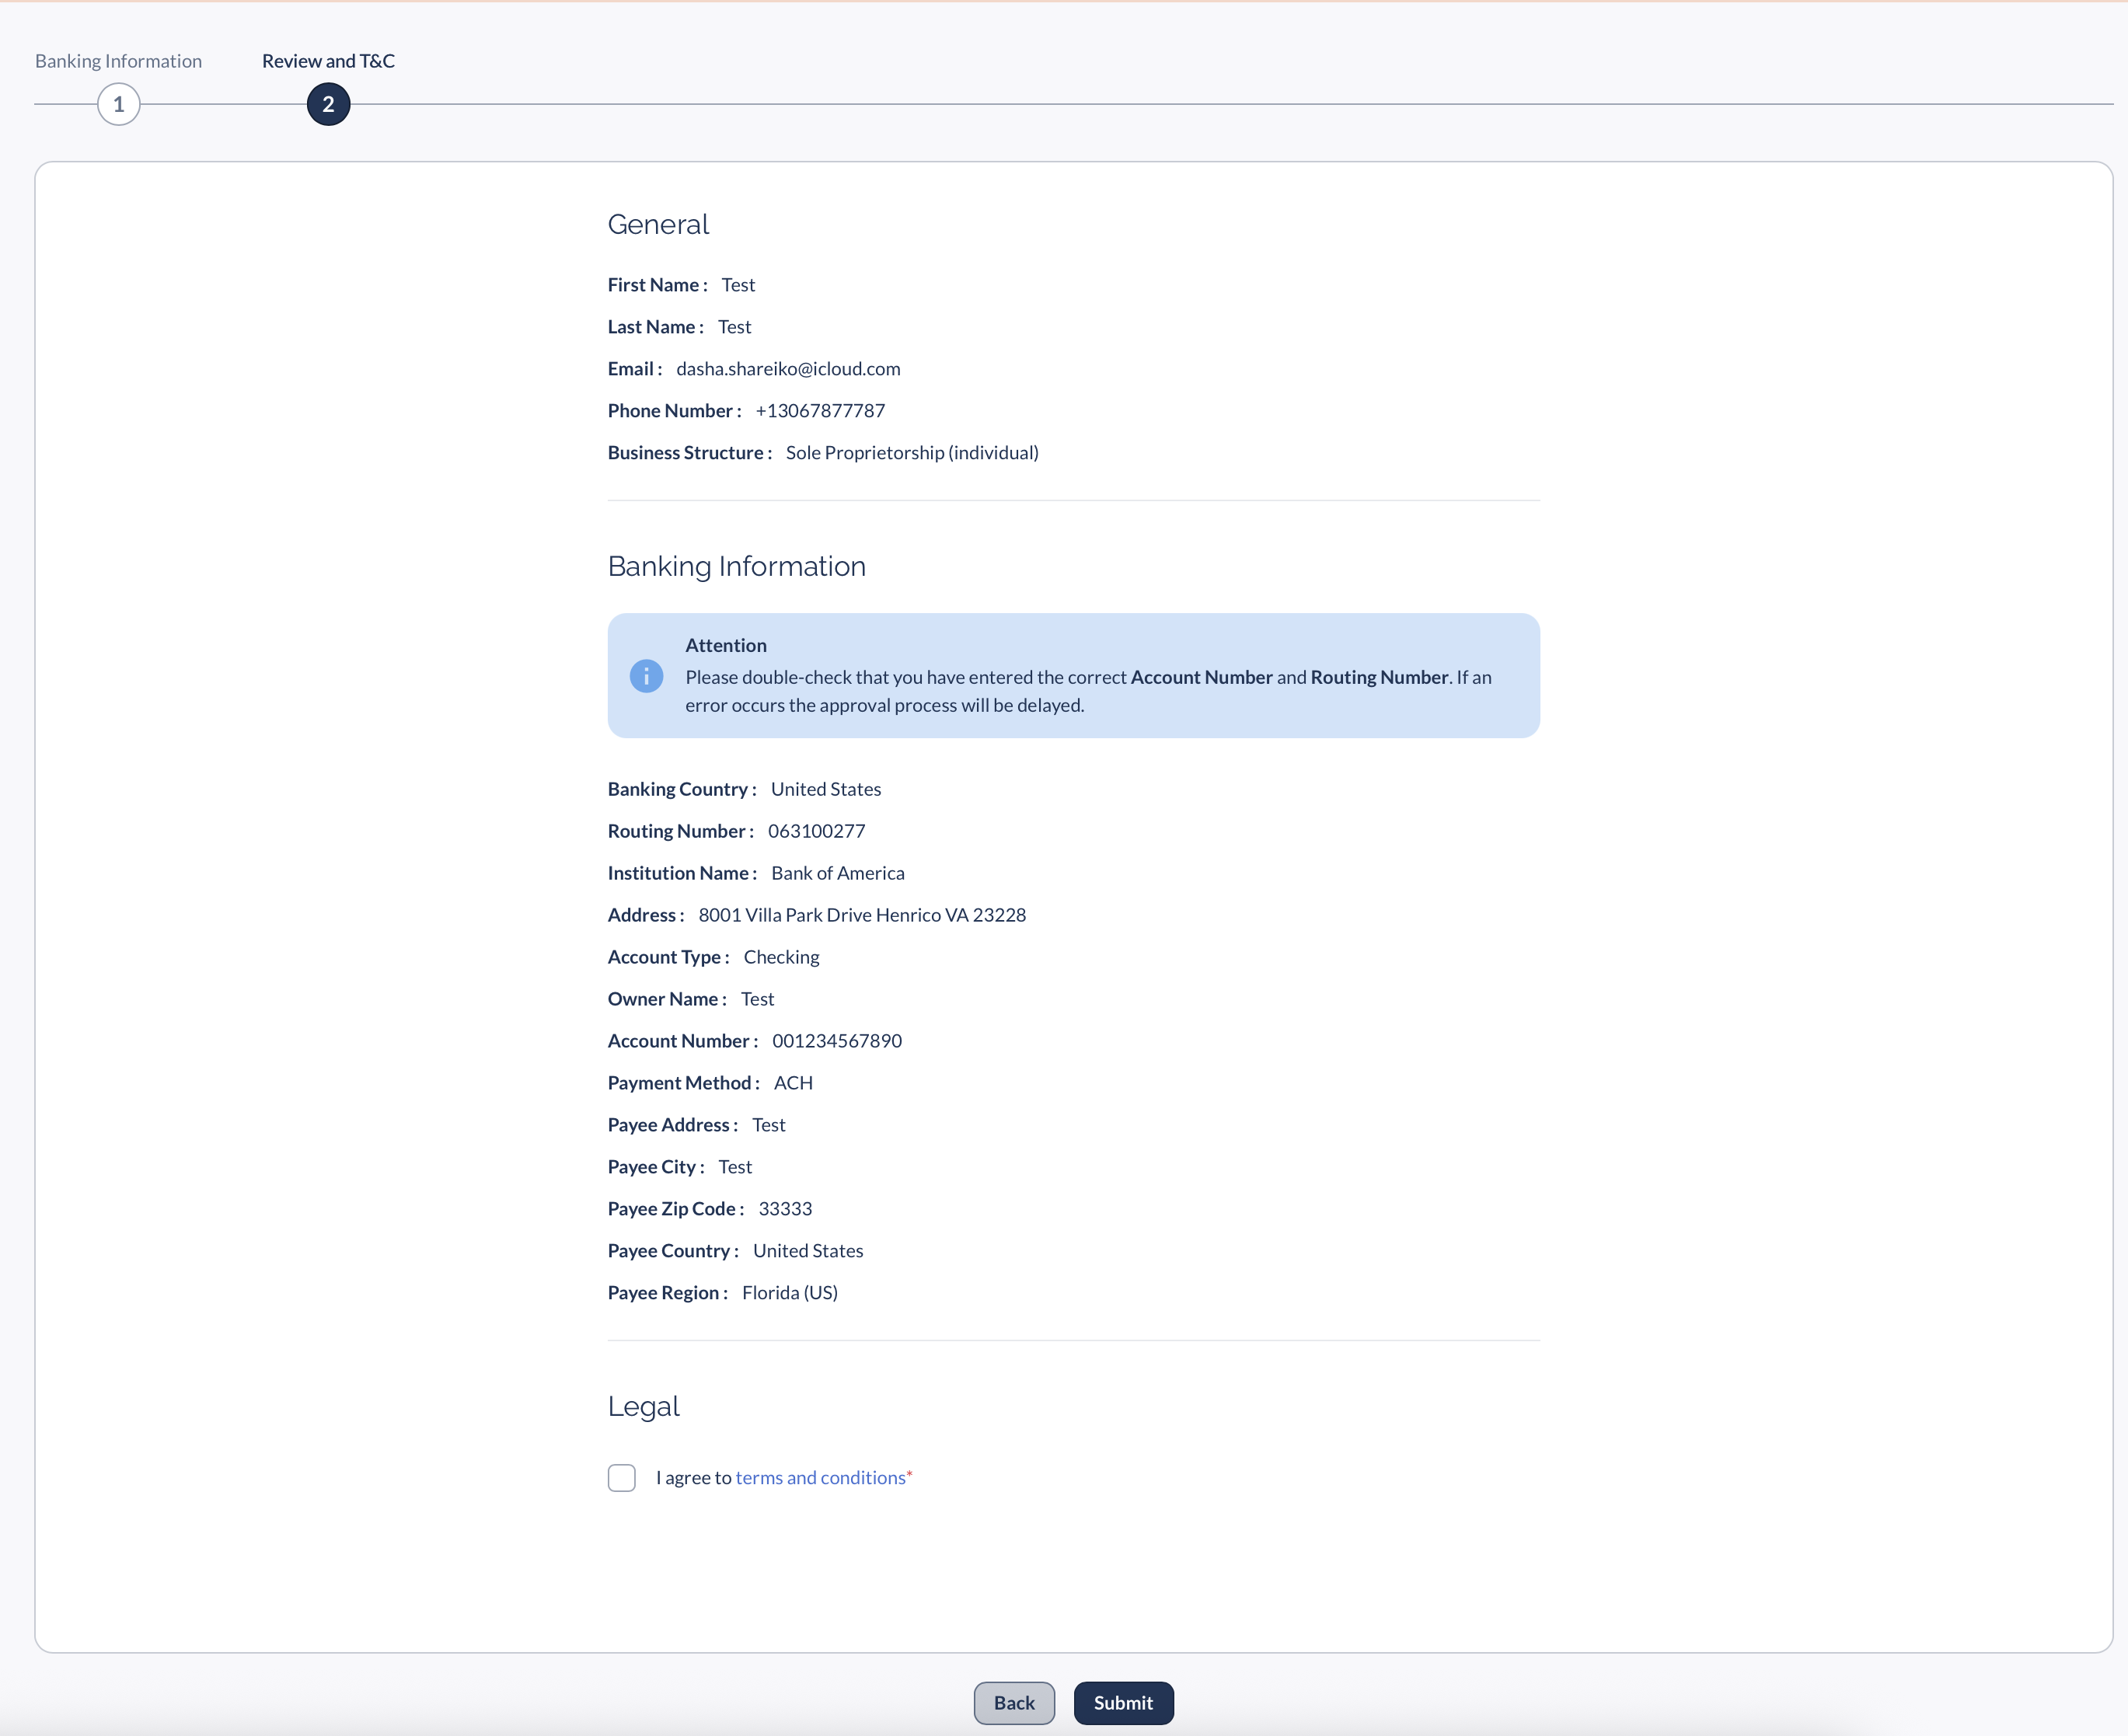
You'll enter your personal and banking information in a two-step form:

1 Banking Information
General info + Banking details
2 Review and T&C
Confirm details + Accept terms
Banking information form
Step 1: Enter your general information and select your bank country

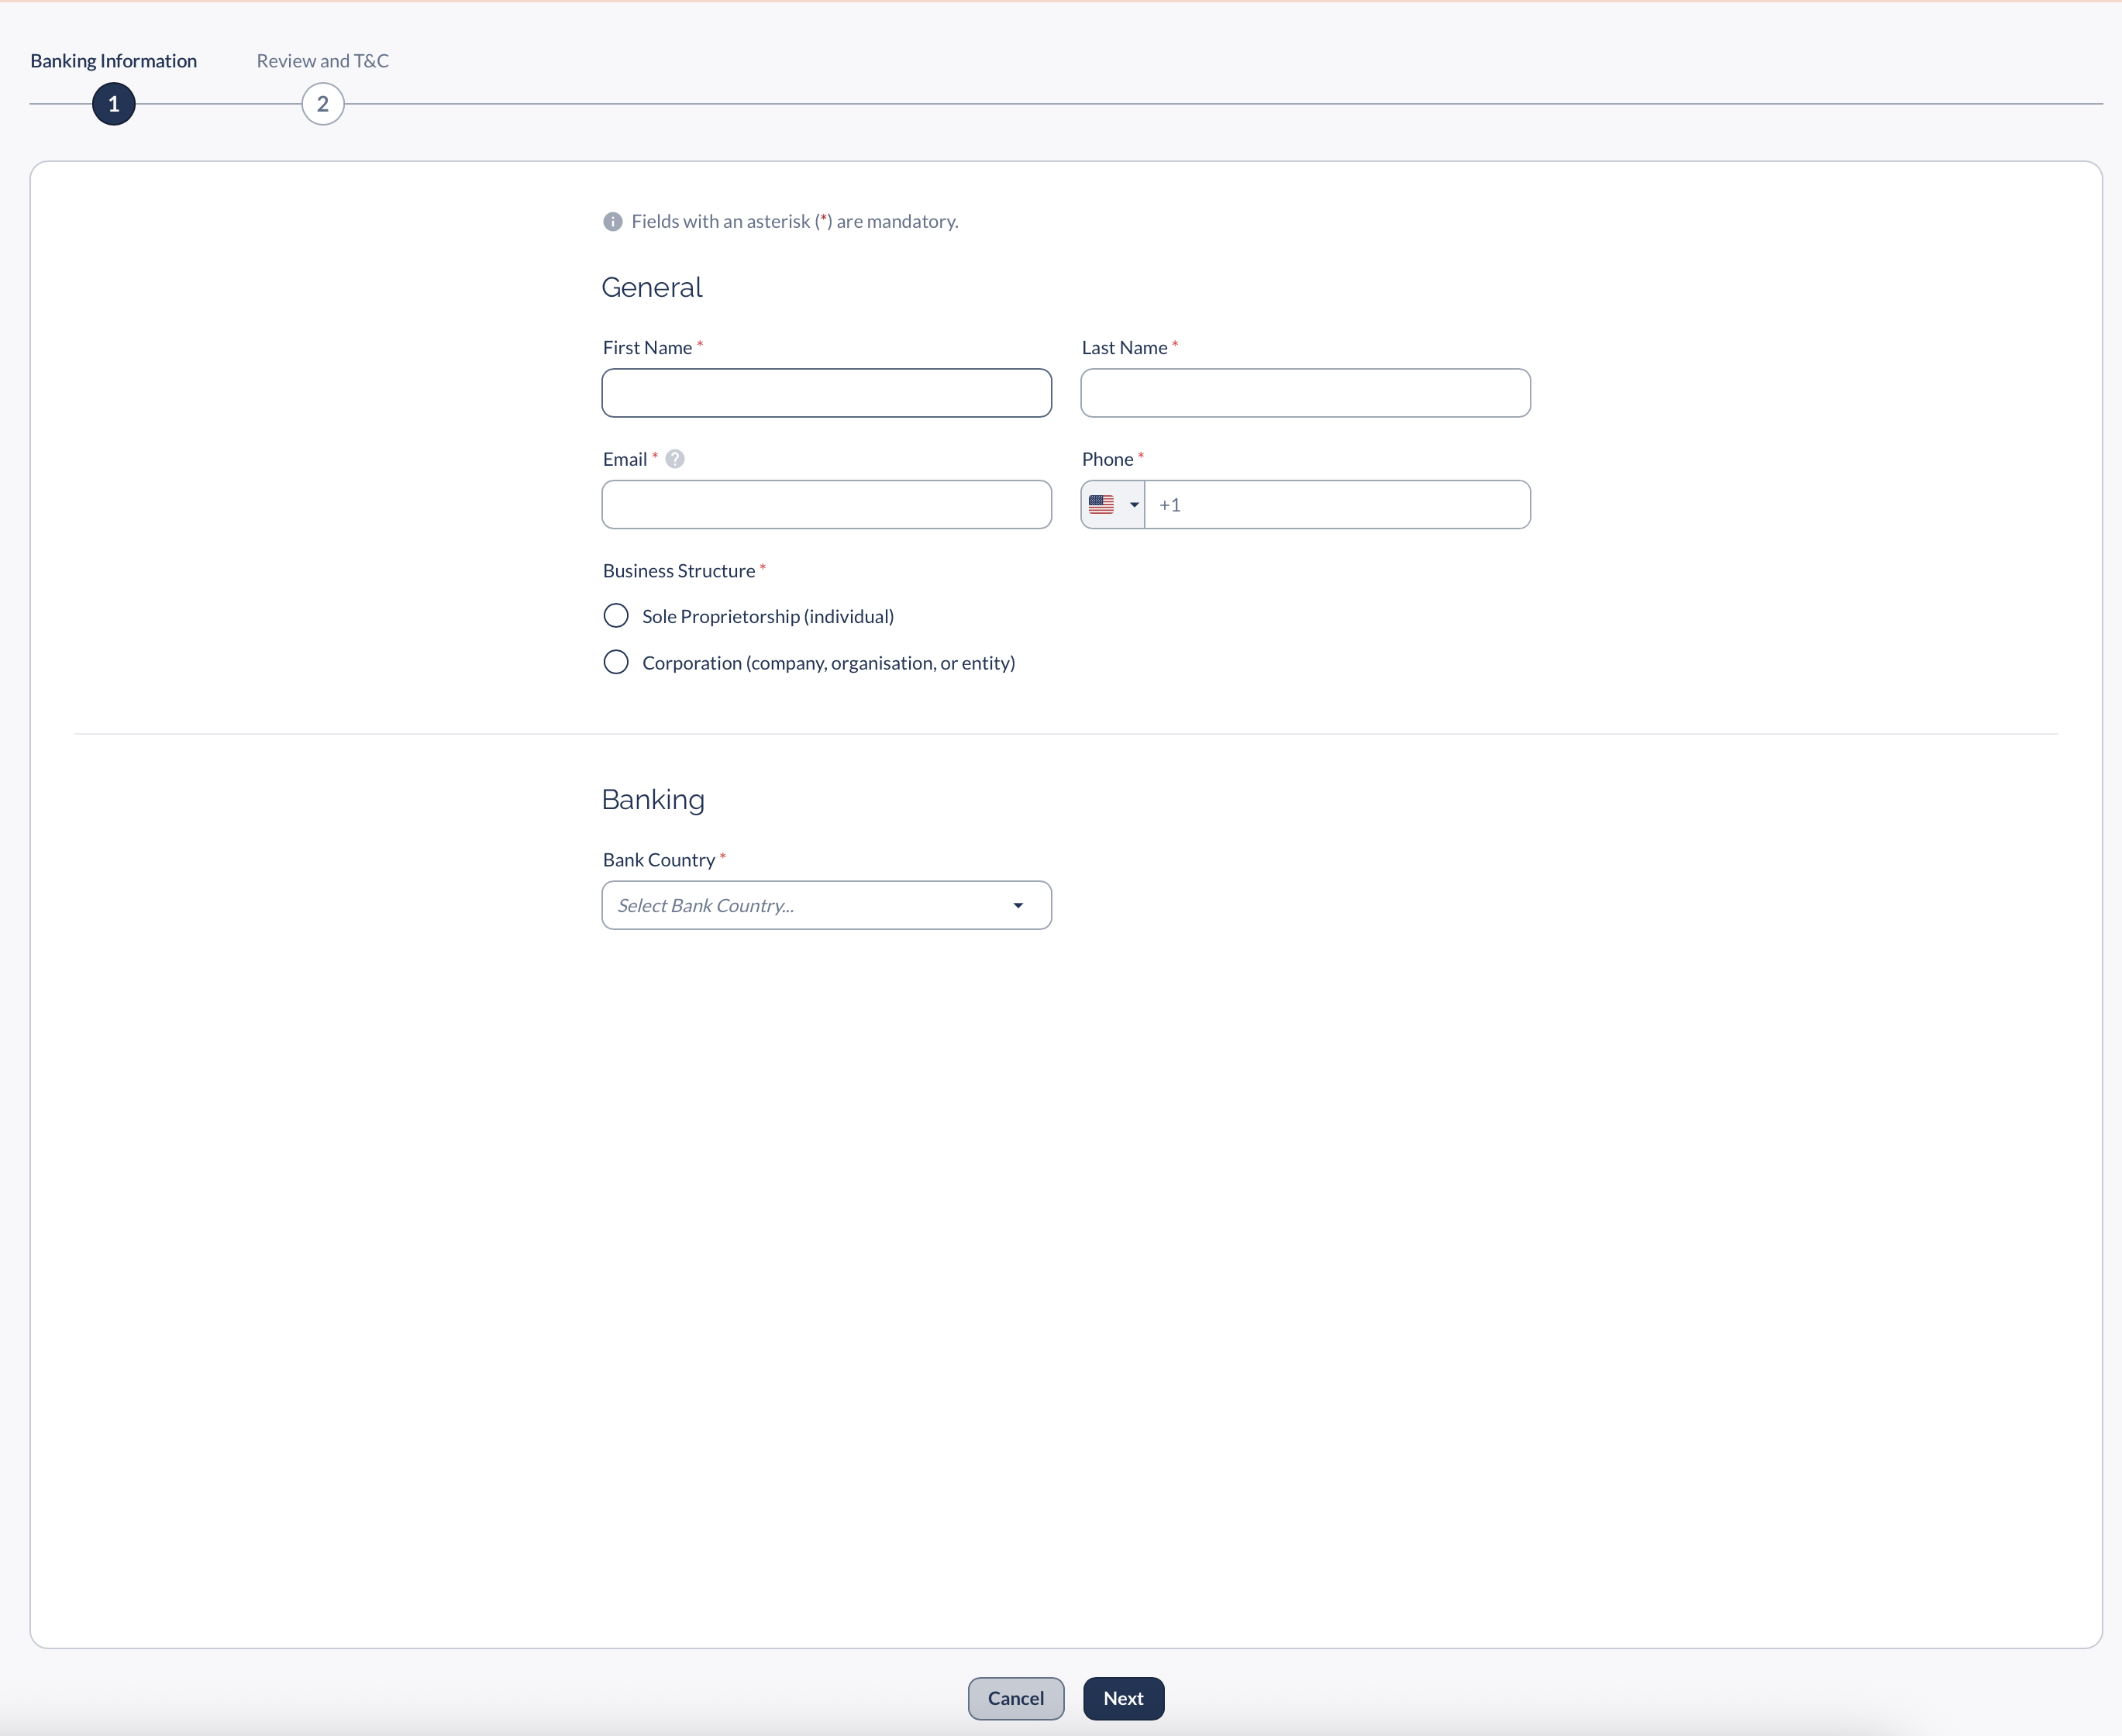
The banking fields you see depend on your Bank Country selection:

🇺🇸 For US-Based Partners

You'll need:

  • Routing Number: Your bank's 9-digit routing number
  • Account Type: Checking or Savings
  • Account Number: Your full account number
  • Payment Method: ACH or Wire (depends on your routing number)
Payment Method
You'll only see both ACH and Wire options if your routing number supports both.
🌎 For International Partners

You'll need:

  • Bank Country: Must match your Country of Residence
  • Currency: Your deposit currency (e.g., AUD, EUR, CAD)
  • SWIFT/BIC: Your bank's international code
  • Account Number: Your full account number
  • Additional Codes: Transit Code or Institution Number (if required)
⚠️ Important
Your bank must be in the same country as your Country of Residence.
Review and Terms & Conditions screen
Step 2: Review your details and accept Terms & Conditions
3

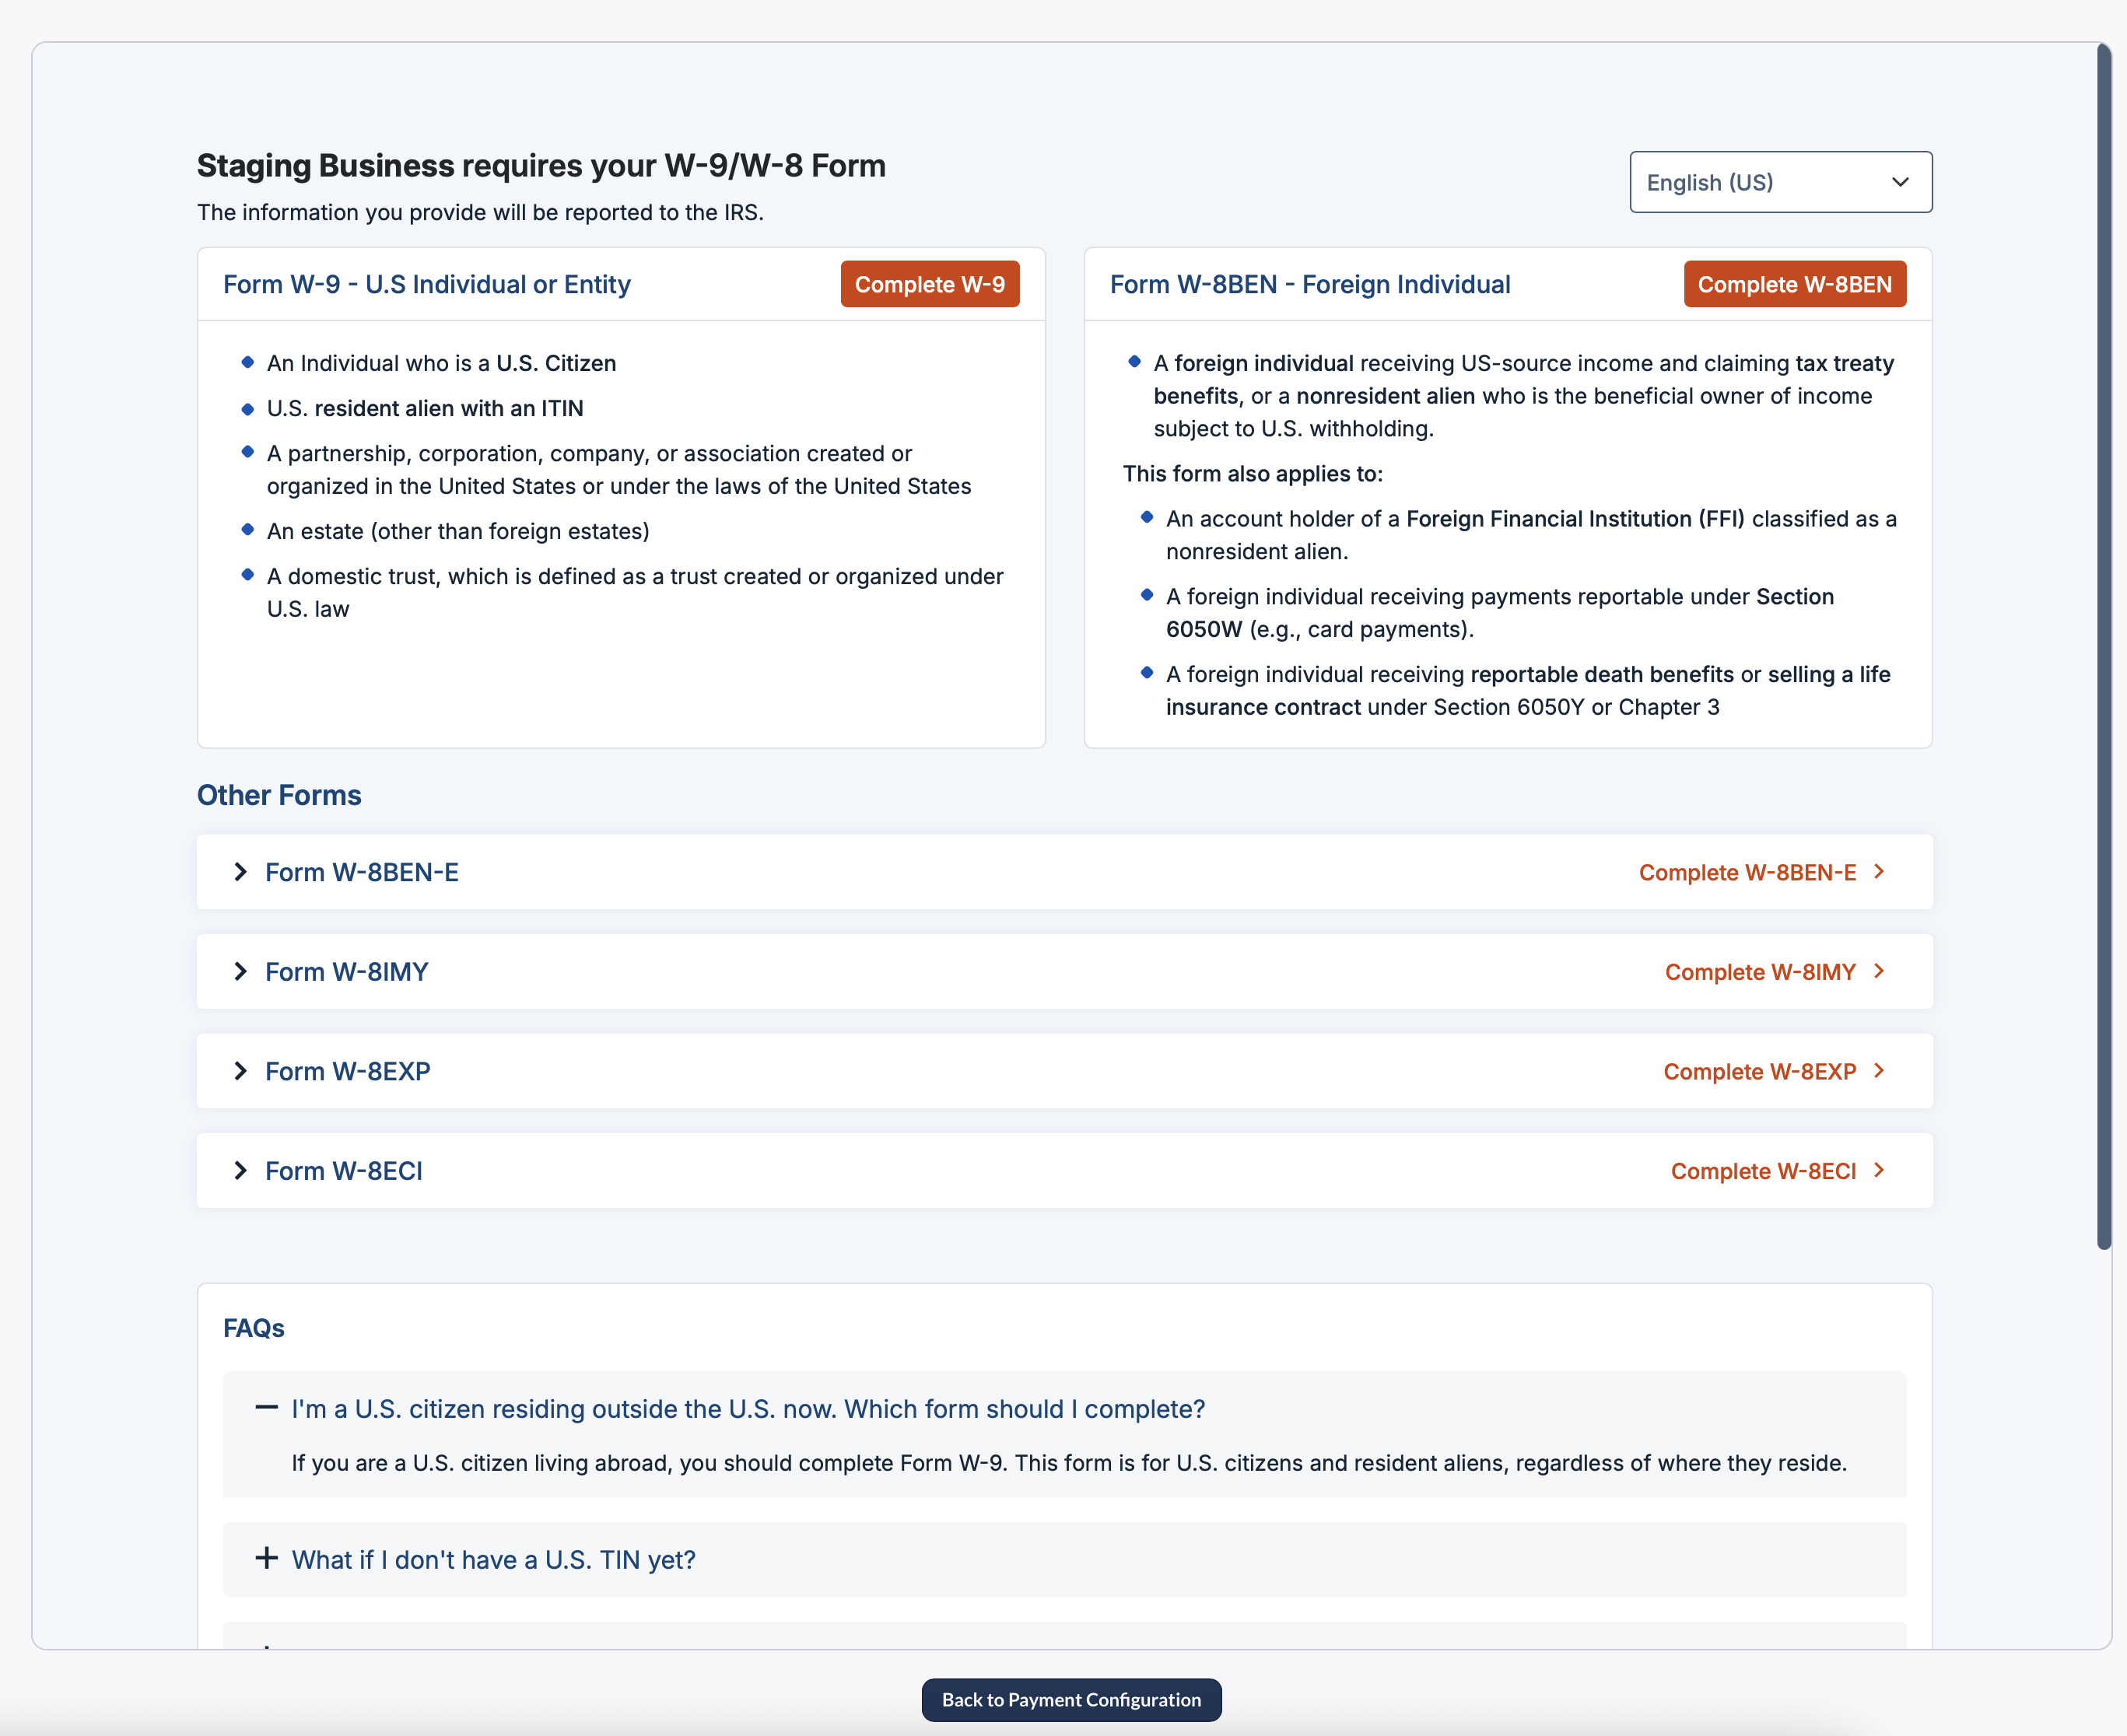
Select & Complete Your Tax Form

After submitting your banking details, you'll see a tax form selection screen. Choose the form that matches your situation:

Tax form selection screen
Select the appropriate tax form based on your location and entity type
🇺🇸
Form W-9 - U.S Individual or Entity
For US citizens, resident aliens, and US-based companies/partnerships
👤
Form W-8BEN - Foreign Individual
For non-US individuals receiving US-source income
🏢
Form W-8BEN-E - Foreign Entity
For non-US businesses and entities
📋 Other Tax Forms & FAQs

Other Forms Available:

  • W-8IMY: For foreign intermediaries or flow-through entities
  • W-8EXP: For foreign governments or tax-exempt organizations
  • W-8ECI: For foreign entities with US trade/business income

Common Questions:

I'm a U.S. citizen living abroad. Which form?
Complete Form W-9. This form is for U.S. citizens regardless of where they reside.
Do I need to complete this every year?
W-9: Only if your info changes. W-8: Valid for 3 years, unless your status changes.
Configuration status page
After selecting your tax form, monitor your configuration status
💡 Which Form Do I Need?
The form selection is based on your Country of Residence and Business Structure from Step 2. Everflow will guide you to the correct form.

For US Partners: Bank Account Verification (Penny Test)

If you are a US-based Partner, we will send a small test deposit (a "penny test") to your bank account to verify it.

1 Wait for the Test Deposit

The deposit usually takes 3-5 business days to appear in your account Look for "Everflow Technologies" or "ACCTVERIFY" in your bank statement The amount will be a small value (typically under $1.00)

2 Validate Your Account

Once you see the deposit in your bank account:

Return to the Billing page in your Partner Platform Click the Validate Account button Enter the exact amount you received (e.g., $0.47)
Penny test validation screen with deposit amount input
Enter the exact deposit amount to validate your account
Three Attempts Only You have three attempts to enter the correct penny test amount. Make sure you're looking at the right transaction in your bank statement.

Setup Complete

Once your tax forms are processed and (if applicable) you have validated the penny test, your account status will update to Ready to receive payments.

Payment Method Status showing PAYABLE with green checkmark
Your status will change from "NOT PAYABLE" to "PAYABLE" once complete
🎉 All Set! You're now ready to receive payments through Everflow Pay. Your first payout will be processed according to your billing schedule.

Need Help?

If you run into any issues during setup:

Double-check that your bank country matches your country of residence Verify your routing number (US) or SWIFT/BIC code (International) is correct For penny test issues, wait the full 5 business days before contacting support Contact your network manager if you continue to have problems
Next in This Series